








First Previous Page 110 of 178 Next Last

Icon-A-Day 2.0, Day 10, You got Videos in my Pictures Folder!

Friday, August 15, 2008 by mormegil | Discussion: OS Customization

Yesterday we created the first of our User folders, the Favorites folder. In doing so we established the style we will be using for the rest of them. Today we will move from that one to another of the simpler examples, the Pictures folder.


Day 10
(Friday, August 15th, 2008) Line

IAD_10_Pictures_FoldersThe Pictures Folder
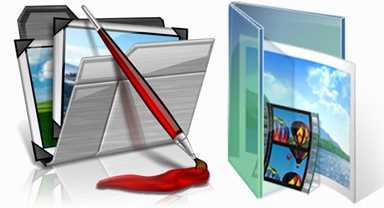
The Pictures folder remains more or less the same in Vista as it was in XP, or even 9x. However like the rest of the User folders, it has been taken out of the Documents folder, and moved into the User folder.

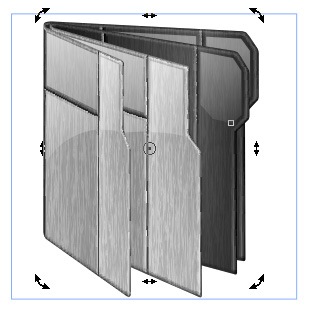
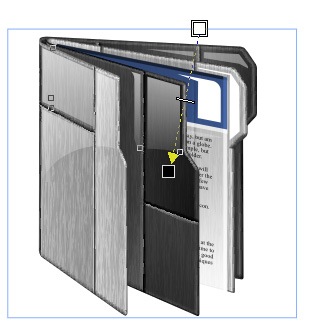
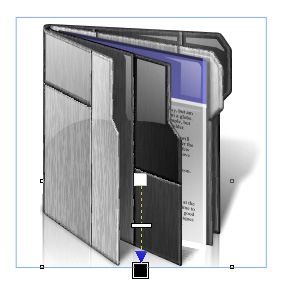
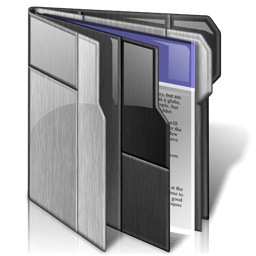
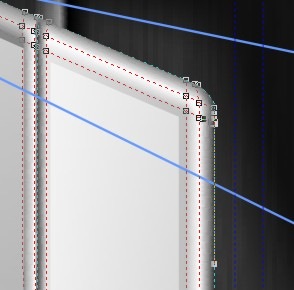
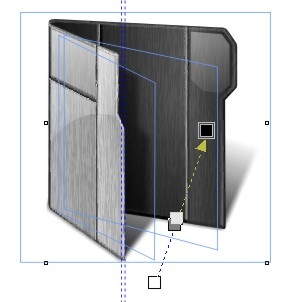
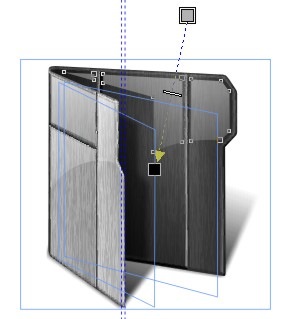
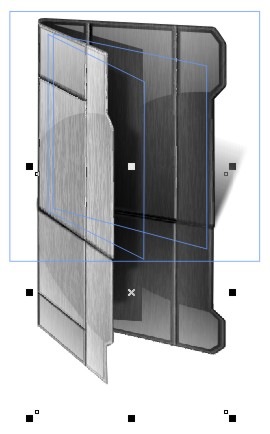
In the Windows Vista Pictures folder icon, Microsoft has also finally acknowledged that just about every digital camera also shoots video, and that despite their efforts, most people will not move the resulting videos into the Videos folder. This is something we will do as well, even though it will be the most time consuming portion of our Pictures folder.

Step 1:   
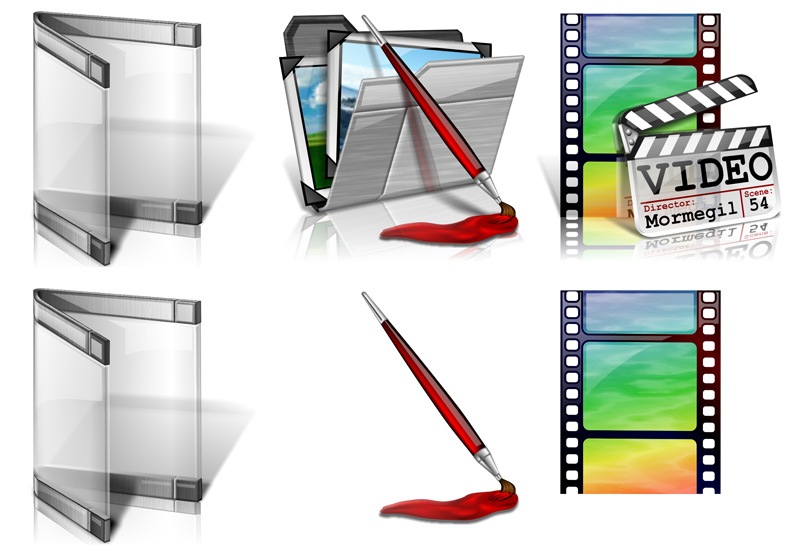
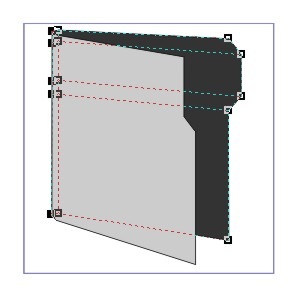
Again we will start with our Wrapper folder from day 8.  I will also grab the original 1.0 My Pictures folder #25, and the Video Clip file # 54.

Once I have these elements gathered together, I delete the elements I don't need. 


IAD_10_S1  
   

Step 2:  
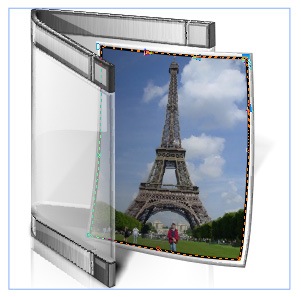
Now, I have chosen to create a brand-new photo rather than attempt to use one of our existing items. This is because I want something a bit higher resolution, and I want to be able to do a nice perspective.  

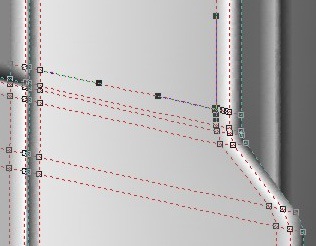
So the first thing I do is use a Mesh Rectangle to draw in the basic shape of my new image. Once I have this I create some additional mesh nodes to give it some depth and definition.
IAD_10_S2  

Step 3: 
Next I import in my new picture, and using the Bitmap 3D Effects Perspective tool, I give it a bit of perspective to make sure it fits. Then I crop it down to fit on my photo back. 

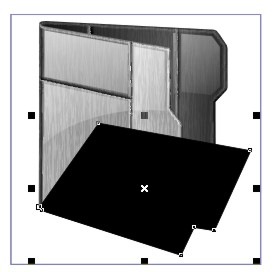
I also want their to be a black outline around the image, so using the Bezier tool I draw a matching rectangle behind it. 
  IAD_10_S3

Step 4:  
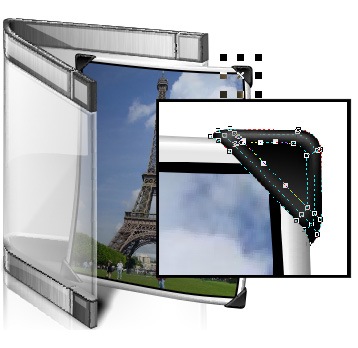
I know it is a bit old fashion, but to make sure that our new Photo matches our originals, I want to go through and add some corner clips.

I do this with four small mesh fill objects. You could probably do this just as well with some basic shapes, but I am partial to the Mesh tool. 

IAD_10_S4

 Step 5: 
We still need to add gloss to our photo, but we will do it later. For now we will move on to our Video file. 

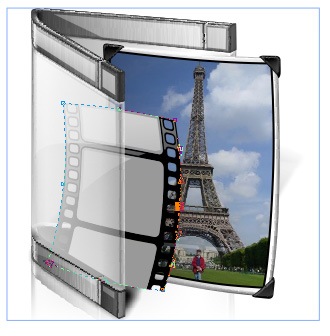
We will want to change the content of the frames of our video file, so I remove the texture fill we have now. Then I group the file together and with the Envelope tool, and give it a bit more of a film-like look.   

IAD_10_S5

Step 6: 
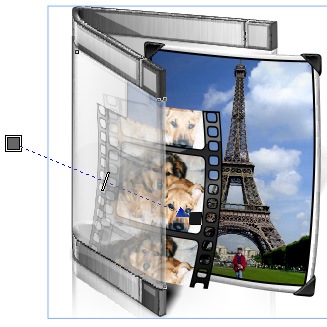
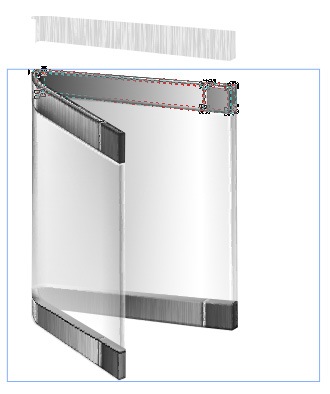
Now that we have our film in place, I want to change the image on the film like I did the photo, so I import in another image. I place this behind the cells of our film, and crop it and skew it until it looks ok.

Then I do this again for the top and bottom frames.  


IAD_10_S7

Step 8: 
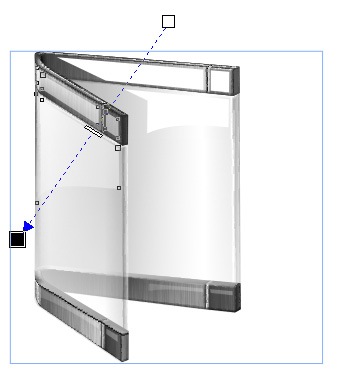
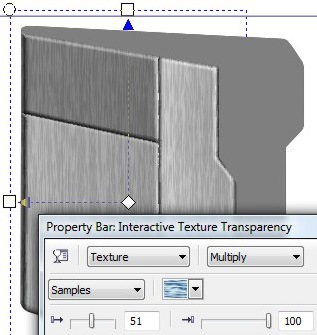
Now I grab all three of these images and convert them to one bitmap. Once this is done, I use the Interactive Transparency tool to give the images some translucency.


IAD_10_S6

Step 9:
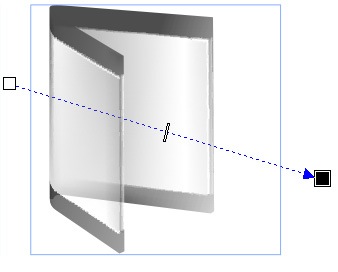
Now, like yesterday, we will need make copies of our new assets and convert them to bitmaps for the reflection on the Wrapper. Once I have these in place, I convert them both into a singe bitmap, and crop them.

Finally I fade them out with the Interactive Transparency tool.

IAD_10_S8

Step 10:
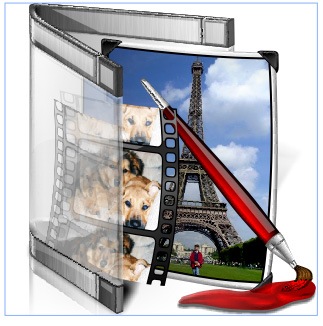
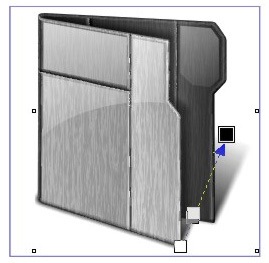
Now we can finally move our paint brush back into the composition. With a bit of tweaking with the shape tool it seems to fit right in.


IAD_10_S10

Step 11:
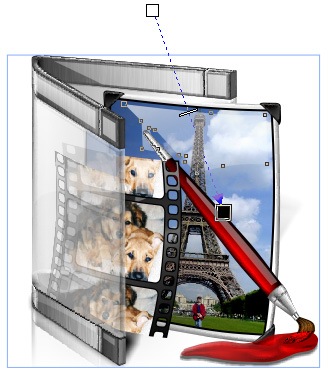
Now that we have all of our assets in place, we need to go through and touch up our gloss. This is relatively simple, but is very important in giving the icon continuity within the set.IAD_10_S11

Step 12: 
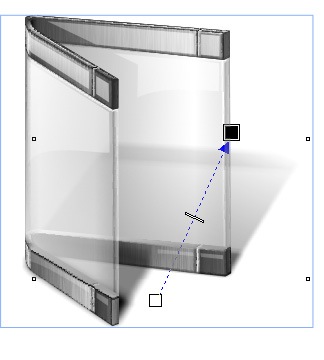
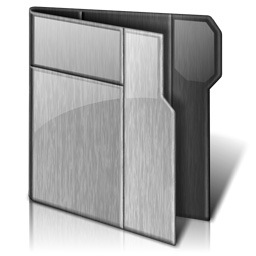
Our lasts two steps, as usual, are to create the shadows and reflections. 
Don't forget that you can learn more about this over at my CorelDRAW for Skinners tutorials.

IAD_10_12

Finished Icon: 
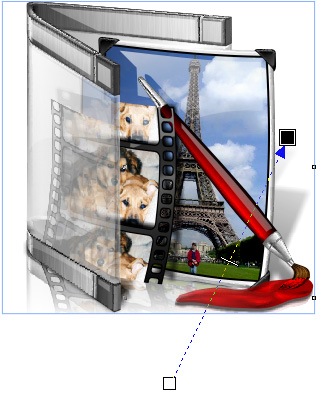
Our finished Pictures folder looks pretty good, even if that silly film strip would not leave us alone.


IAD_10_13

Wrap Up:
This brings us to the end of Week 2 of the Icon-A-Day 2.0 tutorials. So far I am very happy with how it is going, however I would love to hear back from those of you who are following along. Let me know what techniques you would like me to go into in more detail, or even things you would like me to skip.

I will be back next week, and we will continue our way through the User folders.

About Me:
You can find all my skins, tutorials, and articles, on my Wincustomize Homepage, at http:\\mormegil.Wincustomize.com. Questions on icon use and techniques, can be emailed to [email protected]. Twitter users can find me with the user name: Mormegil.

Download Pictures Folder Icon: 
Get today's icon from the Miscellaneous Icons Library.

Find all the Icon-A-Day tutorials, and links to the icons and more at the Icon-A-Day 2.0 Index.
All Icon-A-Day artwork, copy, and icons, are copyrighted by Paul Boyer © 2008, and may not be used with out express permission.

This Week in Skinning - August 15th

Skin Roundup for 8-15-08

Friday, August 15, 2008 by Island Dog | Discussion: OS Customization

Another Friday, another week is done.  A tremendous amount of skins came through the submission pipes this week, and as usual, it was a tough pick.  I have to say once again how pleased I am about the skinning activity over the summer, it didn't slack of, and in fact it has increased!

I hope some of you are already getting your GUI Champs skins ready.

Now for this weeks picks!

http://skins7.wincustomize.com/PuterDudeJim/cursorxp/t2443.jpg


Rocky for CursorFX
by PuterDudeJim

This cursor took some inspiration from the Boulder skin, but it's a cursor theme that will go with many other themes as well.

http://skins2.wincustomize.com/CarGuy1/dream/t1380.jpg


Anchorage in Dreams
by Carguy1

This is a nice, relaxing dream that isn't distracting at all.  Well done.

http://skins6.wincustomize.com/PoSmedley/dock/t14800.jpg


Impulse Blogger in ObjectDock Icons
by Po' Smedley

This is a really slick set of icons.  I see he has done some others in this same style, so be sure to check those out too.

http://skins7.wincustomize.com/Lantec/ob/t320.jpg


Green Piece for RightClick
by Lantec

Not sure what it was, but this skin for RightClick just seemed to catch my eye.  It's a very detailed design.  Great work.


http://skins2.wincustomize.com/hallv5/sp/99.jpg


Jungle Drums for SoundPackager
by hallv5

There are some very unique sounds in this pack for SoundPackager, but if you want something different than the default Windows sounds, this is for you.

http://skins6.wincustomize.com/RichardMohler/wallpapers/t37785.jpg


Stormy Night in Wallpapers
by Richard Mohler

A really beautiful scene here.  Definitely check this one out.

http://skins3.wincustomize.com/JenifferChang/wallpapers/t37750.jpg


Jeniffer logo wallpapers in Wallpapers
by Jennifer Chang

A simple, yet elegant design makes this wallpaper a great pick for this week.


http://skins2.wincustomize.com/pixel-z/wb/t6580.jpg


VITREX for WindowBlinds
by pixel-z

This is another first-time skin that is just fantastic.  A great use of color and design makes this a definite pick.
http://skins7.wincustomize.com/theAVMAN/wb/t6579.jpg 3D Metal for WindowBlinds
by theAVMAN

A 3D skin.  That's all I need to say, so just download it and check it out for yourself.

Thanks to everyone who contributed this week, your work is always appreciated.  Be sure to show this article to your friends and family and show them how cool this stuff is.  See you next week!


Icon-A-Day, Day 9, Bringing Back Some Old Favorites.

Friday, August 15, 2008 by mormegil | Discussion: OS Customization

Yesterday we created a "Wrapper folder" and we will be using it as the key ingredient for our User folders. Tonight we will start with one of the simple ones, just to see how it works out.


Day 9
(Thursday, August 14th, 2008) Line

IAD_Favorites_FoldersThe Users Folder:
In the past, the favorites folder was tucked away in the depths of the Documents and Settings folder. In Vista it sits proudly in the User folder. This is very useful to those of us who back up our Favorites often and do not feel the need to go folder spelunking every time we want something.


In the original Icon-A-Day series, I did what I always did and just made it a folder. In 2.0 we will be bringing it into the new User folder convention by placing our heart and our document inside the Wrapper we created yesterday.

Step 1:   
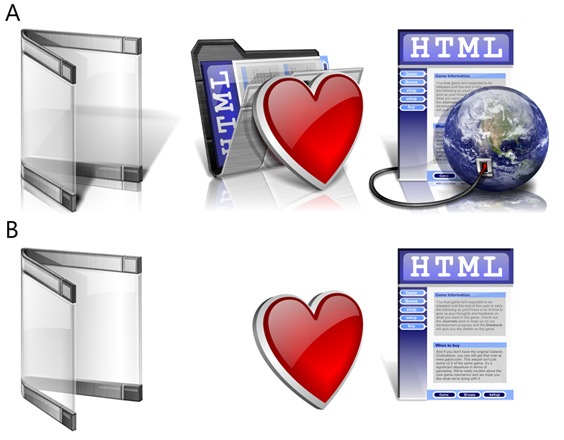
We start as we have become accustomed, by gathering the ingredients that we have already created. In this case we need our Wrapper icon from Day 8, the Favorites folder #43, and the HTML Document #16 from Icon-A-Day 1.0.

Once I have these elements gathered together, I delete the elements I don't need.


IAD_9_S1 
   

Step 2:  
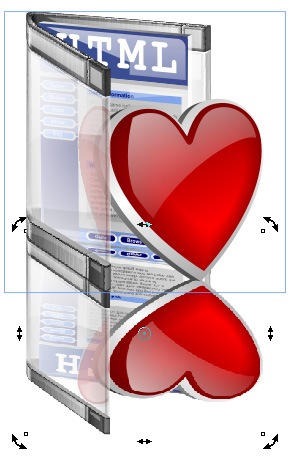
Now we start by placing our HTML file inside our Wrapper folder. Once it is in place, we give it some perspective with the Perspective Tool.

At this point we run into a minor problem. The blue bar on the top of this icon is a Mesh Fill, and a mesh can not be given perspective. So I simply clear the Mesh Fill, and convert it to a basic Flood Fill. This is a bit flatter, but we can fix it later. Now we group the file together, and give it that perspective.
IAD_9_S2 

Step 3:
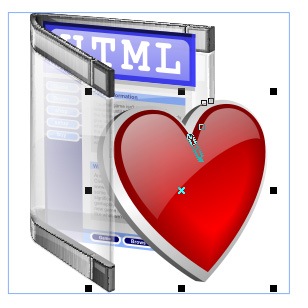
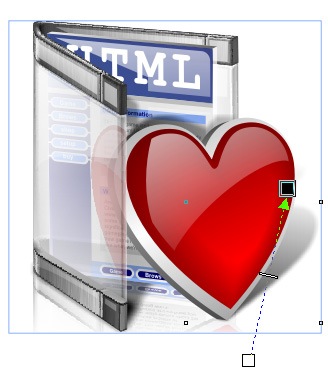
Now we need put put our heart in the right place (See? I'm funny). I was a bit concerned about this, but now that I see it, I think the existing "lean," will work as well, if not better, with the Wrapper folder as it did with the original folders.


IAD_9_S3 

Step 4: 
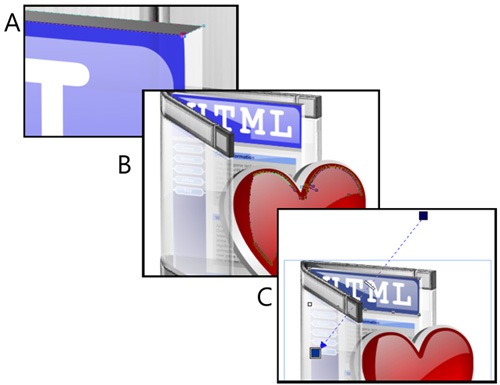
Now we come to the tedious part. We need to go through and polish up our assembled elements to make sure that they all go together.

A: Tweak the file's edge so it has a return.
B. Tweak the gloss on the heart, the file, and the back of the Wrapper to match the new lighting convention. 
C: We need to fix our former mesh fill. In this case I just change it to a gradient, from a darker to lighter blue. 

   IAD_9_S5

 Step 5:
Now we need to go through and update our shadows and reflections. First the reflections. The reflection on the "floor" is done pretty much the same way we have been doing them for the last 5 days.

However we will need to do a few special things for the heart. I start by copying the heart and converting it to an RGB bitmap. Then I use the pick tool to size and skew it into the position that its reflection would take in the glass of the Wrapper. 

IAD_9_S6

Step 6:
Once I have my bitmap heart in place, I use the shape tool to crop it down, then I fade it out with the Interactive Transparency tool.

Now that we have our crazy heart reflection established, I can use our standard reflection techniques to create our "floor" reflection.
IAD_9_S7

Step 7:
Our last step will be to do our shadows. I do this the same way as before; the only reason I am doing it from scratch is that the HTML file and the heart have completely changed the shadows basic shape. IAD_9_S8

Finished Icon:
Now we have the first of our new User folders. This will serve as a template for the next week or so, as we run through the rest. 


IAD_9_S9

Wrap Up:
I chose the Favorites folder as our first User folder because it was both simple, and would it would give us a chance to see if our Wrapper folder works with the original Icon-A-Day assets. I think that today we have established that they do, although not without a few tweaks. Check in tomorrow when we tackle the pictures folder.

About Me:
You can find all my skins, tutorials, and articles, on my Wincustomize Homepage, at http:\\mormegil.Wincustomize.com. Questions on icon use and techniques, can be emailed to [email protected]. Twitter users can find me with the user name: Mormegil.

Download Favorites Folder Icon: 
Get today's icon from the Miscellaneous Icons Library.

Find all the Icon-A-Day Tutorials, and links to the icons and more at the Icon-A-Day 2.0 Index.
All Icon-A-Day artwork, copy, and icons, are copyrighted by Paul Boyer © 2008, and may not be used with out express permission.

Icon-A-Day 2.0, Day 8, Home is were the User Folders are.

Thursday, August 14, 2008 by mormegil | Discussion: OS Customization

Windows Vista has brought us a great many things, some good, some bad. One of the less noticed changes is the new User folder structure. With this they have changed one of the staples of windows customization and icon design in general.


Day 8
(Wednesday, August 13th, 2008) Line

IAD_8_User_Folders The Users Folder:
In Windows 95 through XP, user folders (My Music, My Pictures, My Video, etc.) were placed into the My Documents folder. This was fine for most people but was a bit annoying to people who did not want to poke around the Documents & Settings folder to find their files. In Vista we now have the Users Directory, and in the Users Directory there is a folder for each user, and in that folder almost all user files live, by default. This is not a terribly new concept, as OS-X, Linux, and even more hardcore Windows users have been doing this for years.

How This Affects Our Icon Package:
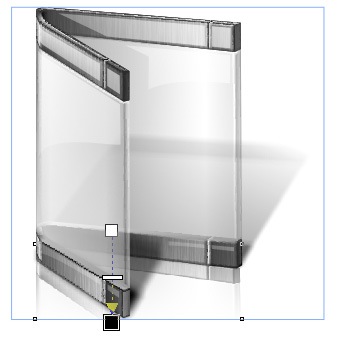
In order to differentiate these special User folders, Microsoft came up with a new convention; they placed them all in a special folder. In Vista it is a glass binder-like thing. The truth is that this is completely superfluous; the folders themselves are still special folders, like they were in XP. However, I am of a mind to keep this convention going for a few reasons. First, because it gives us something new to do, and second, because it gives the user an obvious way to tell what all these folders are - special - and have special properties that they all, more or less, share.


Today we will create a brand-new icons, although sadly it will not be used in our final pack, but will be used in creating all our User folders. For lack of a better name, I am going to call it the "Wrapper." In Vista the Wrapper is the teal colored glass folder. Because the Icon-A-Day icons have already established several glass elements in the icons, we will do it again in our Wrapper, but we will try and keep it from looking too much like the standard Vista style.

Step 1:  
Because the Wrapper will need to contain several different types of sub-icons - folders, documents, music, etc. - I am going to begin by making a copy of my Open folder icon from last week and use it as a guide for my shapes. 

Like in Day 3, we will start with two rectangular mesh fills.
   IAD_8_S1

Step 2: 
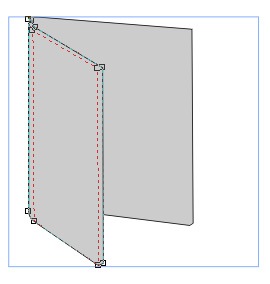
Once I have my shapes in position, I can delete the Open folder assets and begin to sculpt my meshes into the shape I want our Wrapper to be.


 IAD_8_S2

Step 3:
Now unlike our folder we want the bulk of our Wrapper to be glass, so I primarily use white and black in my fills. I then use the Interactive Transparency tool to make them translucent. This will make everything wash out a bit, but we will get our definition back in a few steps, with gloss and shadows.


IAD_8_S3

Step 4:
Now we dont just want to copy the teal Wrappers from Vista, we want to make our own. In order to change things up a bit, we will create a brushed metal edge on the top and bottom of our wrapper. This is done more or less the same as we made the main portion of the Wrapper, except this time we give our shapes the more "tooled" look of our folders.  
IAD_8_S4  

 Step 5:
Once we have our metal bands, we need to bring in some gloss to sell the glass look, and to bring some definition to our shapes. We have to be careful not to make the gloss too bright, however, since these Wrappers will be going around other icons in the future.
IAD_8_S5

Step 6:
Now we need to re-establish our shadows. These are a bit more touchy than in the last few icons, because the bulk of our Wrapper icon is transparent.
As we bring the shadows in you will notice that it goes a long way in selling the glass feeling.


IAD_8_S6

Step 7:
Our last step, as is often the case, is to do our reflection. I do this more or less the same way as in our previous icons, but like the shadows it is a bit more touchy do to the transparency.

IAD_8_S7

Finished Icon:
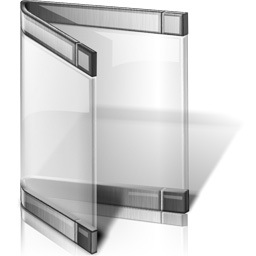
Here we have our finished Wrapper icon.
I will be including it, and 2 Pings, a front and a back in today's zip, so that people will be able to create their own matching User folder icon if they choose.

IAD_8_S8

Wrap Up:
Tomorrow night, we will take this Wrapper and begin creating our USER folders. We should, in theory, be able to reuse many of our 1.0 folder assets as we go along. I have not quite decided which to do first, so you will have to check back tomorrow to find out. It probably depends on how late I get home from work

PS. Those of you who use Twitter, can follow me; username Mormegil. I will be tweeting after each Icon-A-Day post is posted, as well as throughout the day, with various things from tech to running.

Download Wrapper Folder Icon: 
Get today's icon from the Miscellaneous Icons Library.

Find all the Icon-A-Day Tutorials, and links to the icons and more at the Icon-A-Day 2.0 Index.
All Icon-A-Day artwork, copy, and icons, are copyrighted by Paul Boyer © 2008, and may not be used with out express permission.

Icon-A-Day 2.0, Day 7, Folders Within Folders.

Wednesday, August 13, 2008 by mormegil | Discussion: OS Customization

Windows Vista made several changes and additions to the way folders are displayed. The most obvious change is the Live folders; subtler is the addition of the Data folder. The Data folder is often mistaken for a Live folder, but is, in fact, simply a folder, with another folder inside of it. It is used whenever a folder contains one or more sub-folders. The Data folder is used even if those folders are empty.


Day, 6
(Tuesday, August 12th, 2008) Line

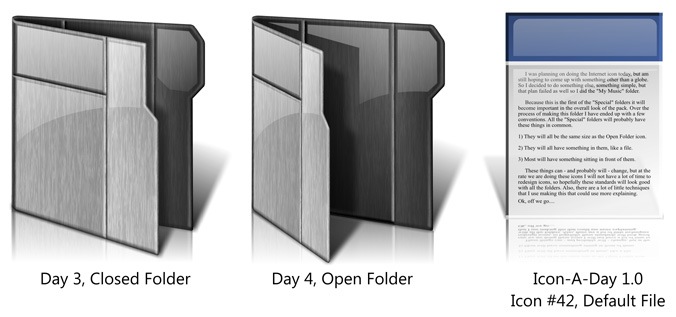
Like the Open folder, and the Live folder, we will be able to use our pervious work to create the Data folder, in fact we will be using the Open folder almost without change for the exterior folder. The bulk of our work will be to create the interior folder, and fill that folder with a file. We will pretty much be following the same exact formula Microsoft uses to accomplish this.

Ingredients:
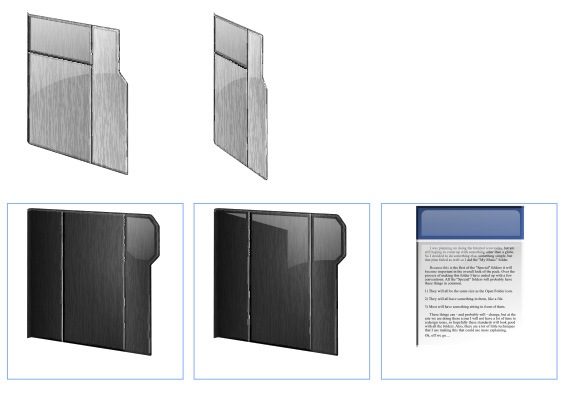
Like I mentioned, we have already done the bulk of the work for today's icon. We will be using the Closed folder, and the Open folder from days 3 & 4, as well as the Default Document file from the Original Icon-A-Days series. With minimal changes we should be able take these assets and make our brand new Data folder.

       IAD_5_Parts

Step 1: 
Gather our 3 icons together in one file. Once we have them together we can delete the elements we will not be using, like the reflections and the shadows.


 IAD_7_0

Step 2:  
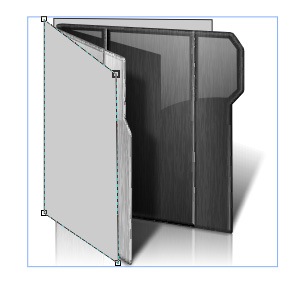
To make things a bit simpler, before we can start putting our assets together we need to group some things. I need to group the fronts and the backs of both folders together, and this will help us control our Z order. Once I have the groups made, I nudge our elements out of the way.
IAD_7_1

Step 3:
Now we simply put our Closed folder inside our Open folder. In its current state it looks pretty silly, but with a some sizing, and skewing, we can wrestle it into an acceptable position.  

IAD_7_2

Step 4: 
Now, in order to make the inner folder stand out, I will go in with the Mesh tool and tweak the colors and mesh. In this case I want to make the folder front darker, and the folder back lighter.

IAD_7_3 

 Step 5:
Once I am happy with the folders, I need to place the file inside the center folder. We could spend some time on this, but I think that we can get away with simply sizing the file, and skewing it. Just to polish it up a bit I use the Shape tool to modify the bottom of the file to better match the perspective.

IAD_7_5

Step 6:
Now that all of our elements are in place, we need to go through and touch up our gloss since the existing gloss no longer  looks correct.


IAD_7_6

Step 7:  
Last we need to go through and create new shadows  and reflections. Once again check Corel For Skinners for more of the techniques used.

IAD_7_7

Finished Icon:
Using the Data folder, in conjunction with the Open folder and the Live folder icons, we should be able to completely replace all the standard folders in Windows Vista.

IAD_7_8

Wrap Up:
Now that we have all of our standard Vista folders, tomorrow we will begin tackling the Vista USER folders. These folders are used for the special folders in the users directory. In Vista they are represented quite differently than the standard folders, represented by glassy plastic folders. This is a convention that I am becoming fond of, however we will try and do something a bit different. Join me tomorrow, and we will both find out what.


Download the Data Folder Icon: 
Get today's icons from the Miscellaneous Icons Library.
IAD_Download

All Icon-A-Day artwork, copy, and icons, are copyrighted by Paul Boyer © 2008, and may not be used with out express permission.

Stardock Impulse: Adding New Registrations

Monday, August 11, 2008 by Island Dog | Discussion: Personal Computing

When you purchase an application or game from one of Stardock’s various websites, you should get an e-mail with registration information and some links.  Not everyone might know what to do from there, so I wanted to give you a quick tour on how to get your registrations into Impulse so you can download and manage your products.

Impulse is Stardock’s state of the art digital distribution platform.  You can find more info about it here.

First you need to download Impulse.

- Impulse Client - Web Installer

- Impulse Client - Full

Once installed, make sure you are using the same e-mail address as you used to make your purchase. You can edit your account information by click the Orb button and editing your Stardock.net account.

impulse_registration_02 impulse_registration_01

Impulse should associate items in your account and have them ready for download, but for whatever reason you need to enter registration manually, here is what you need to do.

Click the Edit Registrations button.

impulse_registration_03

That will bring up the Registrations window.

impulse_registration_04

Here you can view, and manage any current registrations  you have.  Just click an individual registration and right-clicking will bring up a menu where you can update the registrations.  If you have a new registration to enter, just click the button as shown in the screenshot above.  A new window will popup and this is where you can enter your registration info.

impulse_registration_05

Just enter your serial number, e-mail address, and the type of product you purchased.  After that just click Add Registration and you should be all set.  Now just navigate to the appropriate tab (My Games, My Desktop, etc), and your product should be there for download.

Icon-A-Day 2.0, Day 5. How to bring life to your Live Folders.

Friday, August 8, 2008 by mormegil | Discussion: OS Customization

On Day 3 we created the new Closed Folder icon, and then on Day 4 we took that folder and created our Open Folder. Today we will take it even further and use our Open Folder to create our Windows Vista Live Folder.


Day, 5
(Friday, August 8th, 2008) Line

In Windows Vista, if you have your folders displaying at any size above 48x48, just about any folder you see is a Live Folder. These folders are one of the more useful and visually appealing new features in the Vista UI, however they have created a few problems for those of us who dabble in OS customization.

What makes a Live Folder?
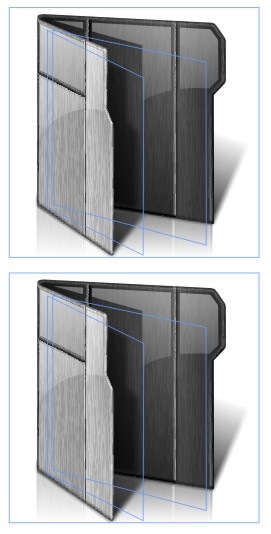
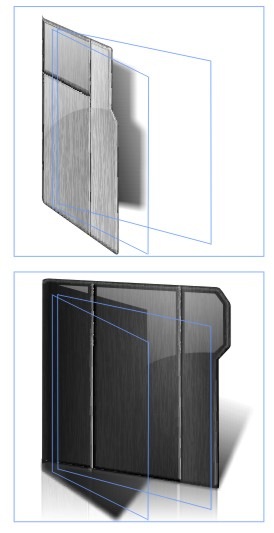
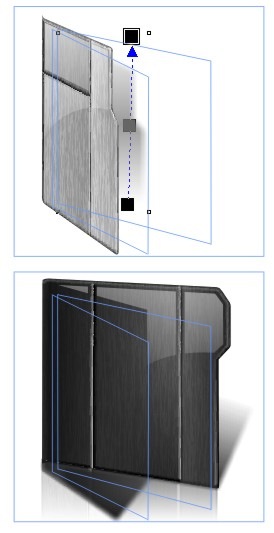
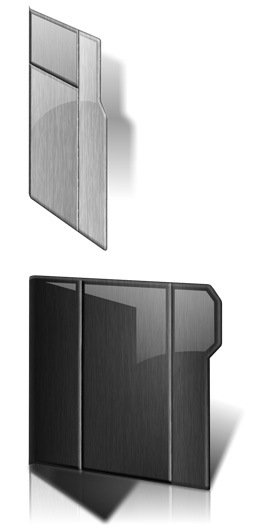
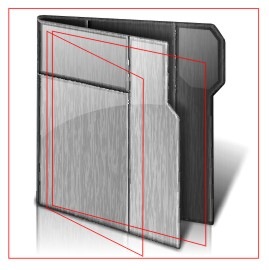
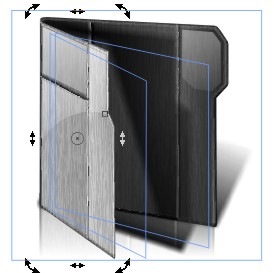
Live Folders are actually made up of two (2) separate icons; the Folder Front and the Folder Back. The "Live" part of a Live Folder is the dynamically generated thumbnails that are sandwiched between them. To create a good Live Folder you have to take into account the dynamic aspects that you cannot at this point change. Over the last year I have dealt with this is several ways. After a few experiments I created a simple guide that allows me to make sure that we don't lose those dynamic thumbnails, or end up with them looking out of place.
IaD_5_Live_Folder_Samples 
There are several things to note in the above images, that will make sure that our new Live Folder work flawlessly in Vista.

First, you will notice that both the front and back images have built-in shadows. The back is the most strange, in that it has a shadow of nothing shooting off the side. This is because Windows does not use the Live Folder unless there is something in it that can be thumbnailed. If it is empty it will use the Closed Folder icon. If the folder only has one item in it, it will generate the rear thumbnail first. This makes sure that there is always something casting that shadow. It will also right-justify it to make sure that even if it is thin and tall it will cast the shadow correctly. You will also note that the shadow on the front is very feathered and ends before it would hit the first thumbnail. This is to make sure that the shadow does not have to fit correctly on the thumbnails.

The next thing you have to account for is the fact that the foremost thumbnail generates its own shadow. This is one of the reasons you pretty much always have your shadows falling to the right in Live Folder icons. Though you can not tell in the images above, Windows will distort the thumbnails if they are to small, tall or thin to make sure that it's shadows still fit.

Lets us make our own:
You might recall that I used this guide yesterday when creating our Open Folder icon. I did this because I want our Live Folder and Open Folder icons to appear exactly the same to the user. It will also make today's icons very simple to create, since we did almost all the work yesterday.

Step 1: 
The first thing we will do is make two copies of our Open Folder icon from yesterday. I will also be copying my guides, just so we can keep track of where the thumbnails will be generated. 
IAD_5_S1

Step 2: 
Now we simply remove the front of the folder from one, and the back from the other.

  IAD_5_S2

Step 3:
Now we will have to tweak the shadows a bit to make sure that everything feels correct with the thumbnails.


IAD_5_S3

Step 4:
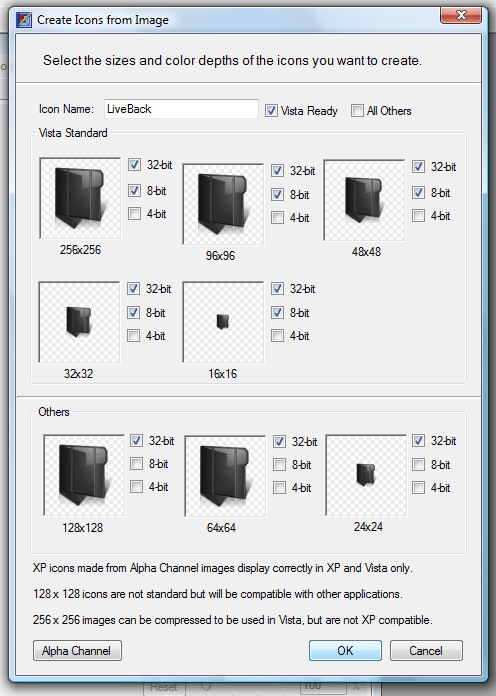
Today I am going to go a bit further with our tutorial and go all the way to applying these in IconPackager. In order to do this we must get our icons created. I do this by exporting them to PNG format; I like to export them as a large 768x768.
IAD_5_S4

 Step 5:
Now we use any number of icon creation programs to turn our PNG's to ICO files. I tend to use Stardock's IconDeveloper, or Axialis Icon Workshop, depending on what I need to do. Make sure you include the Vista 256x256 icon size.

IAD_5_S5

Step 6:
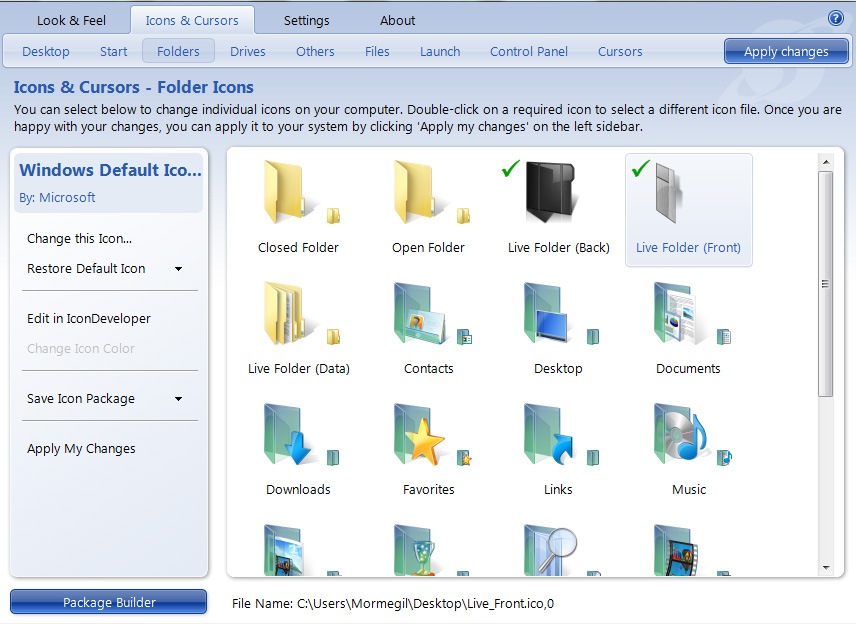
Once we have our icons, we simply open IconPackager, click on the Icons & Cursors tab, and chose Folders. Then simply drag and drop your new icons on the Live Folder Front and Back.

Chose Apply My Changes and you are good to go.


IAD_5_S6

Finished Icon:
Now we have our own Icon-A-Day style live folders, and if you don't mind that the live folders are vertical, you can now apply these to the Icon-A-Day 1.1 icon package and have pretty much a complete Vista set.

IAD_5_Finished

Wrap Up:
With the completion of the Live Folders we come to the end of Week 1 of the Icon-A-Day 2.0 project. I will be back Monday night, when we will do our last non-user folder, the new Vista-only Data Folder.

I would like to thank everyone for the welcoming back the Icon-A-Day project so warmly. With your support, we should be able make the Icon-A-Day 2.0 icon package a must-have.


Download the Live Folder Icons: 
Get today's Icons form the Miscellaneous Icons Library.
IAD_Download

All Icon-A-Day artwork, copy, and Icons, are copyrighted by Paul Boyer © 2008, and may not be used with out express permission.

This Week in Skinning - August 8th

Skin Roundup for 8-8-08

Friday, August 8, 2008 by Island Dog | Discussion: OS Customization

Ok, is the day over yet?  It's Friday and I'm ready for the weekend, how about you?  Well before we all head off to our weekend getaways, lets take some time and go through some featured picks this week from WinCustomize.

Now for this weeks picks!

http://skins6.wincustomize.com/bng/bootskin/t10113.jpg


Odessy for Bootskins
by bng

This certainly doesn't look like a normal bootskin, and this one will definitely have people asking what it is.

http://skins7.wincustomize.com/theAVMAN/cursorxp/t2441.jpg


Hot Metal for CursorFX
by theAVMAN

There are just so many cool cursor themes coming out, it's hard to keep up.  theAVMAN is really cranking some great one's out.

http://skins2.wincustomize.com/Vad_M/widgets/t1394.jpg


Mini Player in DesktopX Widgets
by Vad_M

Vad_M has upload this as a tutorial widget, but this thing is slick and if will definitely help you along with creating your own player.


http://skins3.wincustomize.com/wondae/dream/t1339.jpg


Windows Vista Ultimate Aurora HD in Dreams
by wondae

This is a simple .dream, but has a very elegant look to it.  Very nice.


http://skins2.wincustomize.com/WebGizmos/dock/t14770.jpg


Boulder Tabbed Docks for ObjectDock
by WebGizmos

These docks are made for the WinCustomize subscriber skin, Boulder.   There is also a set of side docks, so check his gallery for more.

http://skins6.wincustomize.com/messiah1/dock/t14771.jpg


Simplistic 1 for ObjectDock
by messiah1

Nothing wrong with keeping it simple, and these dock backgrounds are a perfect example.

http://skins6.wincustomize.com/kenwas/wallpapers/t37722.jpg


Summer Work in Wallpapers
by kenwas

Summer is quickly coming to an end, but it's wallpapers like this that keep it going.


http://skins7.wincustomize.com/AudonLeal/wallpapers/t37686.jpg


Glass Orb in Wallpapers
by Audon Leal

The colors and beautiful design immediately caught my eye.
http://skins6.wincustomize.com/ahabkaba/wallpapers/t37724.jpg Tightwire Sailing in Wallpapers
by ahabkaba

I really enjoy the designs of these wallpapers.  They always have a very unique look.

Be sure to stop by the personal pages of all the skinners featured here, and check out all the other works in their galleries.  This was also a great week all around, so be sure to check the galleries on WinCustomize as well.  See you next week!

Icon-A-Day 2.0, Day 4. Open Folder, Live Folder, what's the difference?

Thursday, August 7, 2008 by mormegil | Discussion: OS Customization

Back in the dark times of 2005, we did not have such things as Live Folder, and the Open Folder was a rarely seen anomaly on the Windows desktop. Now things have changed; though you rarely see the actual Open Folder icon, you see the Live Folders everywhere. We will take advantage of this to finally give the Open Folder some love, and I will try and explain just what goes into the Vista Live Folder icons along the way.


Day, 4
(Thursday, August 7th, 2008) Line

In the original Icon-A-Day series, we only had two types of Windows folders. Closed, and Open. In Vista we have four types, consisting of five different icon files. Closed Folder, Open Folder, Live Folder (Front), Live Folder (Back), and Data Folder.

This does not even include the User Folders, which in Vista are given a different style in order to set them apart from the normal system folders. Today we are going to be keeping it simple and take care of the Open Folder icon. The problem is that these will more or less be the same, visually, as the Live Folders, so today's and tomorrow's tutorials may seem a bit redundant.

Open Folders:
We should be able to save a lot of time today, because we will be creating the new Open Folder icon by modifying the Closed Folder icon we created yesterday.

I will be using a new guide that I created to make sure that our folder works with the Live Folders; I will go into how and why I created this in tomorrows post when we create the Live Folder icons.

Step 1:
Here you can see my Live Folder guide. In step one I will simply copy our Closed Folder and place it behind my guide. 

  IaD_4_S1

Step 2:
Now I will simply grab the front of the folder and size it and skew it, using the Pick Tool. I just want to make it look more or less like it is opened up. We will touch it up a bit in Step 3.
IaD_4_S2 

Step 3:

If we were in a hurry the simple skewing and sizing of the folder front would probably be good enough, however, since we are trying to do things right, I want to tweak the mesh nodes to make sure our folder front does not look squished.

In order to do this, I nudge the brush fill out of the way so I can get to my folder front.

 IaD_4_S3

Step 4:

Once I am done touching up my mesh tool, I nudge my texture fill back over. Since I have not changed the folder shape much, I don't need to edit it.

Now that we have changed our folder front, our inner shadow is messed up. In order to fix this we will use the same shadow technique as yesterday.


   IaD_4_S4   

 Step 5:
Now that we have the correct shadows, we can see that our gloss no longer looks quite right. Once again I just draw in some new white shapes, or edit the existing ones, and then I fade them out with the Interactive Transparency tool.

   IaD_4_S5

Step 6a:

Our last step, will be more or less the same as our last step yesterday; we have to re-do our reflection.

In short I copy both our folder front and back, create bitmaps with them, then size them and flip them, placing them in a mirrored position under our icon. Then I squish them down until they look right.

IaD_4_S6a 

Step 6b:

Once I am done with that, I convert them to one bitmap and fade them out with the Interactive Transparency tool.

Once again I will point out that both the techniques in Step 4 and Step 6 are in the Save video over at Corel For Skinners.

IaD_4_S6b 

Finished Icon:
Once we export our file, to a PNG, we have our finished image, our Open Folder icon is ready to go.


IaD_4_7

Wrap Up:
Today we were able to take yesterdays work, and quickly create our Open Folder. Tomorrow we will use our work from today to quickly create our Live Folder icons.  While we are at it, I will try and explain how Vista Live folders are created, and the special challenges they inflict on icon designers.

Download Open Folder Icon: 
Get today's Icon form the Miscellaneous Icons Library.
IAD_Download

All Icon-A-Day artwork, copy, and Icons, are copyrighted by Paul Boyer © 2008, and may not be used with out express permission.

Icon-A-Day 2.0, Day 3. Seems like I've done this before.

Thursday, August 7, 2008 by mormegil | Discussion: OS Customization

The first Icon in the original Icon-A-Day series was the Closed Folder. I have to admit that I was not quite sure what I was getting into at the time. This time I do, so we will begin once again at the beginning, with the Closed Folder.


Day, 3
(Wednesday, August 6th, 2008) Line

The funny thing about the Closed Folder icon is that by default, in Vista it is no longer closed, it is just an open, empty folder. I must admit that I kind of like this convention, but if you have a logo or something you want to showcase you lose one of the most often seen blank surfaces in Windows.  So in icons, like the My Colors NBA Icons that I did last year, I made the folders completely closed.

To further complicate things, in Vista we have Live Folders, so unless a folder is empty, you pretty much never see the default Closed Folder anymore. It is still seen in the tree view in Explorer, but only at 16x16. I want to keep more or less the same feeling that we had in the original Icon-A-Day icons; the same Sci-Fi brushed metal finish, but we have to make sure that they fit into the new Vista scheme of things. What all this means is that the Closed Folder will more or less be our blueprint for the Live Folder icons that we will be tackling on Day 5.

One Last Important Note: I am going to jump right into these tutorials where we left off, in that I will be assuming people have seen the original series. These tutorials are more to help people understand how to create high quality icons, not a "How to use CorelDRAW" tutorial set. I have one of those, it is called CorelDRAW for Skinners and even though it is also a few years old, it you can use it to better understand some of the terms I toss around. I will be updating it as well, as this project picks up steam. But in the mean time I will be keeping some of the technical aspects pretty basic. If you have CorelDRAW questions, or questions about my techniques, please ask in the comments and I will try and answer; at the least it will give me ideas for new CorelDRAW for Skinners videos.

With that said, lets get this party started.
Closed Folders:
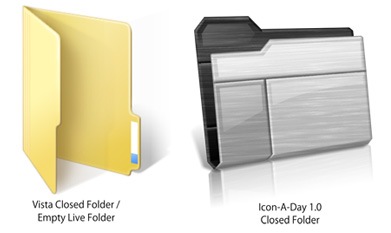
The most obvious change to the folders in Windows Vista is their orientation. Though not the first ones to do it, it is now known as the Vista Style.

Sadly I was not aware of this change back in January 05, much less the fun that would come with the Live Folders, so our original Icon-A-Day folder was quite simple and followed the more conventional orientation of the time.

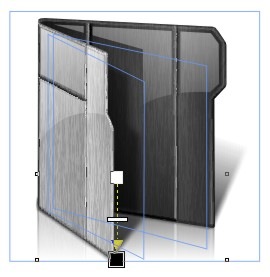
Because of the complications that Live Folders add, it will be simpler for us to adopt the Windows Vista Style folders in 2.0.
Defaul_Folders

Step 1:
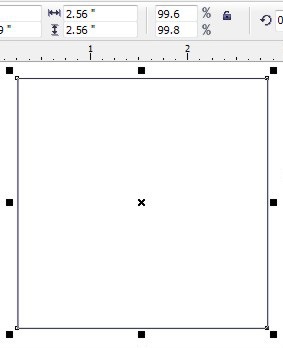
The first thing we will have to do is establish our new default size. This time In Corel we create a new Document and create a box, 2.56"x2.56". When we export our final icon, it will be 256x256 at 100dpi.

  IAD_3_S1

Step 2:
Now, in almost the exact way we did last time, I start with two (2) rectangular Mesh Fill Objects, each with only 1 grid length. I will then start to push them around with the shape tool to get our basic shapes established.


 IAD_3_S2

Step 3:
As I mentioned above, I want to keep the same basic look and feel as the original folders, so using the shape tool, I will begin by sculpting our mesh's into more or less the same folder we had before, just standing on its side.

Once we have the basic shape, I also give it the base colors, we will need. I do this by selecting each shape and assigning the same colors to all the nodes in the mesh.

    Corel

Step 4:
Now we begin to use the Mesh Tool in earnest. This is basically the same as in Icon #1 of the original series. You can learn a lot more about the Mesh Tool In the CorelDRAW For Skinners Tutorials.

First I go through and add several new mesh nodes. These will be used to give our folders depth, and realism. As I do this I start tinting the colors by selecting one or more nodes and holding down control, while clicking on a color in in the Palette. In this case I will more or less be using black and white. I just keep this up until I am happy with the end result.

IAD_3_S4    

 Step 5:
Once we have our shapes and fills set, we need to add some flare. We will do this with the same tricks that we used in our original series, starting with adding a the signature brushed metal texture.

We will do this the same way as before. We copy both the folder front, and the folder back. We give them both a 50% black fill, and then use the interactive transparency tool on both new objects, giving them a multiplied and stretched texture. See Corel For Skinners for transparency tips.

   IAD_3_S5

Step 6:
After we have our texture established, we have to get in the ever present gloss. This we do by drawing in a few shapes and filling them white. Then, once again we use the Interactive Transparency tool, to create a gradient blend, fading out our white shapes, leaving the classic gloss.

Since our folders our now facing up, and the front of the folder is not facing directly into the light source we will have to fake the gloss a bit more, but we want to keep it in order to maintain a uniform look.IAD_3_S6

Step 7:
One of the staples of the Icon-A-Day icons was the shadow. At this point we run into our first Vista Style conflict. The original icons all had a shadow dropping to the left, and back. Windows Live Folder thumbnails, actually generate their own shadows that drop to the right and back.   

In order to deal with this, we will have to change our shadow to the Vista Style. However the lighting on our icons is still in the 1.0 direction. Hopefully this will not tell on us too badly.

IAD_3_S7

Step 8:
The shadow brings us to one of the big changes in the new version of Corel. In the original icons, when we made a fancy shadow, I would just use the drop shadow of a shadow mask shape, then I would break it apart and fade out the resulting bitmap with the interactive transparency tool.

In Corel X3 or above when you break apart a shadow, it does not leave a bitmap, it leaves a mask. Rather than going into why, just understand that now you have to convert that mask into a bitmap to use the original technique. So that's what we will do here.
Corel   

Step 9:
The final signature feature we need to make this truly an Icon-A-Day icon is the reflection. This is going to be a bit difficult, because of the much taller aspect of the new folder. But we will do it the same old way. By copying the front and back of the folder, converting them each to bitmaps, then flipping them.
Once we have our flipped bitmaps, we can squish them down, and skew them into place. Once they are in place we use the Interactive Transparency tool to fade them  out.

IAD_3_S9

Finished Icon:
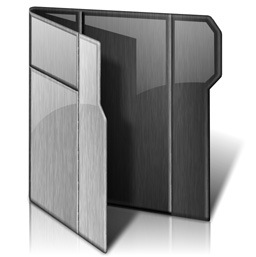
There we have it, the first new Icon-A-Day icon in almost 3 years. We will be using this folder as the base for our next few icons, so they should go pretty quickly.


Icon-A-Day2_Closed_Folder    

Wrap Up:
As I get back into the flow in the creation of these tutorials, and as I get to know who is reading them, and what they are interested in hearing about, I should be able to streamline. But I seems kind of fitting that our 2.0 Closed Folder took the same amount of steps as the original.

Once again, I welcome feedback. As a mater of fact I am relying on it, so please comment. Join me tomorrow as we make our new Open Folder icons.

Download Closed Folder Icon: 
Get today's Icon form the Miscellaneous Icons Library.
IAD_Download

All Icon-A-Day artwork, copy, and Icons, are copyrighted by Paul Boyer © 2008, and may not be used with out express permission.


web-wc01