Learning DX Step-By-Step - #3
Tutorial #3 - Attack of the Clones
Thursday, February 22, 2007 by RomanDA | Discussion: DesktopX Tutorials

 |
|||
| Step-by-Step Tutorials |
#3 - Attack of the Clones |
||
|
A series by RomanDA |
|||
|
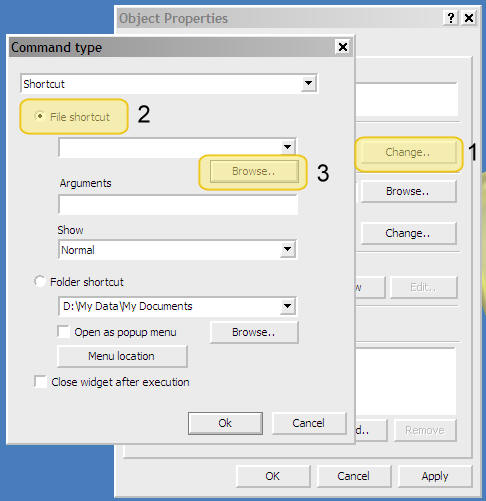
Listing of other DX Tutorials: Click here Today's Lesson: "Attack of the Clones" In this lesson we will cover how to create a clone from an object, so we can have multiple items on the screen linked to a Folder, a Program and a web URL. In order to use this tutorial, you will need to first go thru Tutorial #2 (and download the zip file from there as well). I will assume you downloaded the zip of the png files, followed the Tutorial #2, and are ready to take your Lightbulb and make a new one that will point to a Program and another to a URL. For this and all the Step-By-Step DX Tutorials you will need to purchase DesktopX for $14.95 from Stardock. Lets get started. |
|||
| STEP 1 - Cloning the Lightbulb | |||
Again, I know this is
redundant but you need to have completed Tutorial #2 before you attempt
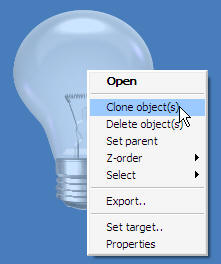
this one. That said, we will take our lightbulb and make a clone:
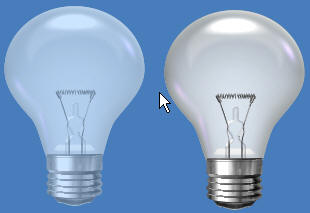
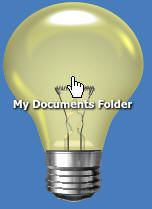
You have just created a CLONE!! *** Repeat this step one more time so that you end up with 3 lightbulbs *** |
|||
| STEP 2 - Point your Clone to a Program | |||
|
|||
| STEP 3 - Adding a TOOL-TIP to these so you know which one is which | |||
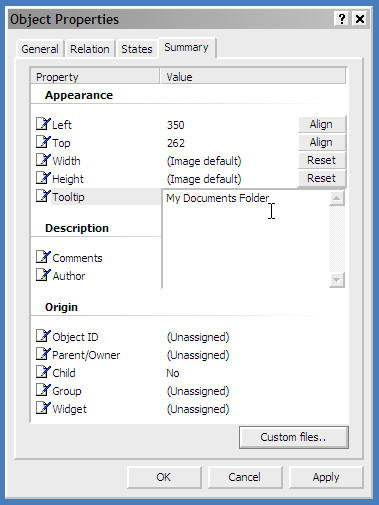
Ok, you have 2 identical
(well 3 really) clones on your desktop. So that you can know which
one does what, we are going to add a TOOL-TIP (the text that shows up
when you mouse over something) to each.
|
|||
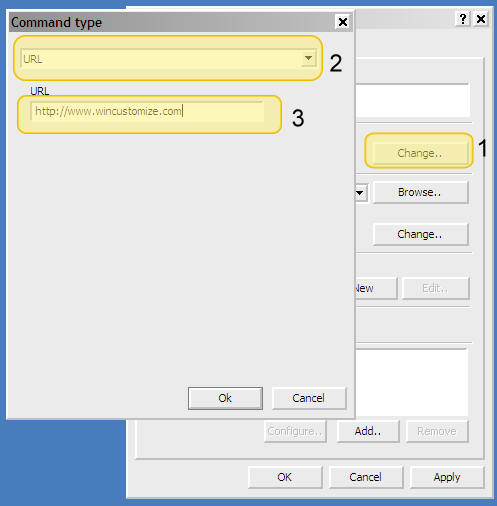
| STEP 4 - Making a URL Linked Object | |||
|
|||
| CONCLUSION | |||
|
Ok, That wasn't hard was it? Ok, yeah so now you have these 3 HUGE lightbulbs on your desktop, and they suck, well make your own images, and change them! Changing them is simple, go back to Tutorial #2, look at step #3 and just pick your own images for "mouse over" and "mouse away" states. You can even download from the MISC Icons library and use them for these states. Check back as I add new Step-By-Step Tutorials on how to make this a link to a folder, web-site, or just about anything you want! I hope you have enjoyed this step into DX, and look forward to the next installment..
|
|||
Reply #2 Thursday, February 22, 2007 10:19 AM
Cloning can be dangerous, one wrong move and you end up with a ton of garbage on the screen.
Reply #3 Saturday, February 24, 2007 8:36 AM
Once you have an image up on the screen, can you resize the image? make it smaller or larger?
And another question: is it possible to mix states in an object, i.e have the mouse away state be an image, and have the mouse over state be text?
Reply #4 Saturday, February 24, 2007 8:45 AM
There are script commands for height/width/top/left so you can change the size and position.
Look over: Resizer demo for more info
No, images and text states cannot be mixed. But you can easily turn multiple objects on and off, so you could have a text and image item sitting on top of each other and change which one is visible.
Reply #5 Saturday, February 24, 2007 1:46 PM
Yea, evil mutations.
Reply #6 Monday, March 12, 2007 8:13 PM
No, images and text states cannot be mixed. But you can easily turn multiple objects on and off, so you could have a text and image item sitting on top of each other and change which one is visible.
You can create an image containing just the text on a transparent background, and use that for the mouse over state. It would give you the appearance of mixing both image and text states. But the image would need to be the same size as the mouse away state.
These tutorials are great, keep em coming!
Please login to comment and/or vote for this skin.
Welcome Guest! Please take the time to register with us.
There are many great features available to you once you register, including:
- Richer content, access to many features that are disabled for guests like commenting on the forums and downloading skins.
- Access to a great community, with a massive database of many, many areas of interest.
- Access to contests & subscription offers like exclusive emails.
- It's simple, and FREE!



Reply #1 Thursday, February 22, 2007 9:05 AM
I notified Stardock about this and hopefully this behaviour will change in coming releases.