


What Graphics Software Are You Using With Vista?
Monday, April 23, 2007 by Island Dog | Discussion: Windows Vista
The first application I am evaluating is Corel Paint Shop Pro XI.
The second trial I downloaded was Adobe Photoshop Elements 5.
So for you who are running Windows Vista, what graphics software are you using?
Windowblinds/Skinstudio Video Tutorial
Saturday, April 21, 2007 by Mrrste | Discussion: OS Customization
I don't know if anyone will be interested but after a month in the making, i finally finished by Windowblinds/Skinstudio Video Tutorial  If you have ever wanted to mod, create or just wanted help with skinstudio and a windowblind, this is what u need. It will help give you a basic understanding of how Skinstudio works and how to go about creating your own skin. Deviantart has helped with this and Aquasoft are linking it. Since this is the home of Windowblinds and Skinstudio, i thought u guys might like to know Check it out at http://mrrste.deviantart.com
If your wondering, due to the file size and bandwidth needed for this, DA has given me special persmission to host it on my site. They have even promoted it from there accounts and in there newsletters
This Week in Skinning - April 20th
Skin Roundup for 4-20-07
Friday, April 20, 2007 by Island Dog | Discussion: Community
Well the end of the month is approaching and I am having a hard time picking skins to feature. Not because there weren't enough, but because I'm just having a really hard time choosing from all the great submissions. Remember I always appreciate your suggestions on skins to feature, and feel free to e-mail me your suggestions.
Also, don't forget the WebGizmo's ObjecDock Background Contest that is going on. The deadline isn't until May 11th, so there is still plenty of time to enter. Now let's take a look at this weeks picks.
INDUSTRIAL conformity for CursorXP
By Drill'n Boss

I really like the animations with this cursor. He says it goes with Industrial skins and I can definitely agree, but even if you don't have an industrial skin, be sure to download it anyways.
CPU_TEMP in DesktopX Widgets
By RomanDA

Here is a simple CPU Temperature widget. Color changes depending on temperature range. Be sure to check his gallery for more great gadgets.
Ovals in Dreams
By Neil Banfield

This is a dynamic dream with two slowly moving semi-transparent oval shapes. It's simple, but it looks really good on the desktop.
Clear OB for ObjectBar 2
By Quentin94

The ObjectBar 2 gallery on WinCustomize is started to get populated, and that is great news. Quentin94 has been hard at work adding a few skins in there, and this latest one deserves to be featured.
Leather Dock Backgrounds for ObjectDock
By messiah1

This is a really cool set of dock with a real leather look to them. Very nice work.
PoulanZ_Vista IE7 for ObjectDock
By PoulanZ

If you use IE 7, and there are people who do, then you should definitely check out this icon by PoulanZ. Great job.
Fantasy World in Wallpapers
By enormousaxie

This is a really nice wallpaper, and I hope to see more from him. However, I would like to see some resolutions with it.
Nuage Redux in WindowBlinds
By essorant

This skin is based off the original Nuage and makes great use of transparency. There is also Vista compatible versions as well.
There were many great submissions this past week, but time and space won't let me list them all. Be sure you browse the galleries on WinCustomize because you don't want to miss the other skins that are there. See you next week!
Best Skins of 2006
Thursday, April 19, 2007 by Frogboy | Discussion: OS Customization
Last year was another great year for skinning. Users from around the world created some incredibly fantastic skins.
Culturally, skinning is a great deal different today than it was back in the late 90s. Back then, a popular skin might get a 1000 downloads. I remember when the first "Aqua" skins came out and the infamous "WinAqua" from Dangeruss managed to get 5 THOUSAND downloads total which was, back 2000 or so, a real milestone. Now, downloads of 50,000 are common and most of the top skins can expect to be reaching towards 100,000 downloads.
The popularity of skins has altered the way skins are made. Designs tend to be much more mainstream. While programs such as WindowBlinds and Winamp allow for pretty free-form skin designs, the trend has been to make them conservative and "clean" to appeal to the widest audience.
In this article, we look at some of the best skins of last year. This article is, by no means, the end all be all list, we do try to include a good selection of the best creations from the past year.
 WindowBlinds
WindowBlinds is a 3rd party program developed by Stardock (whom I work for) that lets users apply GUI skins (often called visual styles) that change the overall look and feel of the Windows interface (title bars, push buttons, Start bar, etc.).
To use WindowBlinds skins you will need to download WindowBlinds.
Last year was a great year for skinning. Not counting the great skins that came out of the GUI Championships, here are ten of the best (there were so many great ones to choose from so apologies to all the other great skinners we didn't include).
 |
danill0c's 5imple skin was one of the first WindowBlinds skins to really show off what WindowBlinds 5 could do. Both a practical skin and very polished at the same time. The subtle shadow effect is part of the skin (WindowBlinds 5's engine supports alpha blending effects like shadows and glass). A terrific design all together. [Download] Vista Ready! |
 |
Kol's Thallos was one of the best skins of last year without a doubt. Clean, smooth, and useful, its subtle shadows and polish made it a favorite for users. Thallos is unique in that Kol created both WindowBlinds and msstyles versions of it and hence won in both categories. The two are virtually identical. The WindowBlinds version adds toolbar icons, and a progress animation. [Download] Vista Ready! |
 |
Josephs's Live Suite was one of the highlights of last year. Some argued that this is the look they wish they'd updated Windows 2003 Server to look like. A good step between Windows XP and Windows Vista. [Download] Vista Ready! |
 |
ChaNinja's MotoXP B1 was one of the most beautiful skins created last year. Both highly stylish and very usable. It comes in multiple styles, supports animation, and is very fast.
|
 |
danillo0C was almost certainly the top skinner of 2006. Besides making the top GUI Championship skin Acrylic, he also made Aerial. This skin has it all and is incredibly usable and fully-featured.
|
 |
JJ Ying was another skinning super-star last year and one of the best skins made last year was Ecliz Deluxe. The screenshot really doesn't do it justice as it comes in multiple styles including a clear glass version. A truly amazing skin. And as you can see, it works great on Vista as well as XP.
|
 |
No best of 2006 list would be complete without tehZERO's Eminence. With its cloudy stained glas title bars, clean design, it looks great on both Windows XP and Vista.
|
 |
For users getting tired of Aero-like glassy skins, Buuf-OS from Gabriel provided great relief. With great toolbar icons (for XP users), great progress dialogs, and lots of other subtle tweaks and enhancements, it's just a beautiful and original skin.
|
 |
Adni's VistaPlus was the most downloaded WindowBlinds skin of 2006 with nearly a half-million unique downloads. It doesn't run on Windows Vista but for Windows XP users looking for a fantastic looking skin on Windows XP that in some respects is a better Vista than Vista, VistaPlus is a great choice. |
 |
MikeB's Old Republic was one of the more original skins that also maintained a high degree of usability and polish. With a subtle shadow and distressed style, it's an awesome choice for users looking for something different. [Download] Vista Ready! |
Some Popular Skinners
| Essorant danillo0C Treetog Gabriel VStyler JJ Ying Adni18 Kol |
Z71 MikeB Dangeruss I.R. Braniac InGUI Josephs ChaNinja Patrick24 |
Navigatsio Pinchecl Boxxi Night Train Bones2112 Fuzzy Logic SKoriginals |
 XP MSStyles
Last year might have been the twilight of XP msstyles with Windows Vista's arrival this year. But it was still a great year for .MSSTYLES. MSStyles is Microsoft's skin format designed for changing Windows XP's look and feel. While not as powerful as WindowBlinds, it has a significant following. Third-parties can make skins and use them provided that the uxtheme.dll is cracked to disable digital signing protection. Below are some of the notable ones we found made from last year.
To use .msstyles you will either need to crack the digital signing verification in uxtheme by patching it (which you can obtain at Neowin.net and elsewhere) or you can download/install SkinStudio and use it to convert them to WindowBlinds format. There's a quick guide for that here. In the case where we took our own screenshots, they were taken on Windows Vista via WindowBlinds since XP msstyles won't run on Vista.
Here are some of the best from 2006!
 |
Luna Element 5 from Tornado was easily one of the favorites of users everywhere. With a clean UI that blends XP and Vista together seamlessly, Luna Element makes our list of one of the best skins of 2006. LE 5.1 released in January of this year keeps the updates going. [Download] |
|
Kol did double-duty with Thallos. Available both for WindowBlinds and as an msstyles, it was a user favorite. [Download] |
 |
No top 10 list on msstyles would be complete without mentioning MohsinNaqi's Tener VS. What makes Tener so special is in the details. The taskbar is extremely well done and the colors are very carefully chosen. Mohsin Naqi is a top skinner with icon packages, wallpapers, WindowBlinds visual styles, and more (you can check out his site here). [Download] |
 |
heylove's Area04 (Areao4.2), like many of the top msstyles, made deviantART's daily download (this one on New Year's Eve!). It is significantly different than most of the msstyles we saw last year. Combined with its original design, clean style, and several different sub-styles, Aera04 makes our list. [Download] |
 |
Schluepfer's very first visual style was Klarheit. And if this is what his first effort is, we can't wait to see what he makes for 2007! [Download] |
 |
hsn's Mint 2.0 started its life as a Linux Gnome GTK2 theme and brought over to Windows XP. Despite not being "original", it is still one of our favorite skins of 2006 regardless of where its original platform was. For the shadow effect, you'll need a shadow program such as WindowFX. [Download] |
 |
Tempura is another Linux GTK theme that was ported but like Mint, the platform is less important than the excellence in the skin itself. Lokheed had a great year and you can see his complete portfolio here. hsn's port of it really shines. You can see how it looked on Linux by going here. Like Mint, you'll need to download a program like WindowFX to get shadows. [Download] |
 |
Bant's Reluna Em3lent is a great example of Bant's elegant design philosophy of creating usable, clean, and elegant skins. The skin actually comes in several different flavors that look significantly different from one another. Any individual sub-style would be on its own one of the top skins of the year. Getting them bundled together in this single visual style package makes it just that much sweeter. [Download] |
 |
Cyberchaos's Aquanox VS was one of the most popular msstyles of 2006 with over 100,000 downloads at deviantART. Inspired by some of Kol's other work, this clean, usable and original skin makes our list. [Download] |
 |
dobee's NeoGeniX's is one of the most polished and original looking msstyles of last year. It was a favorite of many of us this past year. When combined with the right icon package, a toolbar theme, and the NeoGeniX ObjectDock, users can give Windows a whole new look. [Download] |
 Winamp Skins
Winamp was the skinning program that started it all. Originally Winamp skins were very limited in what they could be. But WinAmp 5 supports both a free-form skinning format as well as the easy but limited skinning format. Here are some of the highlights from last year.
To use Winamp as your media player, you will need, of course, Winamp.
 |
NeuroSKINS Meridian was definitely one of the best looking Winamp skins we saw last year. Taking full advantage of the Winamp 5 skinning engine, it's both highly usable and just looks great. [Download] |
 |
883's Drone was possibly the best Winamp skin of 2006 that we saw on WinCustomize.com. 883Design has been perfecting this design for quite awhile but its final arrival was Summer of 2006. [Download] |
 |
Tiggz's GT3 skin was ranked on our list as one of the best Winamp skins we saw last year. Part of the GT3 skin series, it is a clean, bold look with a high degree of functonality. [Download] |
 |
In a year with a lot of glass skins, GlassAMP from jeree01 one of the best we saw combining the signature glass look with a high degree of usability. [Download] |
 |
While not as usable as the cleaner, simpler skins made by others, Skinister's self-named skin has a high degree of creativity and originality putting it on our list. [Download] |
 |
faris's Cell skin was another favorite for many users. With over 50 different color styles and many different ways of using, Cell was easily one of the top skins of 2006. [Download] |
 |
Inter-Pol.info AMP continued the trend of glass-styled skins. But unlike many skins, this one was able to carry it out without it looking like a Vista clone. An exceptional skin. [Download] |
 |
Maybe we were a little biased but the Heavy Equipment community project (which delivered skins for dozens of programs) gets bonus points for letting users have their entire UI have a consistent look (screenshot of complete suite here). But regardless, it's still a great skin. Winamp skin from Elvee. [Download] |
 |
MrV2K's Pebble skin has a great, polished design. Its usability to the user depends on the user of course but we found this to be one of the better Winamp skins we found this past year. [Download] |
 |
Snowman's 5imple Winamp skin takes a different route than most. It makes Winamp into an almost iTunes-ish media player with a very simple and clean skin based on the popular WindowBlinds skin. [Download] |
Conclusions
That's it for this year. There are so many other skinnable programs out there that I wish there was time to cover them all. If you have your own list of favorite skins, feel free to comment here and I'll try to check in and update the bottom of this article with some other noteworthy lists or produce a follow-up with with favorite skins of other programs or ones you think we missed.
Related Articles
Changing icons on Windows Vista
New Vista Icons
Make XP look like Vista
Home Office Software Essentials
Software Recommended for Your Home Setup
Thursday, April 19, 2007 by Island Dog | Discussion: Personal Computing
I wanted to write a guide that lists software that every home office should have. Being someone who works from home, I understand how important it is to have software that will make your life that much easier, and your work more productive. Part 1 of this article will deal with office applications, security, and backup.
Office Tools
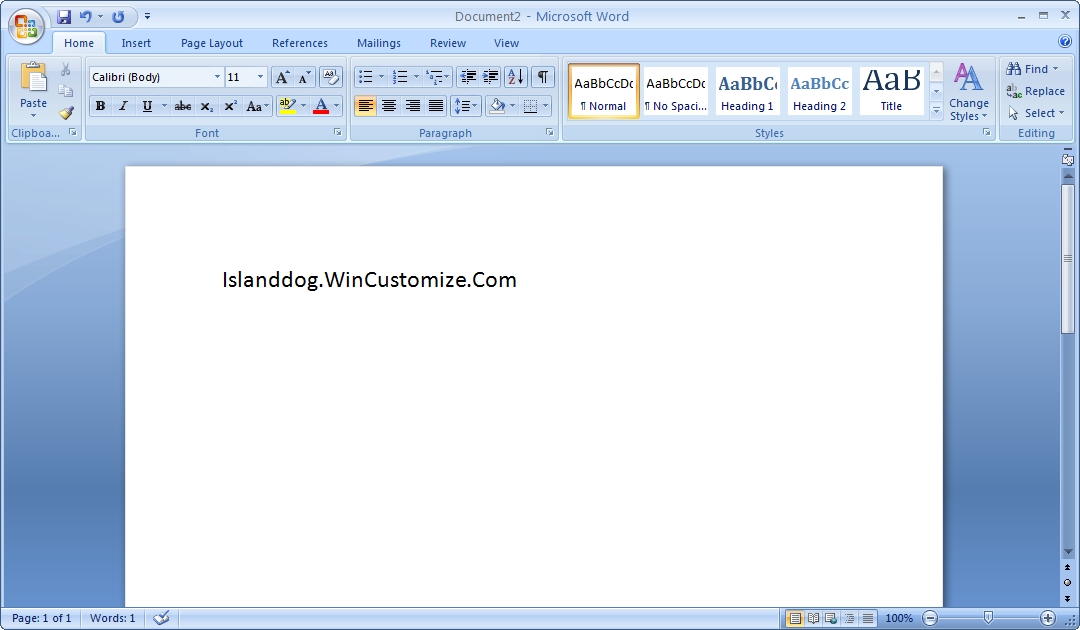
Aside from a web browser, the Microsoft Office 2007 is one of the most used applications on my PC. There are about 8 different suites from the Office Basic version on up to the Enterprise edition. You can check out the comparison chart to determine which suite includes the applications you will need. The most noticeable difference in Office 2007 is it's new interface which includes the new "ribbon". Now I know some will disagree but I have grown to like the ribbon and once I had become familiar with the new layout I found it quite easy to use.
Word 2007
Part of Office 2007 or available stand-alone is Outlook 2007. It is open all day on my PC, and it is essential for my e-mail, calendar, and contact information. One of the really cool features of Outlook is the to-do bar which contains a mini-calendar, upcoming appointments, and displays your task list. This is great because I don't have to switch views just to check on today's upcoming appointments. Other features include RSS feeds, integrated search, and an attachment preview feature.
If you don't need the complete Office suites, then OpenOffice is a great alternative. OpenOffice does not include an e-mail client, but another I can recommend is Mozilla Thunderbird.
Security
Anti-Virus and security tools are very important in your home office setup. There is such a wide variety of good, quality solutions for this, so I'm going to list some of the most popular applications.
- Trend Micro Internet Security 2007 - This is what I personally use and it's a great solution for anti-virus, firewall, spyware protection, wireless networking monitoring, and parental controls.
- Ad-Aware - One of the most popular anti-spyware applications, and they have solutions for personal and business use. The signature files are updated often and it does a great job of cleaning your system.
- CCleaner - Another popular application is CCleaner. This program does a fantastic job of cleaning up unused files on your hard drive. It also has a registry cleaner, and tools for cleaning your startup programs.
- Windows Defender - Another anti-spyware program which also includes real-time monitoring.
- KeepPass Password Safe - This is a password manager that allows you to store all your passwords into a database that is protected by a master key or key disk. This is very handy if you have a lot of passwords and want to organize them in one place.
- Zonealarm - When people think firewall, Zonealarm comes to the mind of many. Zonealarm has grown into a complete security suite, but the free personal edition is still available.
- AVG - AVG is a great, free anti-virus program for non-commercial personal use. Talking with many members on WinCustomize this seems to be one of the favorites.
Data Backup
Stardock KeepSafe - KeepSafe is an application that I really can't go without. If you have typed a long report or article and had it suddenly disappear after one of those "rare" occasions Windows crashed, or accidentally overwritten an important file, then you will appreciate what KeepSafe does. It will save your important files in real-time as you are working on them, and you can easily choose and configure which file types to have saved.
The first time you recover a document that has been lost or corrupted you will understand why this is such a valuable program. When you first start KeepSafe there is an easy setup wizard that will have your documents protected in no time.
|
KeepSafe configuration wizard |

Acronis True Image 10 - This is another program that has saved my data many times over. True Image allows you to create an image of your entire hard drive, including the operating system, and will restore in case of hard drive failure or if something goes wrong with your operating system.
In the next part of this article I will cover graphics programs, utilities, and misc. software. The software I listed today are all things that I use and recommend to anyone. If you think I missed something or would like to add your recommendations, please feel free to post them.
Changing icons on Windows Vista
Giving your desktop your own style
Wednesday, April 18, 2007 by Frogboy | Discussion: IconPackager Talk
Windows Vista has some awesome looking icons. Microsoft went way out of its way to try to give Windows Vista a truly polished look. They did this by giving most icons a 256x256 icon. Think about how large that really is. Each Windows Vista icon has an image of that resolution.
But as good as they are, what if you want to change them? How do you do it? Windows Vista maintains the ability to change the icons of individual short-cuts and folders though in very inconsistent ways.
The best, easiest, and to my knowledge only way to change Windows Vista icons all at once is with Stardock IconPackager. With it, users can change individual icons or change all their icons at once by applying a "package" of icons to their Windows Vista system. IconPackager even supports the new "live" folder previews.
Individual Icon Changing
IconPackager adds a context menu called "change icon" for most types of files that looks like this:
 Changing individual icons with IconPackager installed |
Once IconPackager is installed, this functionality is natively added to Windows Vista. It's totally seamless.
 Any icon that doesn't have a 256x256 image gets a smaller version that doesn't look as good as it could |
One issue on Windows Vista is how icons are displayed. Most icons are 32x32 pixels in size. Some programs have a higher resolution 48x48 version. But on Windows Vista, unless there's a 256x256 version, the lower resolution version is displayed in it native size which can look strange (especially on your desktop).
Users of Windows Vista will no doubt soon notice that as they install programs that add short-cuts to their desktops that many of those icons look smaller and strange compared to the default icons on the desktop.
IconPackager supports changing program icons as well. To do it (once you have IconPackager installed) right-click on the icon you want to change and choose properties.

Program icons can be changed with IconPackager installed as well.
Packages of Icons
The entire set of Windows icons can be changed in a single click by using an icon package. There are thousands out there. Most do not yet support the 256x256 resolution of native Vista icons yet (Stardock is working on a way to up-convert on the fly if there's a sufficiently high resolution version available). But all the icon packages that come with IconPackager include full Windows Vista support.
 The IconPackager application |
Changing your icons is a pretty straight forward process -- choose the icon package you want, load it, and hit apply. Within a few seconds, nearly all your icons will be changed.
More Screenshots
   |
Getting IconPackager
IconPackager is a free download. You can get it at www.iconzone.com (or https://www.stardock.com/products/iconpackager).
New Vista Icons
Windows Vista Changes How Icon Customization Works
Tuesday, April 17, 2007 by Zoomba | Discussion: Icons
![]() Windows Vista has a lot of little visual tweaks and changes versus it's older sibling, Windows XP. Where XP's icons are simple and straight-forward in their design and presentation, Vista's icons require more design work, and have a bit of technical flash to make them fit in with the rest of the improved visuals of the recently-released operating system.
Windows Vista has a lot of little visual tweaks and changes versus it's older sibling, Windows XP. Where XP's icons are simple and straight-forward in their design and presentation, Vista's icons require more design work, and have a bit of technical flash to make them fit in with the rest of the improved visuals of the recently-released operating system.
In Windows XP, icons are typically a maximum of 128x128 pixels, with most people viewing them at 32x32 size on their desktop. If you wanted to change the size of your icons, you had to dig through preference windows and dialogs to try and manually set the sizing. Sure, there were a few preset views (large icons, small icons) but those didn't give you a great deal of choice when tweaking your display. There's also no dynamic scaling. So you can't easily/quickly test icon sizes on your screen to see how they look. Add to this the fact that many applications don't necessarily have high-quality larger icons defined in their .ico file (this is especially typical of shareware type software, or older apps from the Win9x/2k days) so if you run with higher icon sizes, some icons look gritty, pixelated and down-right ugly. Woe to the person who has a very large monitor or poor eyesight.
Of course, there's a certain benefit to how icons work in XP, you have a few preset sizes you have to worry about, anything else is something strange only a handful of users would every try anyway. So as an icon artist, your life is just a little bit easier. 16x16, 32x32, 64x64 and 128x128 are all you need to hit 99% of what users will try/see.
![]() Now there's Windows Vista. Vista not only takes icons up to 256x256, it does dynamic icon scaling, adds dozens of new system icons for icon package artists to design for when creating new themes, and adds a completely new type of icon; the Live Icon. These changes present a completely new set of challenges to artists trying to make complete system icon packs, or for ones looking to update their XP pack for Vista. First, lets look at the dynamic scaling. While there are still a few presets for users to click through, there's also a convenient slider in the view menu that will, in real-time, alter the sizing of any icons on your screen.
Now there's Windows Vista. Vista not only takes icons up to 256x256, it does dynamic icon scaling, adds dozens of new system icons for icon package artists to design for when creating new themes, and adds a completely new type of icon; the Live Icon. These changes present a completely new set of challenges to artists trying to make complete system icon packs, or for ones looking to update their XP pack for Vista. First, lets look at the dynamic scaling. While there are still a few presets for users to click through, there's also a convenient slider in the view menu that will, in real-time, alter the sizing of any icons on your screen.
Icon scaling is a nice feature that will make life much easier for those of us with either poor eyesight, or impossibly huge monitors. Vista's icon scaling also is done per-window, instead of across-the-board like in XP. In XP, you set the icon size once, and that was the size across every single window you opened. In Vista, you set icon size independently in every window you open, and even on the desktop. This level of built-in choice is nice for users who only have a few very important icons on their desktop, and for usability purposes want those to be large and easy to spot, while keeping other icons on their system small and neat,
![]() Possibly the coolest icon change in Windows Vista is its support for the display of "Live Icons" when browsing through folders. If your files have an appropriate thumbnail handler, you'll be able to see a richer preview of the file in question as opposed to just a static icon set by type.
Possibly the coolest icon change in Windows Vista is its support for the display of "Live Icons" when browsing through folders. If your files have an appropriate thumbnail handler, you'll be able to see a richer preview of the file in question as opposed to just a static icon set by type.
This support is also present when viewing subfolders in an Explorer window. For instance, if you have a subfolder filled with images, the Live Icon support will attempt to show the first couple as part of the folder icon to give you an idea of the folder contents.
On top of scaling icons and live icons, Windows Vista throws a lot of new items into the mix that you now have to build new icons for. Artists who tried to theme out even the Control Panel icons for XP will find that not only have many of those Control Panel items changed, but there are also more than a handful of completely new ones to make icons for now. Windows XP has roughly 30 Control Panel icons on a default install. Windows Vista Ultimate? 53.
With this brave new icon world stretching off into the distance, there comes the question of tools for both the artist and the user. Customization junkies that are making the leap to Vista no doubt are looking for the same level of control they enjoyed with Windows XP. For artists, the world of tools is much like it was just a few short months ago. Tools such as Eclipsit's Microangelo Toolset 6, Stardock's IconDeveloper, and IconWorkshop from Axialis still exist and work just fine for creating all the new icons needed for Windows Vista.
![]() On the user end, it's a little more difficult to find software that lets you switch out your icons for something newer and cooler looking. By default in Vista, users technically have the ability to change every icon they use by selecting them individually, digging through their properties and changing them one by one. A step up from that comes with tools like Microangelo Librarian which let you change them out with simpler to follow menus. However, if you want to completely switch out your icons and replace them with completely new Windows Vista icons, your only option on the market is Stardock IconPackager, which added full support for Windows Vista and Live Folders in version 3.2. IconPackager lets artists bundle their icon sets into one easy to use file, and users can substitute in that entire set, replacing all of their main Vista icons with just a few simple clicks.
On the user end, it's a little more difficult to find software that lets you switch out your icons for something newer and cooler looking. By default in Vista, users technically have the ability to change every icon they use by selecting them individually, digging through their properties and changing them one by one. A step up from that comes with tools like Microangelo Librarian which let you change them out with simpler to follow menus. However, if you want to completely switch out your icons and replace them with completely new Windows Vista icons, your only option on the market is Stardock IconPackager, which added full support for Windows Vista and Live Folders in version 3.2. IconPackager lets artists bundle their icon sets into one easy to use file, and users can substitute in that entire set, replacing all of their main Vista icons with just a few simple clicks.
Live Icons, real-time scaling of icons on the desktop, and numerous altogether new icons make Windows Vista a new and interesting challenge for both artists and users. Just another example of some of the cool new opportunities presented by Vista.
Note:
If you're interested in seeing how the Live Folder Icons go together, we have a set of template images for you to take a look at when building your own icons for Windows Vista. Grab the example files here.
WindowBlinds: Manage Your Desktop Wallpaper
Walkthrough of WindowBlinds Wallpaper Features
Monday, April 16, 2007 by Island Dog | Discussion: WindowBlinds
I recently wrote about the ability of WindowBlinds to
change the
color of your visual styles, so this week I wanted to touch on another cool
feature of WindowBlinds which is the built-in wallpaper changer. If you
are like me, then you probably have a large gallery of wallpapers on your hard
drive. Organizing them isn't always easy, and finding them and adding them
to your desktop can be just as tedious.

Fortunately, WindowBlinds has some features that can help you with managing your wallpaper collection. In this article I am using WindowBlinds 5.5 to demonstrate these features. In your WindowBlinds configuration window select "Change my wallpaper" from the menu on the left side.
You can simply browse through the thumbnails, and when you want to apply a wallpaper, just double-click the preview and your wallpaper will be applied to the desktop.
There are two options near the bottom right on the configuration window just
above the thumbnail previews. The first one will change the wallpaper
between the larger preview and a gallery view. The second image (tools
icon) is the wallpaper settings option. From that screen you can
add/remove folders that include wallpapers, and select/deselect those folders
from viewing as well. Simply click "add folder" and browse to the folder
that contains your wallpaper collections and they will be added for viewing in
WindowBlinds. You can also set the wallpaper options such as tiled, centered,
stretch, or smart mode from there.
Now that your wallpaper collections are set up, click "Changer" to configure your wallpapers to change based on certain settings. You can set WindowBlinds to change your wallpaper on Monday mornings, every morning, at every logon, or every hour. These are optional settings and you can set it to never change your wallpaper with those settings. You can also set these to only use the wallpapers of your choice, or apply it to them all if you like.
Now a quick note for people who don't want WindowBlinds to apply wallpaper that is included with a theme they are using. In the WindowBlinds configuration select "Override default settings", and make sure the setting "Apply the wallpaper included with a skin" is unchecked.
I made a short video to go along with this tutorial. It shows how easy it is to manage your desktop wallpapers and goes through the features described in this guide.
Creating 'Shell Animations' for SkinStudio Part 1
Creating AVI animations in Flash tutorial Part 1
Saturday, April 14, 2007 by Life is a Game | Discussion: WindowBlinds Tutorials
I used Flash to create the animations because I’m quite skillful with it as I’ve been using it since the Flash 5 release 6 years ago and it’s really easy to draw and animate graphics. OK, enough talking let’s get started. You can download the source file used in this tutorial WWW Link here.
--------------------------------------
STEP 1
First create a new document and then click on size option (1) and ‘Document Properties’ window will open where you enter the title (2), set dimensions to width 272 px and height 60px (3), choose the background color of your animation (4). Make sure it matches the color of the background of your dialog windows. Finally set the frame rate (5). I recommend the rate of 10 frames per second.

-------------------------------------
STEP 2
Next we need to create layers where we will create some objects later. In this tutorial we will need 3 layers as Flash animates all the objects in the selected layer. So we have to make sure that the objects that we want to animate and the ones we don’t are not in the same layer. Create layers by clicking on the ‘Insert Layer’ icon (1) and rename them for reference into ‘background’, ‘animation’ and ‘foreground’ (2).

-------------------------------------
STEP 3
Now that we prepared the document and layers we the fun begins. First click on the ‘foreground’ layer to tell Flash that you want to draw and object in this layer (1). Then select the ‘Rectangle Tool’ (2) and the properties window will show the below options (3). Choose the stroke color and thickness and the fill color to suit you. Finally draw an object (4).

-------------------------------------
STEP 4
Now we will ‘skew’ the object downwards to create the feeling of an open folder. Select the ‘Free Transform Tool’ and double-click on the fill of the object to select both fill and stroke. Finally position your mouse cursor on the right-edge of the object and click-hold and pull it downwards a bit and release it (2).

-------------------------------------
STEP 5
We also need to add the back cover of our folder. Click on the ‘background’ layer (1) and repeat the steps with the ‘Rectangle Tool’ (2) and ‘Free Transform Tool’ (3) from the STEP 4 and now your folder should look something like this (4).

-------------------------------------
STEP 6
Next we need to duplicate the folder to the other side of the document. To do that you need to select the folder with the ‘Selection Tool’ (1) and draw a rectangle around the folder to select both front and back cover (2). Finally press and hold ALT and then click and drag the folder to the other side of the document and release the left mouse button followed by the release of the ALT key. I recommend to hold SHIFT while dragging to make sure both folders are aligned.

-------------------------------------
STEP 7
Now we will ‘mirror’ the duplicated folder. If you have deselected the duplicated folder repeat selection method from the STEP 6. With the folder selected open the ‘Transform’ panel (1) and make sure that the ‘Constrain’ option is switched off. Finally add a - in front of 100.0% (3) and press ‘Enter’ to apply changes and Flash will mirror your folder (4).

-------------------------------------
STEP 8
If you are happy with your folders lock the ‘background’ and ‘foreground’ layers to make sure you don’t move them by mistake while working in the ‘animation’ layer. You can lock layers by clicking on the black dot in the ‘lock’ column (1) and (2). Dots will turn into small locks when clicked to show that the layer is locked for editing.

-------------------------------------
STEP 9
Now we need to create an object that we will animate moving from the left to the right folder. Click on the ‘animation’ layer (1) and create an object with ‘Rectangle Tool’ (2) method that we used in the STEP 3. You can either create more objects in it or as in this tutorial add some text (4) with the ‘Text Tool’ (3).

-------------------------------------
STEP 10
Now we need to insert the amount of the frames we want to create for our animation. I recommend 35 frames for your animation. Before inserting more frames move your object with the ‘Selection Tool’ inside of the folder (2). To insert frames click the 35th frame of each layer (3) and press the ‘F5’ key to insert frames (4).

-------------------------------------
STEP 11
Now we will convert our object into ‘Motion Tween’. Right-click anywhere in the timeline of the ‘animation’ layer (1) and select the ‘Create Motion Tween’ option from the drop-down menu (2). Finally select the last frame of the ‘animation’ layer and press the ‘F6’ key to insert a keyframe.

-------------------------------------
STEP 12
Next we need to determine the final position of the animated object. To do that click the last frame of the ‘animation’ layer and move the object with the ‘Selection Tool’ (2) to the desired location (3).

-------------------------------------
STEP 13
And now the moment we’ve all been waiting for… Press CTRL+ENTER to ‘Test Movie’.

-------------------------------------
STEP 14
If you are happy with your animation you should export it to AVI to use in SkinStudio. Go to File>Export>Export Movie. In the ‘Export Movie’ window type in the ‘File name’ (1) and choose the ‘Windows AVI’ from the file type menu (2) and press ‘Enter’ key.

In the next window you will see the settings for exporting to AVI. Make sure that the ‘Width’ and ‘Height’ are 272 and 60 (1) and that ‘Maintain aspect ratio’ is on (2). For video format I recommend 16 bit color (3) with both ‘Compress video’ and ‘Smooth’ options turned on. Finally choose ‘Disable’ sound format (4) as our animation doesn’t contain any audio and click ‘OK’.

In last Export window you will be able to adjust the compression options. You can test a bit different codecs and compression options but I recommend to use the ‘Full Frames’ compressor for best results (1).

There you go we have created an AVI animation for the SkinStudio in Flash. We used only basic animation options in this tutorial. Flash comes with lots more effects which I will cover in my next tutorial. The exported animation created in this tutorial looks like this. Please note that the actual exported AVI is better quality then the below exported GIF.

This Week in Skinning - April 13th
Skin Roundup for 4-13-07
Friday, April 13, 2007 by Island Dog | Discussion: Community
We are just about halfway done with this month, and it's been pretty good so
far. The holiday seemed to have slowed things down a bit, but submissions
are rolling in and it's shaping up to be another great week.
I'm seeing
some activity in the ObjectBar section again, and it's always good to see some
new submissions in a category that is sometimes lacking.
Let's get to the picks!
Splash Orange for Bootskins
by
Life is a Game
Splash Orange is definitely different than your standard XP bootskin, and that's a good thing. Sometimes it needs a little color, and Life is a Game has accomplished this and has a few different versions with different colors, so check out his gallery for more.
Circles in Dreams
by
Hyszz
This Dream has received a lot of attention in the past couple of days with good reason. It might seem like a simple idea, but it looks really good on the desktop. This is one animated wallpaper you need to check out.
Old Ironsides in Wallpapers
by
kenwas
Another beautiful creation. This wallpaper speaks for itself so it's best for you to download it and try it for yourself. Great work.
Black in WindowBlinds
by
tehZERO
This is a fantastic WindowBlinds skin that is clean, and has a great use of transparency. This is one you need to download.
Neutronium DM in WindowBlinds
by
I.R. Brainiac
This is another skin that speaks for itself. It's hard to describe, but I'm pretty sure you won't be disappointed with this one.
Don't forget to e-mail with your suggestions and picks for featured skins. Your comments and suggestions are always appreciated. Also remember to keep the community updated with our "What are you working on?" thread in the forums. Great job to everyone and see you next week!