


WC Community Question: What's Your Favorite Skin or Theme?
Friday, December 11, 2020 by Island Dog | Discussion: OS Customization
Happy December! The holiday season is here, and we've been talking about holiday skins for the past couple of months. Now that many of us have our holiday desktops in order, let's find out what the favorite holiday skins of our community are!
What's my favorite? There are many wonderful holiday WindowBlinds skin out there, but I always appreciate the design of Christmas Holidays by adni18.

Post a link or image of your favorite holiday skin or theme in the comments below and lets share our favorites!
Remember IconX? Let's check it out!
I wanted to see if it still worked on Windows 10.
Thursday, December 10, 2020 by Tatiora | Discussion: Stardock Blog
Sometimes, my blog writing has me diving back through years of Stardock’s history from the development and evolution of WindowBlinds, to the evolution of the Drengin in Galactic Civilizations III, and even all the way to a history of desktop icons. This time, I’m taking a look at one of our old products, one that was here long before me: IconX.

A screenshot of IconX on Windows XP, pulled from the program's original website.
First, let’s talk a little bit about what IconX is.
IconX is a program that enhances your Windows desktop icons by giving them shadows, making them any size you like, and more. With IconX, you could make it so that your icons would zoom-up on mouseover, re-label your icons, and make your icons smoother and more attractive thanks to the addition of anti-aliasing.
Other options included the ability to alter the font, size, and color of icon labels. You could also trigger sounds and special effects on mouse over, click, and double-click events.
Once I had an idea of what IconX was and what its history was, I had one big question: would this program, which was originally released in 2004 for Windows XP, still work on Windows 10?
The answer: Yes! Sort of.
I had some trouble getting it to load properly on my PC, so I enlisted the aid of our resident expert, Matt. With some finagling - he actually had to change the properties of the download to initiate the compatibility mode and set it to XP - he managed to get it to run.

Although all of the features aren't in tact and there are some bugs, the program does run on Windows 10. You can see on the left side of the image above how it has adjusted the icons slightly, but it did kill the background image on the desktop and would occasionally make the taskbar blink.

Above, you can kind of see here the kinds of options and customizations that were available in the original program. Some of the icons still worked(ish) and hovering over them would change the color/size.

Installing this older program onto a modern PC came with quite a few side-effects, like messing up the right click menu by making it the wrong size and just straight up making some icons go missing. But, in IconX's heyday it had all sorts of perfectly compatible options for changing your icons, like sliders for adjusting brightness and contrast. You could also be very specific with your shadows, adjusting things like sharpness, darkness, height, and angle.

Although IconX isn't fully compatible with Windows 10, we have a much more current program that works wonderfully: IconPackager. You can replace all of the default Windows icons at one time using custom icon packages that come with the app or that you download from WinCustomize. If you’re into making your own icons, you can also have some fun with IconDeveloper.
Since IconX and IconPackager technically serve different purposes, in theory they could work side-by-side to offer you even more customization for your icons. Not only could you change all the default Icons with IconPackager, but you could then adjust shadows, font size, and interactions with IconX.
Did you use IconX back in the XP days? Is it something you'd want to see updated for Windows 10 someday? Share with me!
Berlin startup company, Wonder, raises $11 million for new video conferencing program
Wonder offers a unique approach to online meetings by allowing people to wander and join "groups"
Wednesday, December 9, 2020 by Tatiora | Discussion: Personal Computing

An image taken from Wonder's website showing off their new app
There is no substitute for organic mingling and in-person interaction. Planned calls on Zoom or Teams isn't the same as mingling with your friends or coworkers at a social event, no matter which way you slice it, but Wonder, a Berlin startup, has built a platform for people to come together in video-based groups.
How is this any different from Zoom, Teams, or the multitude of other video chat options there are out there now? This new program replaces the traditional video conference with something a little more unique. With it, users can meet up, network, and collaborate, all while maintaining a "bird's eye" view of a larger space where they can more intentionally interact with others, somewhat similar to an office or business venue.
While other conference apps dominate the market right now as many of us turn to remote work, Wonder's new program fills a gap that is sorely lacking in the other apps' overall experiences. Particularly, it addresses what's missing from being in physical spaces with other people.
Wonder is built around the idea of a "shared space" that you enter. You get a single window where you can "see" from an aerial view all of the other people whoa re in the same space and in areas of that space where they might cluster together. The clusters can be designed around a specific interest relevant to the people gathering (for example, if it's a company, you can have separate clusters for marketing and for HR). If the product is being used at a career fair, each "cluster" can represent a different organization participating in recruiting and interviewing.
Users can move around all of the clusters - or start their own - or sit in the margins with another person. When you come together to interact, you can join in a video chat. You can move your icon around the room by clicking and dragging, which will let you join into groups that are already chatting or having discussions. If you need to have a private meeting, you can make your cluster private, as if you were in a physical meeting room. The overall intended effect is that, without actually being in a physical space, you get this sense of a collective group of people in motion.
Wonder announced on Monday that it has raised $11 million for this endeavor in a substantial seed round. The funding was led by European VC EQT Ventures, with BlueYard Capital also participating. Wonder has seen some impressive traction this year with over 200,000 monthly users from a diverse set of organizations, including Deloitte, NASA, Harvard, and others. The organizations are using Wonder's program for a variety of purposes anywhere from team collaboration to career fairs.
According to co-founder Stephane Roux, Wonder will use their funding to add in more user-requested features and to hire more people for its team. Some of the features they are planning to implement includes sharing files and other technical services. Wonder is currently free to use, and will be until sometime in 2021.
What do you think of this? Does it sound like something you'd prefer to use either at work or to mingle and communicate with larger groups of friends who don't live nearby? As someone who personally has lots of friends who live all over, I'll admit that I'm rather intrigued.
Share your thoughts with me!
Get Your Desktop Ready for Christmas!
Tuesday, December 8, 2020 by Island Dog | Discussion: WinCustomize News
![]() Just a few weeks left until Christmas and the holiday season, but still plenty of time to get your Windows desktop all decorated! Christmas is the top holiday for skinning, so we have quite a large variety of WindowBlinds skin, DeskScapes animated wallpaper, CursorFX cursor themes, wallpapers and much more available to change nearly every aspect of your PC desktop.
Just a few weeks left until Christmas and the holiday season, but still plenty of time to get your Windows desktop all decorated! Christmas is the top holiday for skinning, so we have quite a large variety of WindowBlinds skin, DeskScapes animated wallpaper, CursorFX cursor themes, wallpapers and much more available to change nearly every aspect of your PC desktop.
Once you get your PC all ready, head over to our December screenshot thread and show us how you decorated your desktop!
Here are some recommended holiday themes!
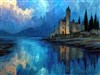
Christmas Joy by LightStar (WindowBlinds)

Xmas Holiday by don5318 (WindowBlinds)

Here Comes Santa by joyton (DeskScapes animated wallpaper)

Christmas Elf by Libardo (CursorFX)

ChristmasTime by mormegil (IconPackager)

Tangled Christmas Lights by WC_Bot (Wallpaper)

Christmas Lights by Island Dog (Desktop Gadget)

Fun with Fences: Using Fences on Multiple Monitors
Thursday, December 3, 2020 by Tatiora | Discussion: Stardock Blog
A recent surge in coronavirus cases here in Michigan sees me once again working from home. Fortunately, the work I do at Stardock is pretty easily taken remote, but that doesn’t mean that certain tools don’t make that transition easier. I am, of course, talking about Fences.
In a previous blog, I gave a rundown of a bunch of the really cool customization options that Fences has to offer - but I couldn’t cover everything. I wanted to share a little bit about how I separate my workspace from my playspace while it’s all contained on the same machine, while at the same time sharing a few other Fences customization tidbits.
I would like you to know, also, that this shuffling of icons and creation of Fences was a relatively recent idea. The last work from home stint I was on, I pretty much lived in chaos: icons everywhere, mingled, mixed, and not at all matched. I’ve decided to start with a clean slate and try something new this time around. Let’s have a look!
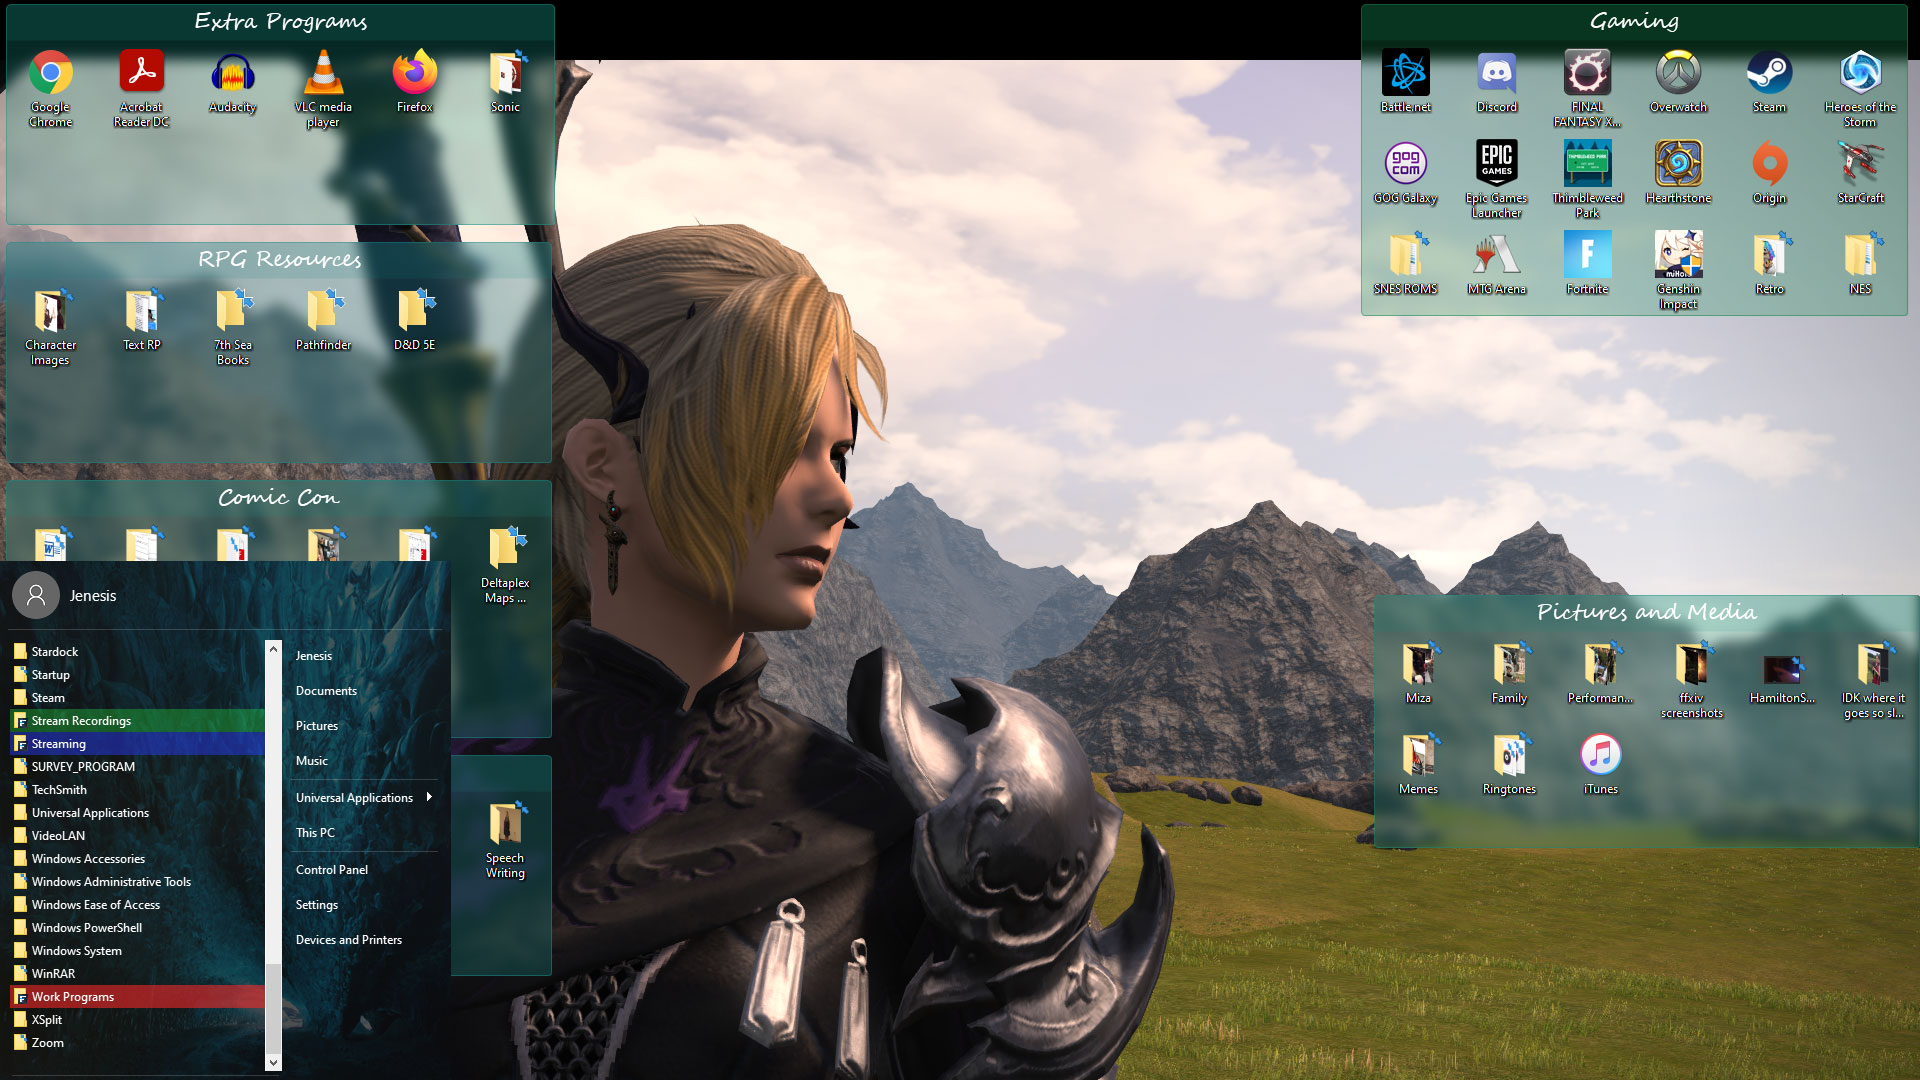
The “Play” Monitor
This is my primary monitor. I’ve chosen to keep all of my personal stuff in fences here, making it easy for me to find while also keeping it separate from work stuff (which I’ll show you shortly). Also, don’t judge me on my gaming choices - I tried Fortnite as a favor to a friend (what I’ll never admit is how much fun I had with it, don’t @ me!).

My desktop background reflects my “play” aspect - it’s a screenshot from Final Fantasy XIV, a game I spend too much a lot of time on. I chose to keep all the Fences uniform in color and separate all of my stuff into fairly straightforward and easy-to-navigate categories.
It took me a little bit of time to clean up all of the icons I had just sitting on my desktop and organize them into this, but honestly I think it was time well spent. I also went into my Fences “sorting and organizing” options and directed where certain file types will go: for example, I adjusted it so that any saved images I have will go straight to my Pictures and Media Fence, where I can easily find it and place it where I want it to go from there.
I may fiddle with it more later, but right now I’m happy with where it’s at.
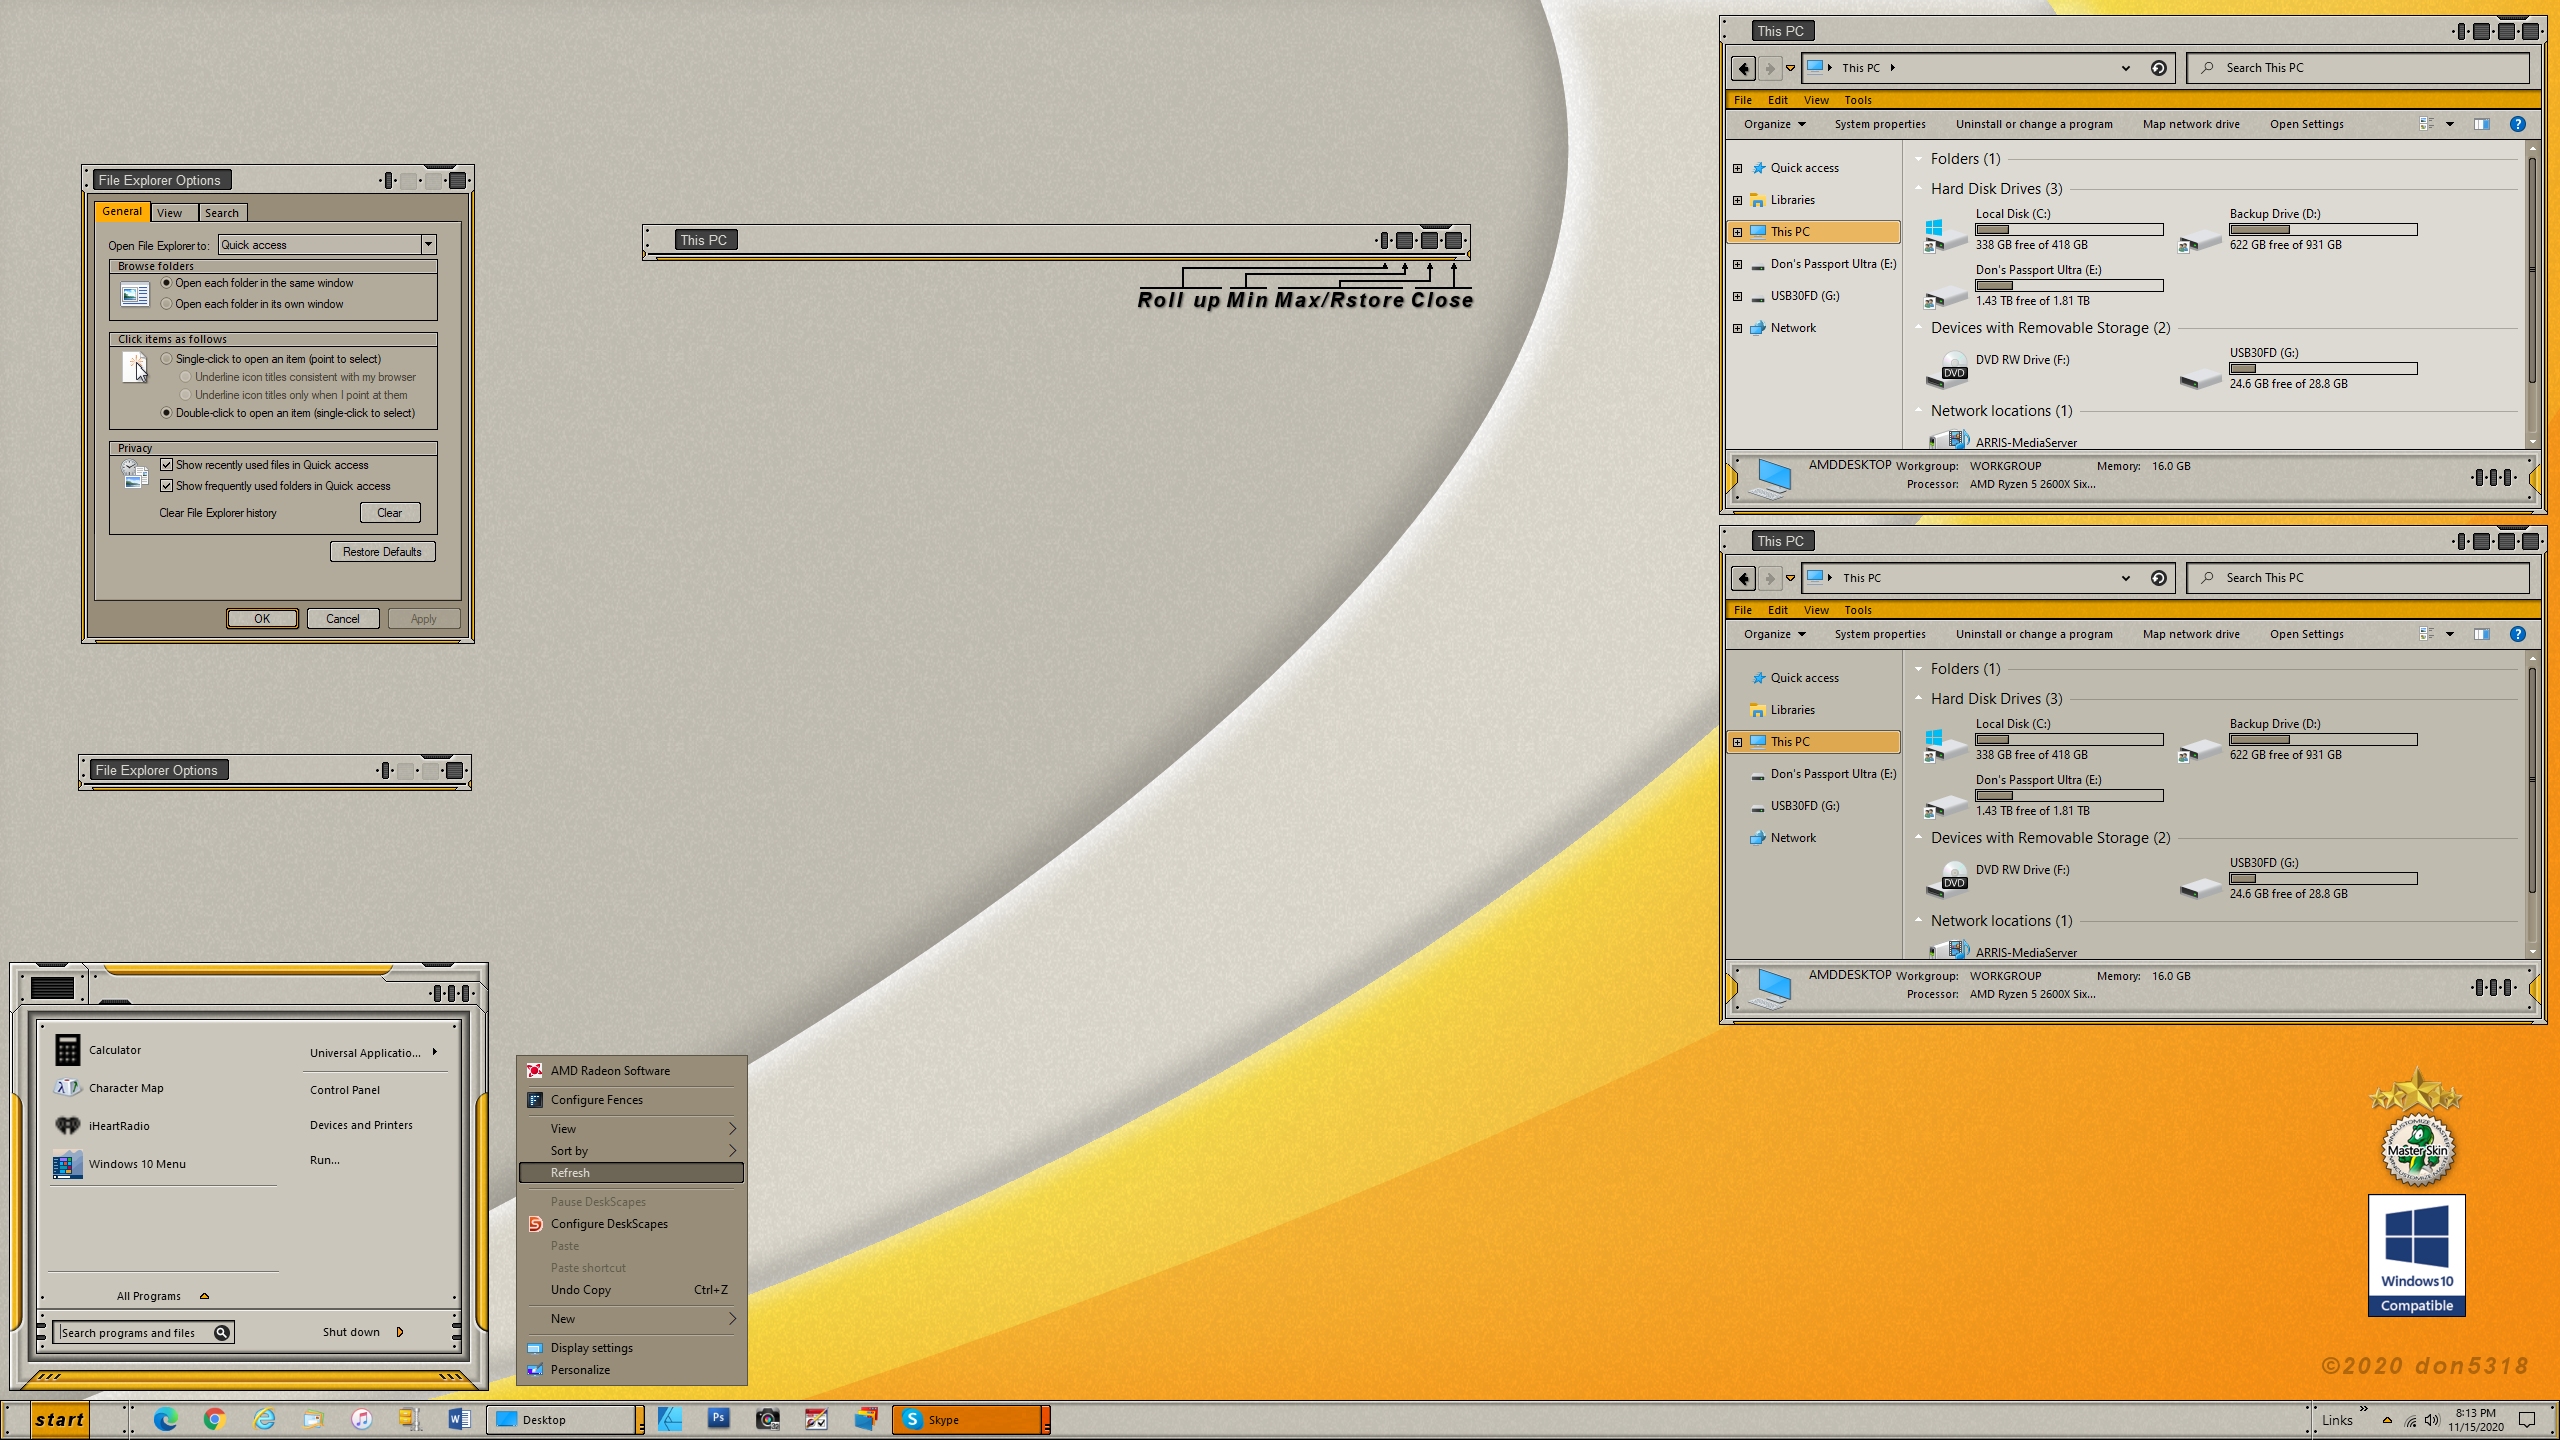
The “Work” Monitor
For the most part, I just need a word processor to perform the primary part of my job function. That said, when I write, I have to write about something - and usually that means making sure I have certain software installed so that I can explore them, much like I am now.

We also wear many hats here at Stardock, which means that there are certain other functions I perform that require other programs like, for example, XSplit. There are also some folders that I access frequently via our VPN, so I created Folder Portals for them on my desktop so I don’t have to constantly go digging through Explorer for them. You can see that I have them rolled up here to conserve space.
On another note: did you know that all your fences don’t have to be uniform? I decided to have a little bit of fun with my work monitor and choose a colorful background with enough black that would make the different colors I’ve chosen for my fences really pop.
I love this separation of work and play because it lets me find things easily and helps me to segment my work from my leisure time (since I spend a lot of leisure time at my PC to begin with anyway).
Side by Side
You can see that the two monitors are extremely contrasted. I did that on purpose as a bit of a mental trick that would help me further separate the two and their varied functions. I’m not really sure that it actually works that way, but since I’ve convinced myself that it does, that should be good enough, right?

Oh, I should also mention: the reason I’m able to apply two different backgrounds to two different monitors is all thanks to DeskScapes. I’m not using anything animated right now, but one of my favorite features of DeskScapes is being able to use animated backgrounds on my PC, so definitely check that out if you haven’t!
A Fun Discovery
I’ve written a lot about our software, especially lately, but that doesn’t mean that I don’t discover something new from time to time.
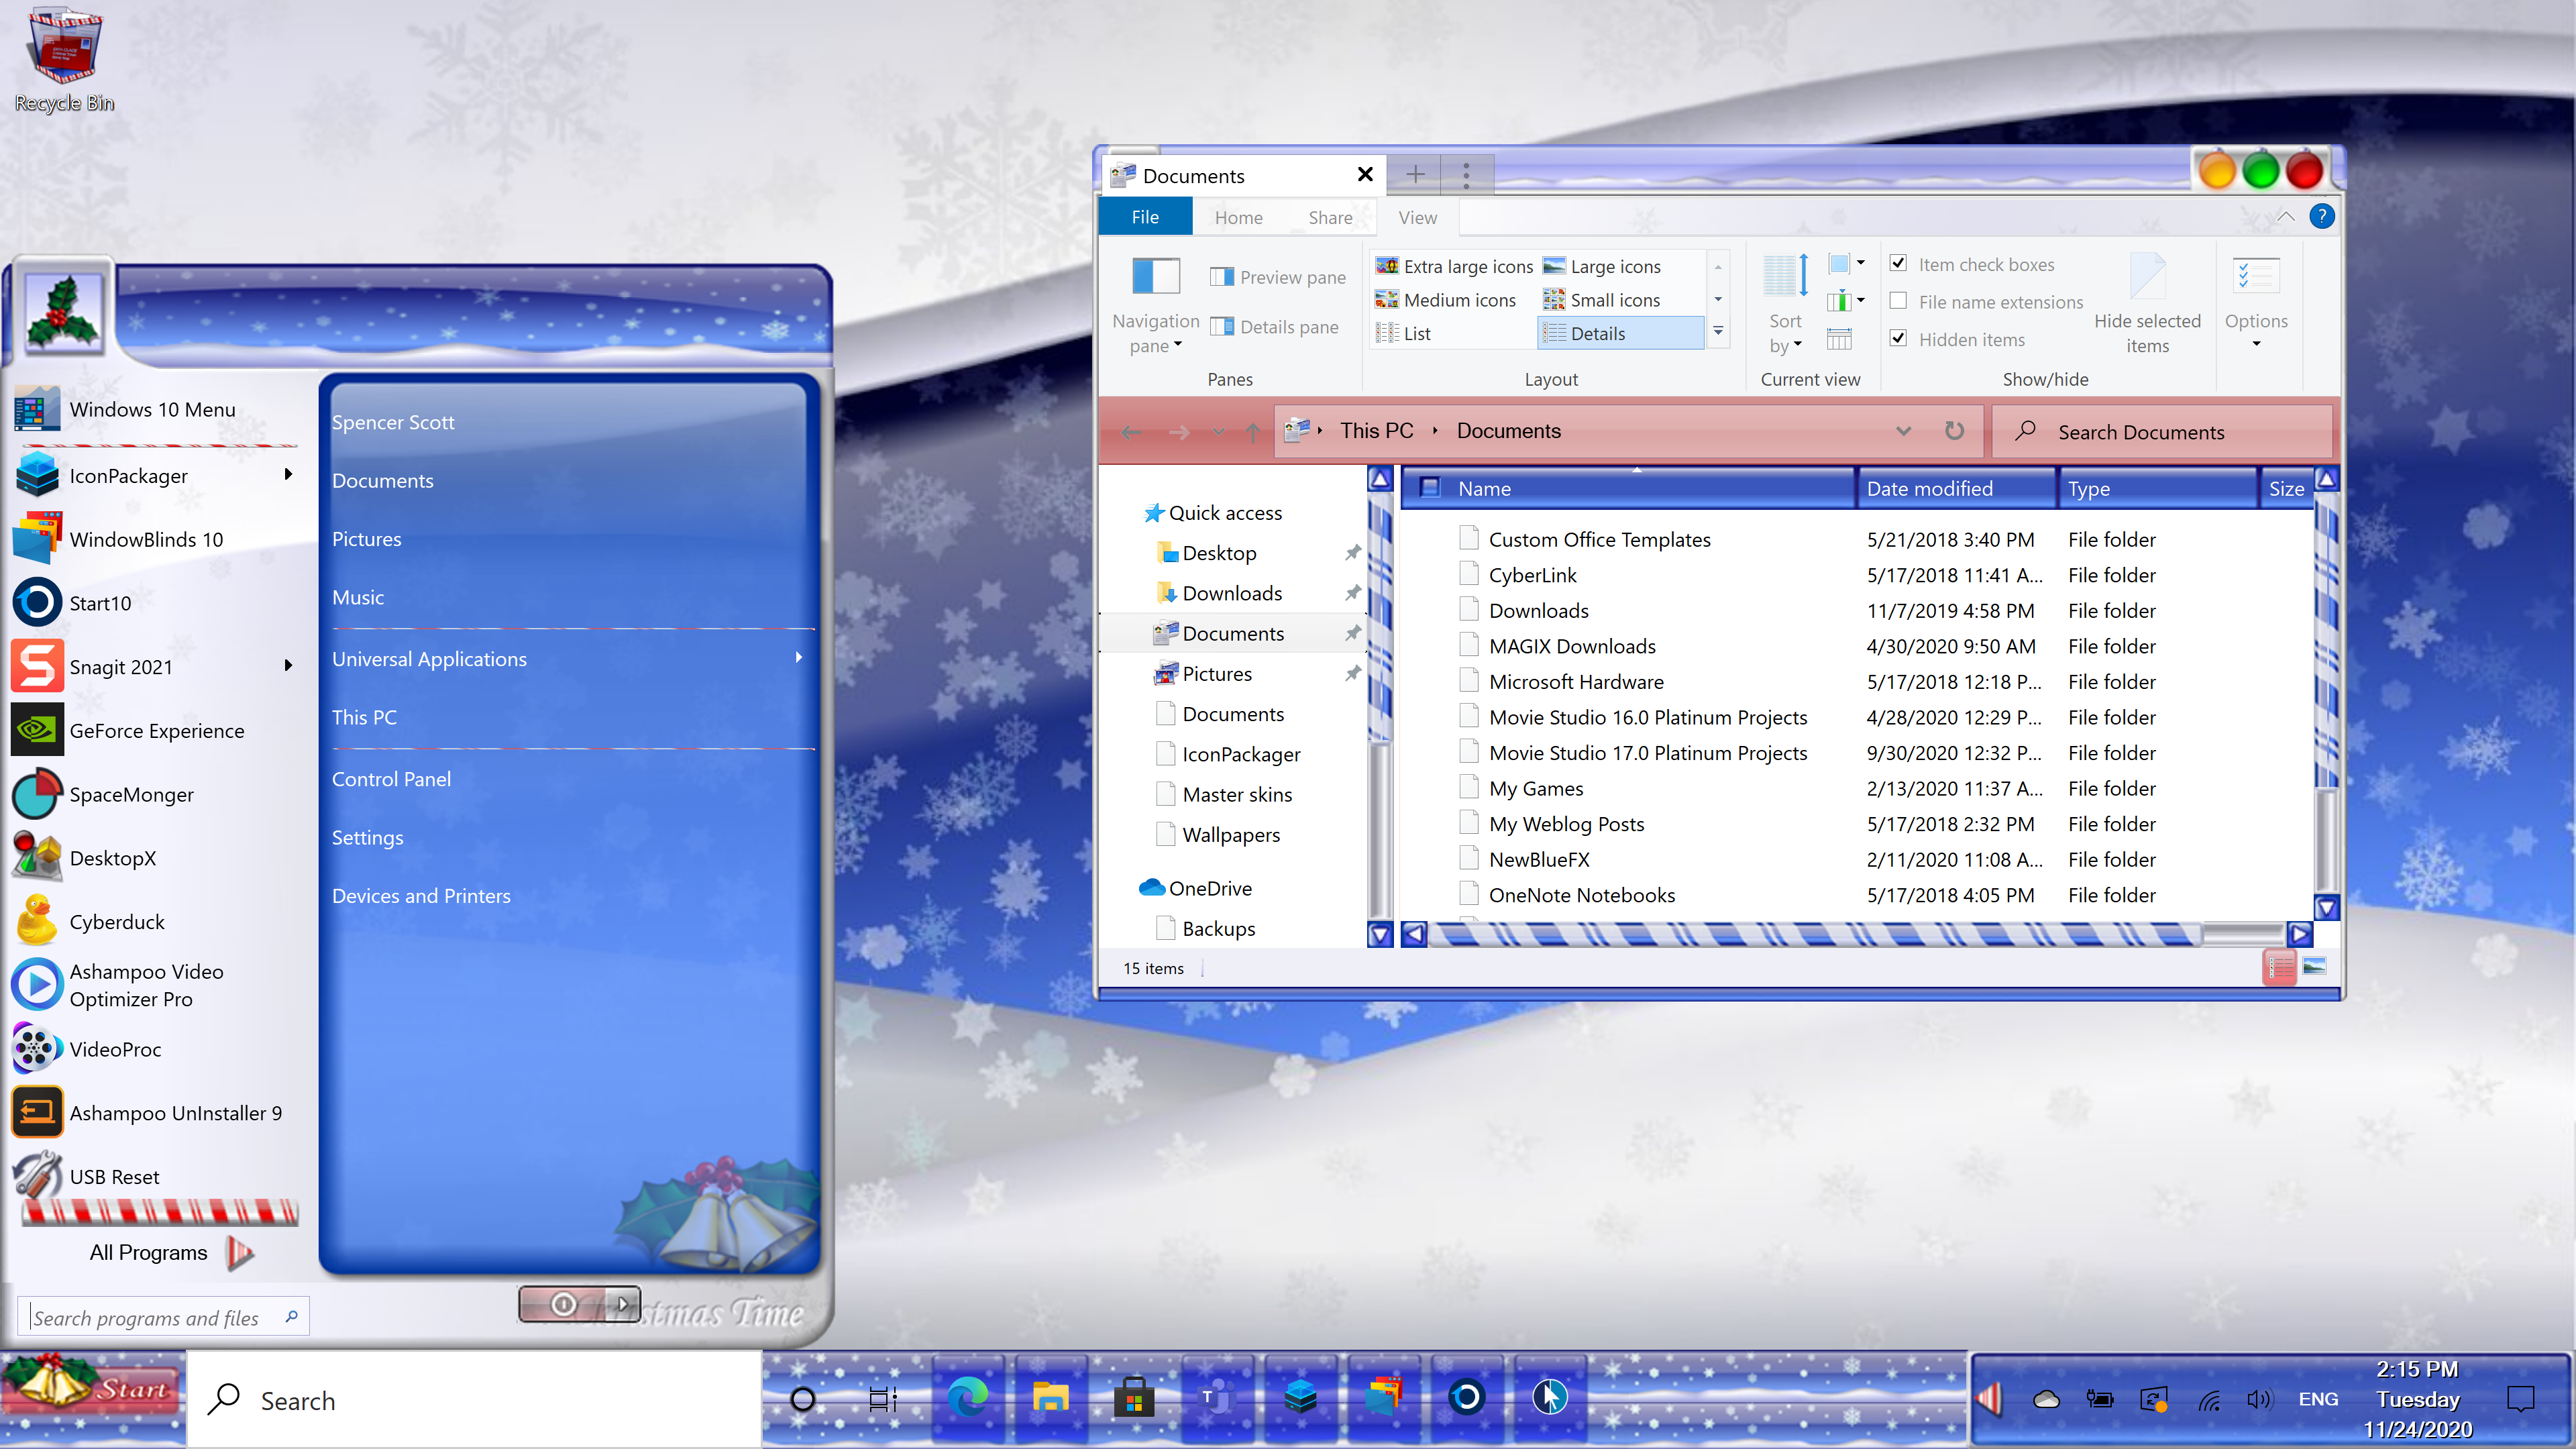
I knew, for example, that Start10 perfectly integrates with Fences. What I didn’t realize, though, was that the Fences labels in the Start menu would actually match the colors that I’ve selected for the individual fences! Cool, right?
This is how I’ve made Fences work for me on multiple monitors, especially as I work from home. Do you use Fences more at work or at home, or equally at both? Share with me!
WinCustomize Monthly Wrap-up - November Edition
Tuesday, December 1, 2020 by Island Dog | Discussion: WinCustomize News
![]() Can you believe it's December already? I'm excited as the weather is getting cooler here and we're officially in Christmas season! But before we get ahead of ourselves, let's look back at the highlights of November.
Can you believe it's December already? I'm excited as the weather is getting cooler here and we're officially in Christmas season! But before we get ahead of ourselves, let's look back at the highlights of November.
Here's a wrap-up of some new, articles, forum posts, and skins you might have missed!
Community Posts You Might Have Missed:
Getting an Early Start on a Christmas Themed Desktop!
Inexplicable Monolith Discovered in Utah's Red Rock Country
For Workflow Efficiency, Look no Further than Groupy
Fences: Making Desktop Customization Work for YOU
Revisiting a Christmas Skinning Classic....ChristmasTime

New and Updated Skins, Themes, and Wallpapers:
Snowman in Winter Ice (Wallpaper)
Revisiting a Christmas Skinning Classic....ChristmasTime
Friday, November 27, 2020 by Island Dog | Discussion: OS Customization
I was searching through WinCustomize looking at some Christmas skins and I came across what I think is one of the most classic skins of Christmas. That of course would be ChristmasTime by mormegil!
The WindowBlinds skin was first released way back in 2003 for the Stardock 2003 Christmas Suite. At that time, WindowBlinds 4 was the latest version and it was later updated to support WindowBlinds 5 which brought support for per-pixel alpha blending, toolbar button changing, progress animation improvements, animated per-pixel Start menus, title bars, and much more.
I used this skin for many holidays years after it was released and is one of my top five favorites of all time. It was hugely popular back then and was the base for many desktops around that time. In addition to the WindowBlinds skin, Paul (mormegil) came out with a lite and full icon pack that was just as amazing. As of today, the WB skin alone has over 400,000 downloads!
Download here:

Members of the community (with permission) also created some matching themes.
Since we're revisiting this skin, I installed the skins on my Windows 10 PC to see how they work many years after they were released. So how do they look? Well not too bad for such old skins.
For the WB skin the most obvious issue is the taskbar, but that is to be expected with all the changes since Windows XP. Icons applied simply fine and worked. The CursorFX theme also worked with no issues that I noticed. Even though there are some minor issues, this still brings back great skinning memories and I think I'll keep it around for a while.
Do you remember the Christmas Time suite? Let us know in the comments below!
Fences: Making Desktop Customization Work for YOU
Thursday, November 26, 2020 by Tatiora | Discussion: Stardock Blog
We make a lot of software here at Stardock, and while all of it is wonderful and useful in their own ways, there are just a couple of programs that I consider my “ride or dies” for my PC experience. Fences is absolutely at the top of that list (followed very closely by Groupy).
The basic functionality of organizing my icons, folders, and programs into fenced in areas on my PC desktop is great enough on its own, but the more I explored Fences I began to realize that there was quite a lot more that I could do with it, especially aesthetically. With all of the customization options available in the program, you really can make your desktop look exactly how you like it.
Let’s take a look at some of the cool stuff you can do!
Color Customization
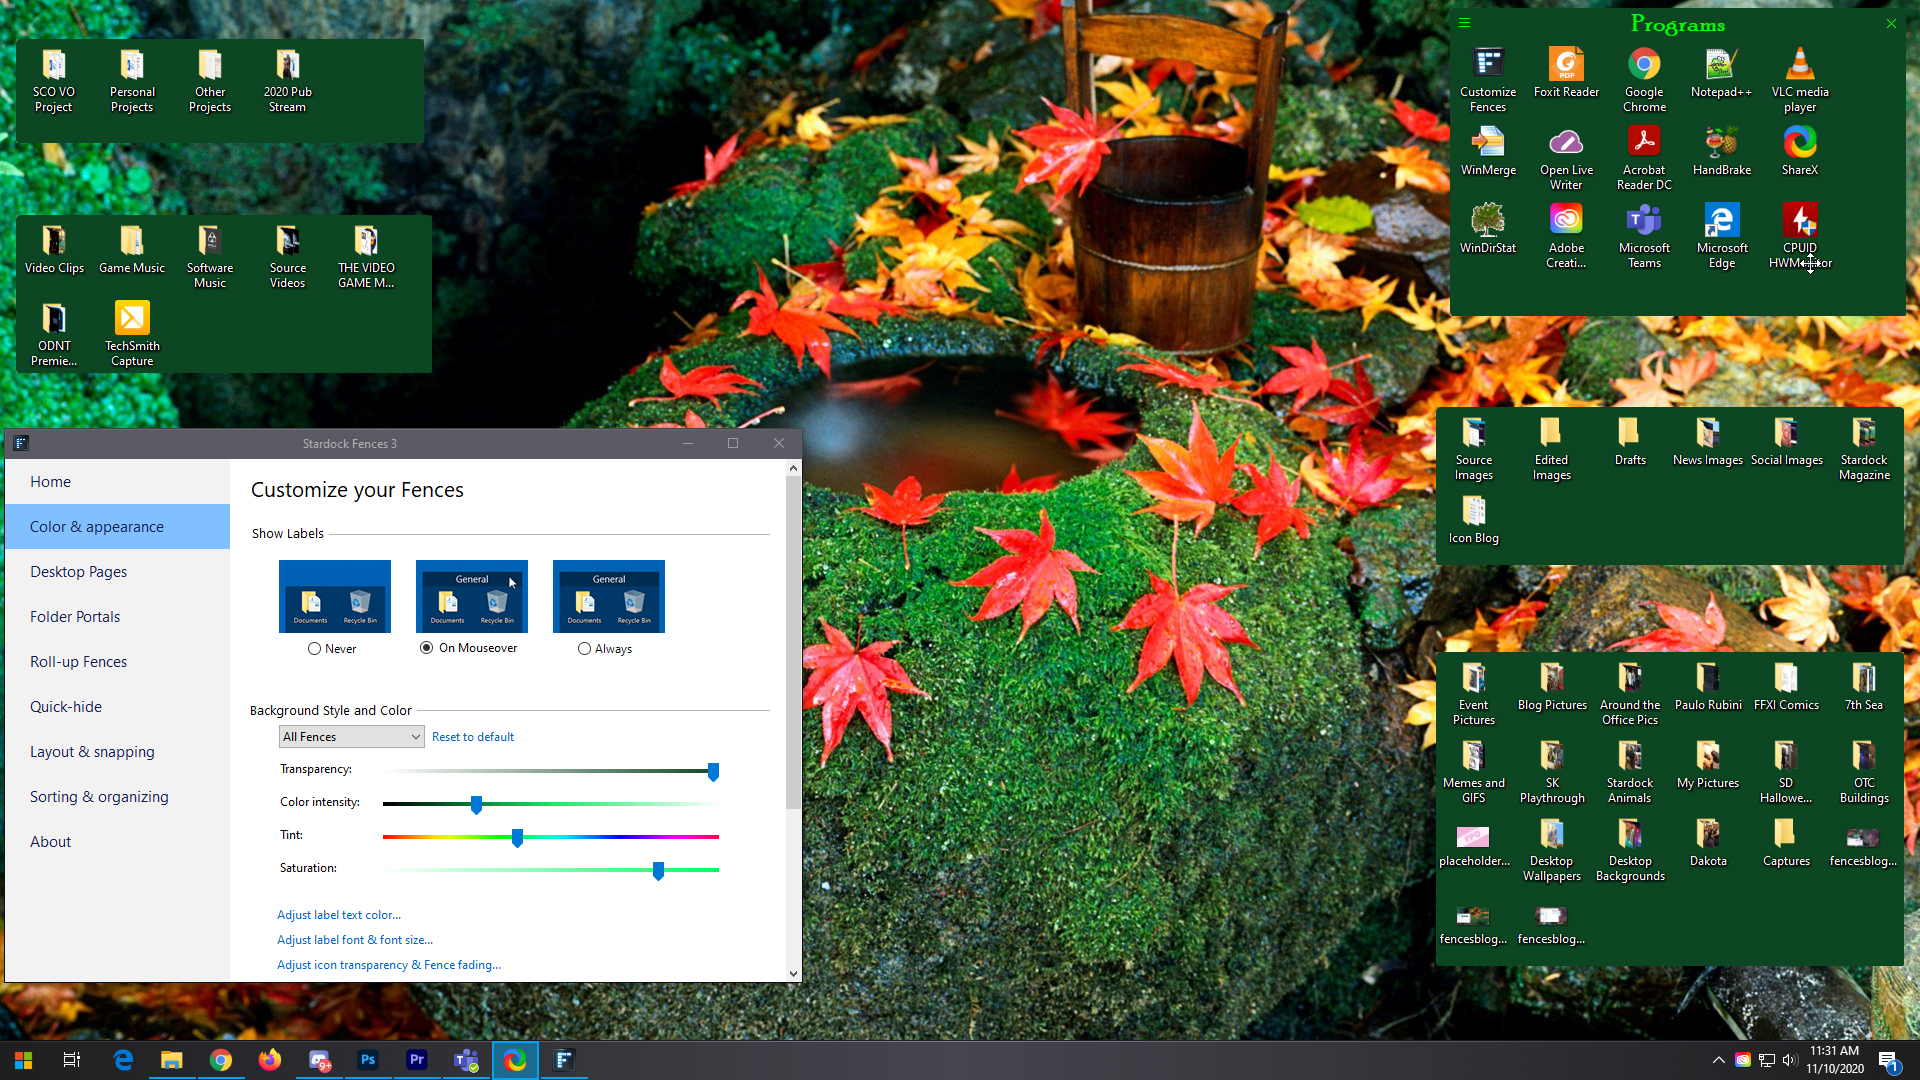
This one is fairly straightforward, but is probably one of my most favorite options: colors. I can adjust the color of my Fences (both as a group or individually!) to complement the background that I’m using on my Desktop.

There are a lot of options available here. You can adjust the transparency, color intensity, tint, and saturation of your fences using the sliding scale, choosing to either apply the options uniformly across all of your fences, or individually to a select few. You can color code your fenced areas if that’s something that helps for organization - or if you just want a myriad rainbow of color on your desktop, that’s valid too!
You can achieve drastically different effects by choosing varying levels of saturation and transparency. Below, I have an image that shows a more solid fence without the transparent effect, plus you can also see that I have an option enabled that hides labels unless I mouse over them.
You can also adjust the font colors of your fences labels, which leads me into the next set of options you have…
Label Text and Size
You can customize the labels to your fences in lots of different ways besides just what you name them. The color and size of your fonts can change, as well as the font itself. Many of the options you’d find in any Word processor are available in the Fences option menu. Several of them allow for variations like bolding and italicizing if you feel like it.
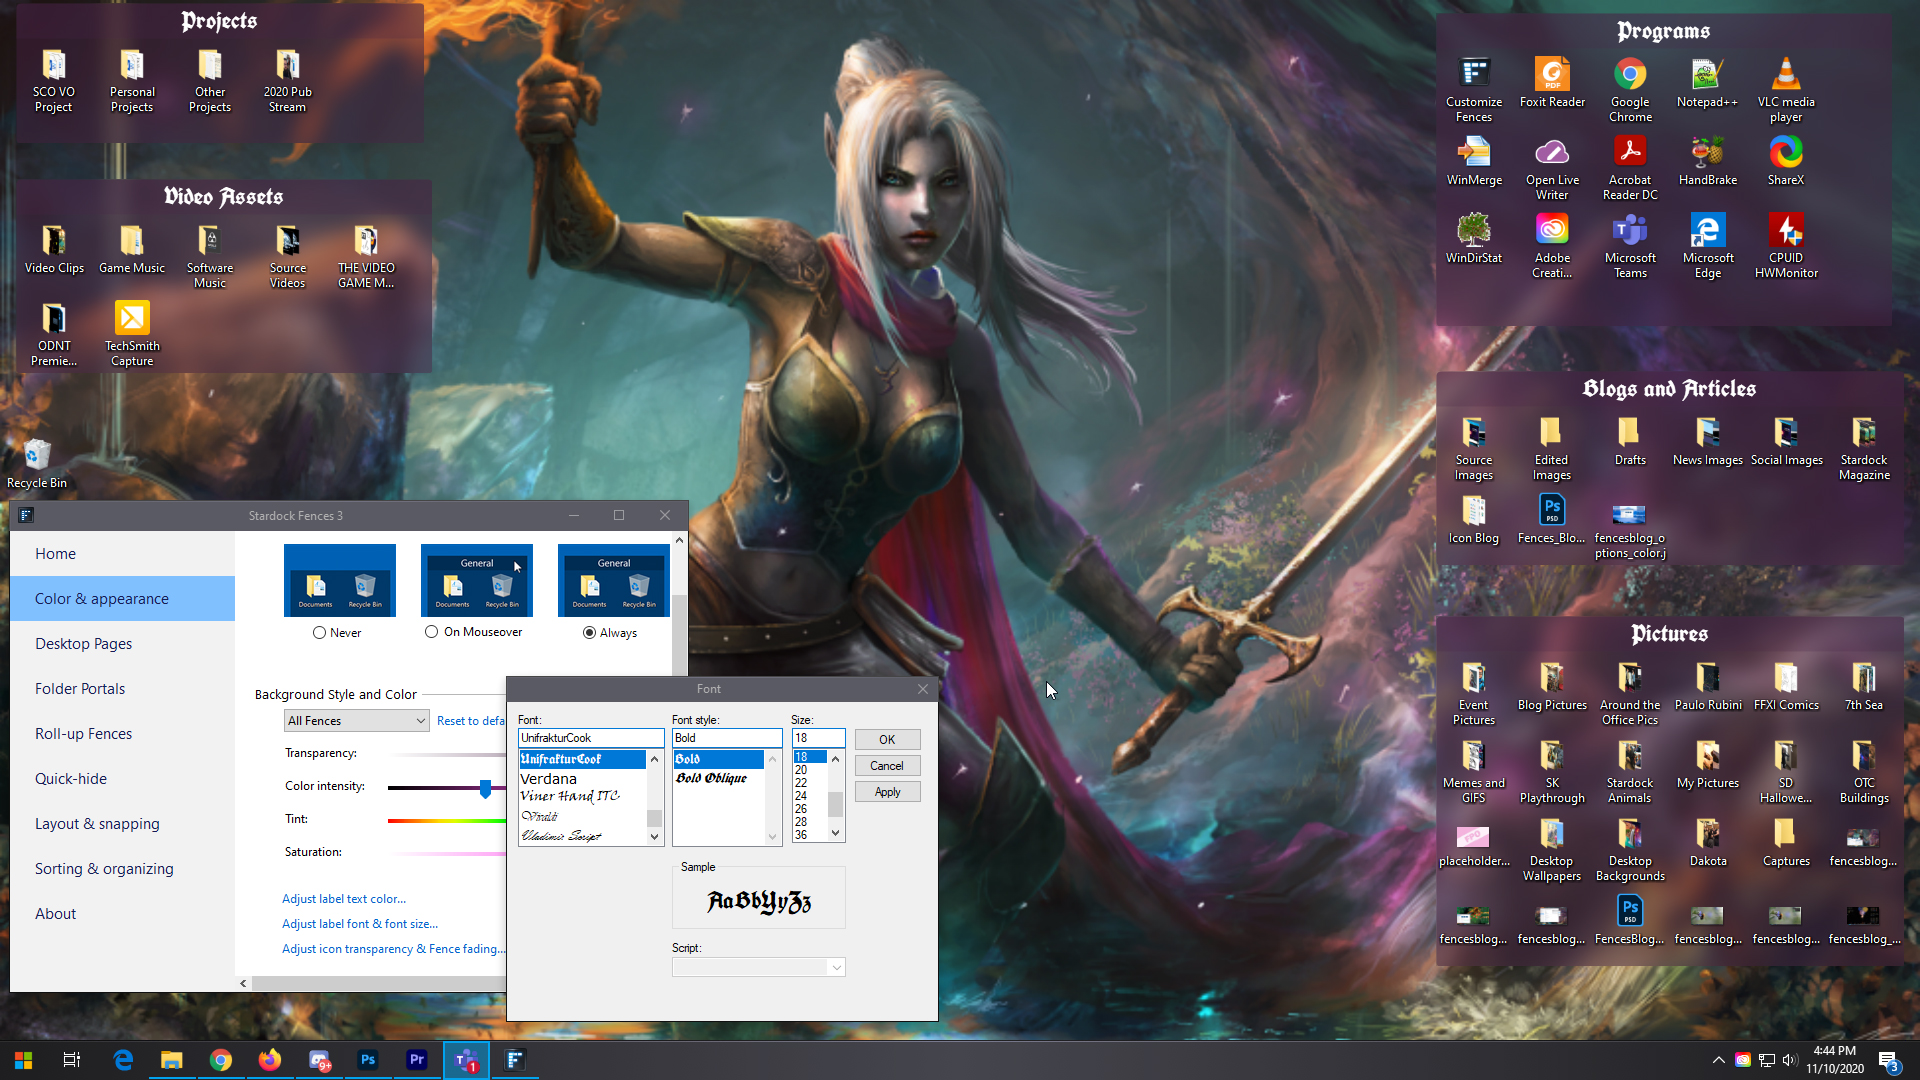
I like to adjust my colors and fonts to match whatever I choose for my background. I’m a pretty big Dungeons and Dragons nerd, so I think the medieval script font goes nicely with this image of one of my first ever original characters, Tatiora, that my friend Leo drew for me a couple years ago.
You can also change the font color if you want, though I find that usually keeping it simple with white allows me to read the labels more easily. I also keep my fonts sized somewhere in the middle (in this case, I believe I selected size 16), but you can go bigger or smaller if that suits your needs better.
Speaking of needs, let’s say you prefer a little less noise on your desktop and like to hide away excess things. You can do that!
Visibility
I personally like seeing my Fences and my labels - it makes it easier for me to find what I’m looking for. But, if you’re not into that, there’s ways you can work around it while still keeping your icons and programs grouped together so you can access them quickly.

By taking the transparency all the way down to 0, you can make it so that your fences don’t show up at all, but your icon groupings remain within their fenced areas. You can leave labels on, set them so that they only show when you mouse over them, or even turn the labels off altogether.
Let’s say you don’t like your icons showing, either - you’re all about a clean desktop! You have a couple options for that. You can either double-click on your desktop to hide everything (don’t panic if you do this by accident - not that I would know from experience or anything - another double-click will return them all), or you can change the preferences in your individual fences to make the icons transparent.

As you can see in the image above, I’ve lightened the visibility on some of the fences to make them hard to see. To do this, you go to the title bar of one of your fences, click on the options icon on the left, and go to view > opacity. You can make a fence completely invisible until you mouse over it, if that’s what works for you.
I’d also like to mention the option for rolling up fences. If you want to keep your desktop uncluttered but still see where you’ve put everything, you can double-click on a Fences title bar to hide the rest of the fence so that just the bar is visible.

As you can see, there's a lot you can do to keep your desktop neat and orderly with Fences! There's just one more thing I want to touch on that goes beyond just aesthetic customization, and that's...
Organization and Sorting
In a previous blog, I talked a little bit about Folder Portals and what makes them so helpful, so I’m going to focus on another indispensable aspect of organization: the sorting option.

There are a ton of options here for editing rules on how icon placement and auto-organizing will work. You can choose to make rules for everything from folders to program shortcuts that will determine what fence they sort into when they’re added to your computer.
For example, I have my images set to go directly into my Pictures fence whenever I save an image file to my desktop. It makes it easier for me to find them and then make sure they get into the correct folder that I want. I also do the same for program shortcuts. For general downloads, I actually just make a Folder Portal on my desktop so that I can easily access anything that I download.
You can be really broad with these rules, or get extremely particular. I play pretty loose and wild with my desktop to begin with (in fact, before I set up rules for where images sort to, my desktop was getting really crowded) so I don’t fuss over it too much personally, but you definitely can!
Fences is one of those programs that I don’t think I can ever stop using. It has made my desktop organizing so much easier and it makes my desktop look better overall.
Don’t have Fences yet? No problem, just download it here. Or, if you want to go full throttle with desktop enhancement, customization, and optimization, just get a low-cost membership to Object Desktop and get access to a bunch of our top-rated software all at once.
If you’re already a Fences user, I want to see it in action on your desktops. Share some screenshots with me!
WC Community Question: Roasted, Fried, or Smoked Turkey?
Thursday, November 26, 2020 by Island Dog | Discussion: Life, the Universe and Everything
Happy Thanksgiving! If you partake in Thanksgiving what's your favorite way to cook the turkey?
Roasted, fried, smoked?
Let us know your cooking plans and have a safe and wonderful day!

Happy Thanksgiving Week, WinCustomize!
Monday, November 23, 2020 by Island Dog | Discussion: WinCustomize News
 For many of us, Thanksgiving is this week, so we wanted to send out a Happy Thanksgiving to all of you and a big thanks to our community. No holiday needed, just wanted to say we appreciate you! Although it's a weird time in the world, we do hope you have a nice holiday. Let us know if you have any holiday plans, or if you just have a nice weekend lined up.
Let us know in the comments below!
