Premium Themes Gives Your Desktop a Custom Look and Feel
Wednesday, February 5, 2014 by Island Dog | Discussion: OS Customization
There are a lot of Object Desktop users out there, and while there are some great resources available for skins and themes like WinCustomize.com, but some people just want a custom theme pack that can give them a new desktop look. We have a bunch of premium themes designed and built by the top skin artists available, and they include a premium WindowBlinds skin, icon package, wallpapers, and useful desktop gadget. When you purchase a premium theme, you will receive a .zip file that contains all related files you will need.
As mentioned, you will need Object Desktop or at least the major components like WindowBlinds and IconPackager which is needed to apply skins and icon packs. The description of each theme will let you know exactly what you need, and these premium themes are designed for Windows 7/Vista/XP.
While you can browse through all the great premium themes at the link above, I wanted to highlight a few of my favorites that I think you will also like.
Pirate Theme
This is one of my favorites. I mean who doesn’t like pirates, right? This theme includes a pirate-themed visual style complete with a pirate flag, matching wallpapers and pirate icons which will give your boring desktop a completely new look.
Spring Theme
As the name implies, this theme is all about the Spring season with vibrant colors that is sure to get your out of the Winter rut and ready for a warmer season. This theme includes a WindowBlinds skin, icon pack, custom wallpaper, and a desktop gadget.
Dragon Theme
This has been one of the more popular premium themes over the years. One of the reasons could be the awesome animated start menu with a fire-breathing dragon on top! Like the others, this theme comes with all the components you need to makeover your desktop with the likeness of a mythical creature.
3 Tips for Using Stardock's Start8
Wednesday, January 22, 2014 by Island Dog | Discussion: Personal Computing
Start8 from Stardock has made computing life much easier for users of Windows 8 since it was first released. Start8 brings back the start menu to Windows 8 along with other functionality that gives users a more familiar and enjoyable user experience.
Start8 is very easy to use, but I always like to write about tips that maybe some people might not know about, but should.
Start8 Works with WindowBlinds
WindowBlinds is another application from Stardock that most will probably be familiar with. It gives users the ability to apply one of thousands of skins available that change the look and feel of your Windows desktop. The topic of Start8 and WindowBlinds working together has come up several times recently, so I wanted to detail how they work well together.
A WindowBlinds skin will typically include a skinned start menu and start button to match the overall skin. Using both of these apps you can have a completely skinned and customized desktop with a full start menu on Windows 8. You can also choose in the WB settings to either use the start button provided with the WindowBlinds skin, or use the buttons in Start8. Either way, you have control over the look.
Use a Custom Start Button
As I mentioned above, Start8 has the ability to use custom start buttons. There are several already included, and there are many available to download from the Start8 gallery on WinCustomize.com. In the Start8 configuration, under Style, just click the ‘Custom Image’ box and you can select your custom image to use.
Creating your own start button is super simple. We even have a free tool available to easily create them. Download it here.
Use Advanced Tweaks in Start8
This is probably something a little less known, but Start8 also has an Advanced Tweaks setting which gives you some additional features. Some of these include enabling/disabling for different users, showing hidden items in the Programs list, limited the scope of search results, and more.
You can access these by opening Start8Tweak.exe which is in your Start8 application directory.
Get a Holiday Desktop with Stardock Apps and WinCustomize Skins
Tuesday, December 3, 2013 by Island Dog | Discussion: OS Customization
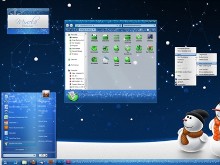
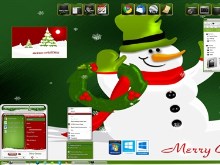
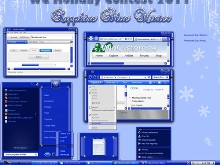
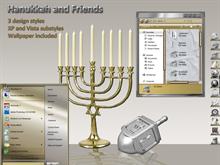
The holiday season is here! Whether you celebrate Christmas or Hanukkah, or just like to give your desktop a winter inspired look, I wanted to give some tips on how to achieve a festive look. There are thousands and thousands of skins and themes available here on WinCustomize, and the holiday season is one that has a lot of skins available. Whether you want just a festive wallpaper, or a complete theme for your desktop, we have it covered.
Holiday WindowBlinds Skins
If you want a complete change to the way Windows looks, then look no further than WindowBlinds. There are lots of holiday themes available and they also serve as a great base for other customization tools.
TIP: New to WindowBlinds? Here's an informative walkthrough.
Here are some recommended holiday-inspired skins:
ObjectDock Backgrounds and Icons
ObjectDock is one of the best desktop tools to organize your frequently used app shortcuts, site urls, and more. It’s also customizable by changing the background and adding custom icons to the dock.
TIP: Learn how to change the ObjectDock Background theme here.
Cool holiday themes for ObjectDock:
Animated Holiday Wallpapers with DeskScapes
DeskScapes gives users the ability to have animated wallpapers on their desktop. There is something really cool and fun with having an animated holiday display right on your Windows desktop. On WinCustomize there are animated wallpapers of lighted Christmas trees and an animated fireplace that you can use.
TIP: Learn more about using DeskScapes here.
Some animated wallpapers to try out:
Change Your Cursor to a Holiday theme with CursorFX
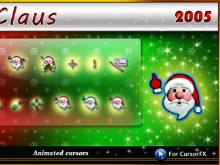
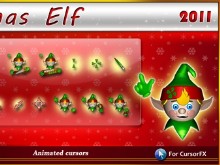
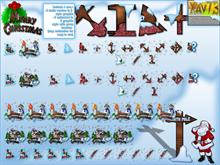
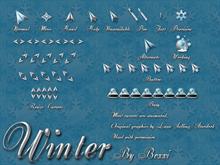
You follow the cursor around on your desktop all day, so why not change it to a custom animated theme? CursorFX lets Windows users change their cursor to one of thousands available. Many of these have some fantastic animations and many are made to match several popular WindowBlinds skins so you can get the complete look you are after.
Holiday CursorFX themes to check out:
The Most Popular WindowBlinds Skin of All Time!
Thursday, November 21, 2013 by Island Dog | Discussion: OS Customization
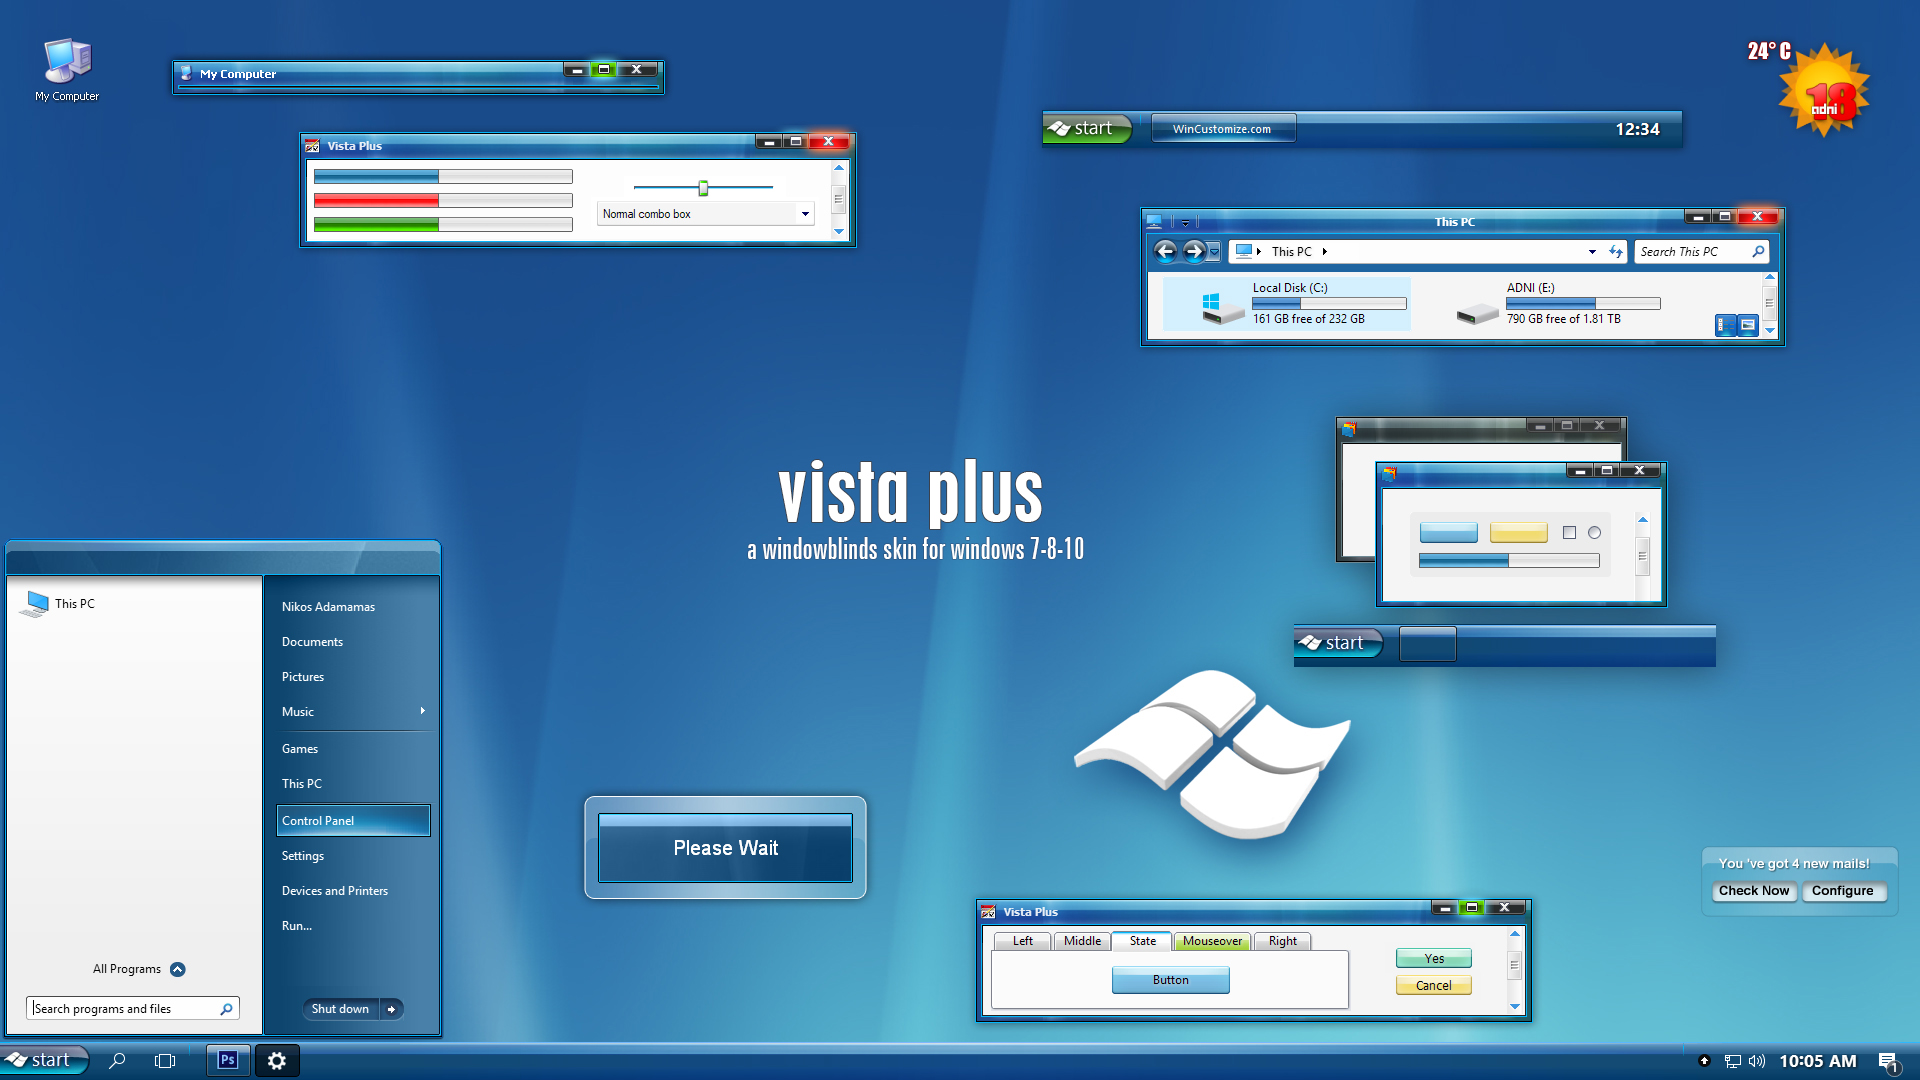
Since we’re spending this month celebrating 15 years of skinning WindowBlinds, I wanted to find out what was the most popular download on WinCustomize.com. From the best I can tell and confirm, Vista Plus Version 3 comes in with over 900,000 downloads since it was released in 2006.
Vista Plus Version 3 by adni18
It’s a little funny a Vista skin has been one of the most downloaded, but as some of you might remember the glassy look was really popular and many skinners created a bunch of skins with that look during that time. This was a skin that was designed to be used on XP to get that look, and as with all of adni18’s skins, he did a remarkable job at creating this style.
WindowBlinds 15 years in pictures
Wednesday, November 13, 2013 by Frogboy | Discussion: OS Customization
WindowBlinds 1.0 was released in November 1998! Since then, it’s gotten over 100 MILLION downloads! Over on CNET’s Download.com version 8 has received over 18 million downloads.
It was the first program to enable users to customize the look and feel of the Windows GUI. 15 years later it is still going strong. Let’s take a look at its evolution in pictures.
Version 1
Changed window frames, menu bars.
Yea, this was the config UI we had..cough..
Version 2
Adds per-window skinning, semi-transparent explorer windows, skin colorizing
Desktop light sourcing
WindowBlinds gets into retail!
WindowBlinds used to send data back to us on what skins people had. We took this out because users were unhappy about their “privacy” (anonymous data being sent). Seems quaint now.
WindowBlinds skins supported adding buttons and other objects into the frames (such as this stock ticker).
Remember AOL? Their client was a huge pain the skin correctly. Also, look at the BeOS skin.
MacOS’s “Aqua” look for its newly launched MacOS X helped make WindowBlinds incredibly popular for Windows users who suddenly recognized how ugly Windows NT/2000 were.
In fact, making Windows look like other, less ugly, OSes was a big deal.
Version 3
Designed with Windows XP in mind, 3.0 was the first version that could skin every part of the Windows GUI. The competition had stiffened as Microsoft had released uxtheme.dll that, once hacked, allowed people to create GUI skins freely. WindowBlinds thus had to provide significant value-add to justify $20.
The quality of the skins had to really go up to compete with the bland but free uxtheme skins.
Third-parties began licensing WindowBlinds for marketing purposes (Nvidia here)
(Nintendo)
(The Microsoft XBox team here – one wonders what the Windows team felt about this at the time)
Sometiems it was just a matter of making Windows XP look a bit nicer than Windows XP defaulted to.
Other times it was about reminding power users just how gimped the Windows XP “Luna” UI made Windows.
Version 4
Version 4 was the point where WindowBlinds “won” the contest versus uxtheme.dll in that it could not only do everything it could do and more but version 4 made use of DirectX draw acceleration to make WindowBlinds substantially faster (i.e. noticeably faster) than using Windows XP without it.
However, this popularity would come at a price – the quality of the average skin submitted became substantially lower. WindowBlinds skins acquired the reputation for being ugly, gaudy, fat.
WindowBlinds 4 added a lot of neat controls for controlling how coloring worked.
Version 5
The era of Aero had arrived. Microsoft was finally taking the aesthetics of Windows seriously and created a new glassy looking UI called Aero. WindowBlinds 5 was designed to support per-pixel alpha blending, toolbar button changing, progress animation improvements, animated per-pixel Start menus, title bars, etc.
Aero all the time
Our own take on Aero
However, the problem Stardock and its community faced was that a “complete” skin was a significant amount of labor. Thus, a lot of the most talented skinners began finding other things to spend their time on. It wasn’t “fun” anymore.
Version 6
WindowBlinds 6 added the ability to apply effects such as Gaussian blurs to skins in real-time. However, the biggest change came in the new configuration because it was becoming clear that the number of high quality new skins was dwindling (while the user base continued to increase). The new config allowed end users to heavily modify their skin library.
That dragon is fully animated and so is the title bar.
The new config allowed users to do all kinds of crazy things to their skins and then save them as a sub-style
The official World of Warcraft skin got a second life with WindowBlinds 6
The Elemental skin for WindowBlinds 6
Version 7
It is with some irony that WindowBlinds 7 was ready in time for Windows 7 (the versions being the same was coincidence). WindowBlinds 7 introduced a new type of skinning format called UIS0 which allowed users to just modify the existing Aero skin. This made WindowBlinds a lot more popular for people who liked Aero but wanted a bit nicer look and feel to it.
A new, simpler and just as powerful config window.
Stardock began contracting professionals to make skins to ensure that there were some good, new, benchmark skins available.
Mac inspired skins remained popular
So with UIS0, you could apply a texture and color to the existing Windows 7 Aero making it look, imo, much nicer.
Version 8
Version 8 was mostly about getting WindowBlinds to work on Windows 8. Microsoft essentially gimped the underlying window theming system they had – they killed Aero! No Aero, no UIS0. They replaced it with the stripped down UI seen in Windows 8 and 8.1.
Once again, a new and improved configuration UI.
BEYOND 8
WindowBlinds 8 is still very new, what but the challenge going forward is coming up with new and interesting ways to skin the Windows GUI that make it attractive for new users! Visit www.windowblinds.net to learn more about WindowBlinds!
Add a quick launch bar to Windows 8 with Stardock’s Launch8
Wednesday, November 6, 2013 by Frogboy | Discussion: OS Customization
Windows 8 comes with the new Start screen which is, especially if you have a tablet, a good way for people to organize their apps. What it doesn’t come with, which is a bit surprising, is a quick launch bar (like iOS and Android have). Launch8 addresses it.
If you have Windows8, definitely give it a try.
Stardock turns 20: The five Stardocks I’ve worked at
Thursday, October 10, 2013 by Frogboy | Discussion: Stardockians
It can be quite a challenge to work at the same place for 20 years. I think that’s doubly true if you’ve never worked anywhere else.
That said, looking back, I haven’t really worked at the same place for 20 years. I’ve actually worked at 5 places, all called Stardock and all very different.
Stardock Primoridal
“This really seems exciting!” –College Student Brad Wardell, 1993
This was back when it was just me. The year was 1993. The closest thing I had to “employees” were friends and family who worked on contract on a specific thing. This Stardock was run out of my dorm room at Western Michigan University (Smith Burnham!).
Stardock OS/2
“Holy cow this is fun! I can format a floppy while downloading on Z-modem and I get paid for it!” –Entrepreneur, Brad Wardell, 1996
This began the day I rented an office in 1995. It was the front office of a tank plant in Canton Michigan. So in the back, they were making tanks and we rented the front office. It was here that we really got our start. The first two people “hired” were Angie Marshall and Pat Ford. They’re both still here!
Galactic Civilizations 2 for OS/2, Object Desktop for OS/2 came out during this time along with a bunch of really high quality OS/2 products. Our days were making cool software and our nights were spent playing Magic the Gathering or Duke Nukem 3D on our company LAN. It was a very fun time while it lasted.
Stardock 2000
“I can make Windows look like a Mac! And our office has air conditioning and the toilets work!” –Brad Wardell, CEO, 2001.
The OS/2 market collapsed abruptly in 1997. I had to lay off nearly everyone I had hired since 1996. It was horrible. I lost some good friends as a result (lesson #1: Don’t hire your friends. Lesson #2: If you disobeyed lesson 1, don’t lay them off!). I put everything I owned up as collateral to secure loans to pay the people we had left so that we could make the transition from OS/2 to Windows.
By 2000, we had made the transition. Barely.
This Stardock wasn’t quite as fun as the old Stardock. But I began making a lot of friends over the INTERNET. This was the age where WindowBlinds, Object Desktop, IconPackager, DesktopX, Control Center, DeskScapes, WindowFX, ObjectDock, ObjectBar, Keyboard LaunchPad, RightClick, Multiplcity, CursorFX, etc. reigned supreme. We kept a finger in the game market by taking a contract to make a Starcraft expansion for Blizzard called “Starcraft: Retribution”.
As time went on, things got better. We were on a roll. We reached a real high point with Galactic Civilizations II for Windows and new software was being released on a regular schedule to glowing reviews and strong sales. were ready to expand in a big BIG way…
Stardock Sucks
“This company is bullshit. I hate it here. I’m printing my resume on that fancy paper as I type this!” – Disgruntled employee, Brad Wardell, 2010
The expansion we made nearly ruined my life and the company. I had no idea how to manage a company with this many people in it and it showed. About the only good thing that came out of this time period was Sins of a Solar Empire and the fun I had working with Brian Clair and the Irconclad team.
I honestly believe that if it weren’t for the friendships I made with people like Blair and Craig Fraser at Ironclad and Chris Taylor and others that I would have rage quitted before making it through all this. It was such a horrible period that even today I cringe when looking back.
So where did it all go bad? One word: IMPULSE.
Impulse was incredibly successful – financially. But it nearly ruined our company culture. So much money going through so few peoples hands had a highly toxic effect. Combine that with an engineer turned CEO whose understanding of non-engineer motivations bordered on non-existent and you have a catastrophe.
Product plans were made based on what would maximize the short-term bonus/compensation/commission of those drawing up said plans. I was too incompetent at business administration to recognize what was being done until it was far too late. While the people actually doing the long hours got only token bonuses, others gamed the system to enrich themselves. It was a bad time and I was oblivious to how political and toxic things were getting.
What I did know was that I hated going to work. I was miserable. Every time I (or others like me here) wanted to set up a project based on making something good we got the uneasy sense from our opponents (though I had no idea they were our opponents at the time) that we were somehow robbing them of bonuses/commissions. Little care was put into what was good for the company long-term.
This is the period that delivered such wonders as MyColors (which nearly ruined Stardock’s desktop enhancement business), Elemental, Demigod, and wastes of time like NBA desktop themes.
But nothing could compare to Impulse. In order to make it successful, you had to bring in sales people, relationship managers, enterprise managers, etc. And if quality suffered and I (or others like me) spoke of the need of quality I got (to quote) “Incentives drive behavior. You need to make my compensation package such that I am incented to care about quality.” As an engineer, such attitudes were horrifying. Technologically, Impulse was amazing. It was far ahead of its curve. The talent pool Stardock had at the time was still amazing. Our problem was cultural.
The launch of War of Magic was the low-point and the moment of truth. That game was a canary in the coal mine. It was a symptom of everything that was rotten at the company at the time. After taking a few days off, I realized that the source of the rot was Impulse or more specifically, the toxic culture that had evolved around it. [I want to emphasize that the Impulse engineering team was excellent and not part of the problem]. Impulse had to go.
By the end of 2011, virtually every person we had hired during the start of this era was gone. It was a new day. A new company. Or more specifically, it was the previous company having undergone a massive Ctrl-Z.
Stardock Renaissance
“I am truly excited about working with such world class-talent,” said Brad Wardell, CEO of Stardock Corp. “I am very proud of what we are accomplishing.” (2013)
I basically took a year off to recuperate. But before I could do that, I needed to build a world class management team who could run the company in my absence. I was now very aware of my managerial strengths and short-comings. From this, we got an amazing new leadership team here who in turn brought on board other talented people that has resulted in a renaissance.
Within a year of the new team being brought on, the games unit quadrupled its revenue and the software team more than tripled their’s. At the same time, a host of new programs were conceived and executed on – all in 1 year!
To put things in perspective, in the Stardock Sucks era (mid 2006 to early 2011), the company only released 1 truly new desktop enhancement (Fences) on the software side and the studio produced ONE game: Elemental: War of Magic, which sucked. Think about that. FIVE YEARS and the game studio only eeked out one new game and it was a mess while the software side only got one truly new desktop enhancement out.
By contrast, in the past year or so the software unit has conceived and/or developed: Start8, ModernMix, Decor8, Tiles, a new Multiplicity, Fences 2, ObjectDock 2 and has 2 more all-new programs scheduled for release this year. Simultaneously, the game studio made Fallen Enchantress, Fallen Enchantress –Legendary Heroes, Sins of a Solar Empire: Rebellion (coded in partnership with Ironclad) and Dead Man’s Draw. And every single one of these titles is excellent.
And not only is the management team focused on quality and long-term viability, they’ve created compensation packages that award everyone fairly and put into place morale lifting programs like on-sight personal trainers, on-sight chefs/nutritionists, health screening days, an extra week per year of vacation (so yea, the team gets more done while working fewer hours and gets paid better).
I’d be hard pressed to even name anyone who has voluntarily left the company during this period (other than maternity leave). If you work in the technology industry you can probably attest that this is a significant achievement on its own.
It’s good to be having a good time again at this new company!
…
So there you have it. The 5 Stardocks I’ve worked at!
Windows 8 Stardock Apps for Under $5!
Wednesday, October 9, 2013 by Island Dog | Discussion: Personal Computing
Many of you are already using Windows 8, and the Windows 8.1 update is just released. Stardock has several apps that have solved some of the reported problems in Windows 8.
Below is an overview of some of the most popular Windows 8 apps, all under $5!
Start8
The start menu in Windows 8 was removed, and in the 8.1 update, Microsoft brought the start button back. Unfortunately, their start button DOES NOT bring the Start Menu with it, it launches the Windows 8 Menu. Start8 returns the missing Windows 8 start menu and brings additional features like customization, pinning of desktop and Metro apps, unified search, and more.
Start8 was listed in the "PCWorld Top 100 BEST" list, covered by USA Today, Forbes, CBS News, the Wall Street Journal and more!
ModernMix
There are some cool and useful Modern UI apps available for Windows 8. The problem is, these apps take up the entire screen when opened, which is annoying when running an app like the weather app. ModernMix takes those apps using the Modern UI (Metro) and puts them in desktop windows so you can easily re-size, switch back and forth through running applications, and easily close out of them.
Decor8
Windows 8 limits your start screen customization options to only a few provided background images and a few pre-defined color schemes. Decor8 removes these limitations and provides the freedom to personalize your start screen with your own images and colors.
Use Acoustic Bridge to Send Audio from One PC to Another
Wednesday, September 18, 2013 by Island Dog | Discussion: Personal Computing
Nowadays it’s pretty common to have multiple PCs on your desktop or in your household. With that being said, I wanted to talk about Acoustic Bridge from Stardock and give you an overview on what it does and how to use it. Acoustic Bridge gives you the ability to take the audio signal from one PC and send that signal to another PC in your network.
A good example of use would be if you have a nice set of speakers connected to your desktop PC, and a laptop or Windows tablet with less-than-ideal speakers. Take that audio output coming from your laptop and send it over to your desktop to listen to your music (or any type of audio) on those great sounding desktop speakers.
Purchase Acoustic Bridge for just $9.99
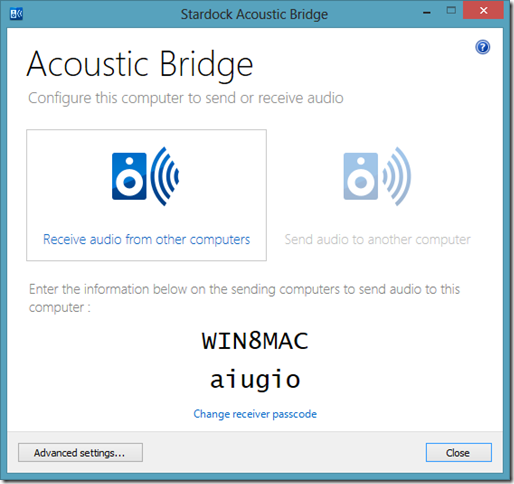
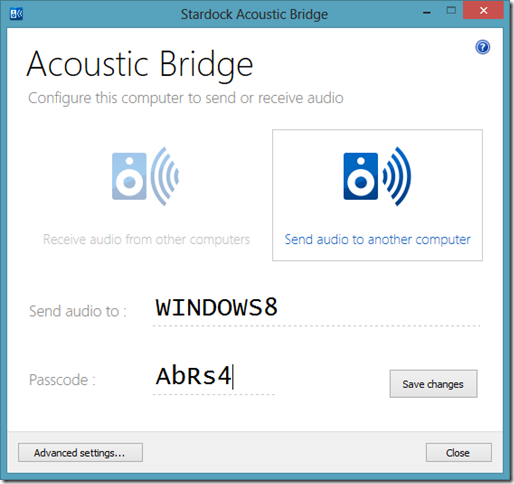
Acoustic Bridge is pretty simple to get setup and running. After installing you choose whether this PC will be sending or receiving the audio signal. This can be changed in settings if you need to reconfigure at another time, and options are available in the system tray for easy access.
TIP: You can install Acoustic Bridge on up to 4 PCs!
Receiving Audio
As you see in the screenshot above, you can configure Acoustic Bridge to send or receive audio. For the PC that wants to receive the audio, make note of the PC name and passcode, and then proceed to install and setup on the PC you want to send audio from.
Sending Audio
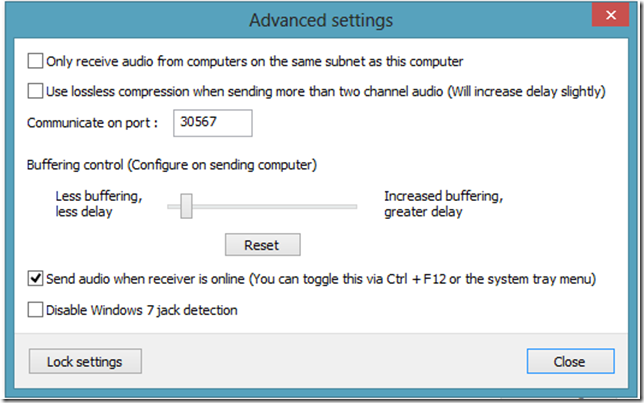
When you select the option to send audio, you just need to enter the PC name and passcode from the receiver setup we mentioned in before. That is the basic setup, but you can click ‘Advanced Settings’ where you can change additional settings such as port numbers and buffering settings.
Once you use Acoustic Bridge you will see how handy it is, and I’m sure it will become one of your favorite desktop utilities!
Object Desktop: The Benefits of Subscribing
Thursday, August 15, 2013 by Island Dog | Discussion: Personal Computing
 If you read our various articles and news you probably see Object Desktop mentioned often. We still get lots of questions about what exactly Object Desktop is, and why a subscription to it should be considered over just purchasing a single product.
Let me first start off by explaining that Object Desktop is a yearly subscription that contains many popular Stardock applications which we’ll cover in detail below.
Purchase Object Desktop for just $49.99
Learn more about Object Desktop
Why Subscribe?
Subscribing gives you access to all the included applications, and as long as your subscription is current, you will receive any updates and new versions that are released. Being a subscriber also gives you the benefit of having early access to beta versions of software so you can check out the latest updates before it’s released to the public.
You are also getting over $100 worth of software for just $49.99, and yearly renewals are just $34.99.
Own any of the stand alone products in Object Desktop? You may be eligible to upgrade for just $34.99! Upgrade now
What’s Included?
You get a whole collection of desktop enhancement apps to both change the look of Windows and to help improve the functionality of it as well. You can download the individual apps from your Stardock account, or use our Object Desktop Manager to keep up-to-date with updates. The Object Desktop Manager is an application that can notify of any new updates available, and lets you download those updates or install any of the various components of Object Desktop which we will talk about more below.
Once you have subscribed, you can download the Object Desktop Manager from your account.

TIP: See a list of all the included apps here.
Now we’ll cover the core applications included with Object Desktop, and a brief overview of what they do.
WindowBlinds
WindowBlinds is one of our most popular pieces of software in Object Desktop, it has been around for many years, and has millions of downloads. WindowBlinds gives you the ability to completely change the look and feel of your Windows desktop by applying skins to the user interface. These skins will change the start menu, window frames, taskbar, and much more. Thousands of skins are available to download and there are styles to match just about every kind of taste.
TIP: Download more skins for WindowBlinds and other Object Desktop apps from WinCustomize.com
Start8
If you are running Windows 8 and are looking to bring back the look and functionality of the missing start button, then Start8 is what you’re looking for. Start8 brings back the missing start menu along with many additional features such as boot straight to desktop, jump list support, customizable start buttons, and more.
TIP: If you use Start8 with WindowBlinds, Start8 will inherit the skin used so it will match.
DeskScapes
DeskScapes does lots of cool things, and the top feature would be putting animated wallpapers on the desktop. Whether you’re looking for a subtle landscape animation, or a 3D rendered animation of the solar system, there are Dreams (animated wallpapers) available. Not only does it apply both animated and static wallpapers, it also lets you apply effects to them giving you even more customization options.
Fences
Fences is another popular desktop utility programs included with Object Desktop. Fences removes those messy, out-of-control icons on your desktop and lets you wrangle them into "fences" on your desktop. You can label, resize, and even create rules for these fences to keep your desktop clean and tidy. Additional features include, letting you create folder portals so you can have direct access to favorite folders right on your desktop.
TIP: Double-click an empty space on the desktop and your icons and fences will disappear. Double-click again to bring back.
WindowFX
WindowFX lets you add a bunch of cool effects to your desktop. Make the desktop windows wobble, assign them different animations for opening/closing, take control of window focusing, and more! We have several demo videos on the WindowFX website to show exactly the neat things that WindowFX can do.
ModernMix
Another app designed for Windows 8 users is ModernMix. If you have ever used a "Modern UI App" (Metro App) in Windows 8 you may have noticed that it’s full screen, which is pretty annoying for most apps. ModernMix lets you run those same apps in a window on your desktop, just like do with regular desktop software.
These are just several of the popular apps included with your Object Desktop subscription. You get many other applications like IconPackager, IconDeveloper, Tweak7, Keyboard Launchpad, and several more.
If you want total control over the way Windows looks and functions, then you can’t go wrong with an Object Desktop subscription.






![wb5-3[1] wb5-3[1]](https://draginol.stardock.net/images2012/819c80f84130_ED02/wb5-31_thumb.jpg)


