First Previous Page 28 of 41 Next Last

This Week in Skinning - August 22nd

Skin Roundup for 8-22-08

Friday, August 22, 2008 by Island Dog | Discussion: OS Customization

Well even though we are on day 4 of non-stop rain, it's still time for This Week in Skinning.  If you missed the news this week, Object Desktop subscribers got their first free MyColors theme, Gloss Burgundy.  Don't forget to post a screenshot of your desktop in our monthly screenshot thread.

Now for this weeks picks!

http://skins3.wincustomize.com/sAARGe/bootskin/t10137.jpg


Blue Arroy for Bootskins
by sAARGe

A great looking bootskin with a matching wallpaper in the galleries as well.

http://skins2.wincustomize.com/gef/dx/t2894.jpg


Orbital in DesktopX Themes
by gef

This Master DX Theme is one of my favorites.  A beautiful design with plenty of functional objects to go with it.

http://skins6.wincustomize.com/Vad_M/widgets/t1395.jpg


SD On Screen Display in DesktopX Widgets
by Vad_M

Another cool gadget from Vad_M, this time showing an on-screen display of your volume control.

http://skins2.wincustomize.com/CarGuy1/dream/t1387.jpg


Channel Marker in Dreams
by CarGuy1

Nice scene of a channel marker in the ocean. 


http://skins6.wincustomize.com/mommaTee/ip/t1717.jpg


Birthday Suit(e): Icons for IconPackager
by mommaTee

Another addition to the Birthday suite.  This time we have an icon pack for IconPackager.

http://skins6.wincustomize.com/DEVJIT/wallpapers/t37839.jpg


Surreal Eclipse in Wallpapers
by DEVJIT

The colors in this wallpaper really stood out to me.  Looks real good on the desktop.

http://skins7.wincustomize.com/kenwas/wallpapers/t37797.jpg


New Roof and a Harvest Moon in Wallpapers
by kenwas

A beautiful scene which is perfect for an ending summer.


http://skins7.wincustomize.com/casualtraveller/wb/t6595.jpg Swimming for WindowBlinds
by casualtraveller

This is a real nice WindowBlinds skin, and it's also good for everyday use.  Nice job.

Great job to everyone this week.  Be sure to stop by the personal pages of each skinner and drop them a note, and check out their other works.  See you next week! 

Icon-A-Day 2.0, Day 13, Mormegil's Music Folder Madness.

Friday, August 22, 2008 by mormegil | Discussion: OS Customization

Today we will dive back in to the core user folder with the Music folder. We will be basing it on our Original Icon-A-Day My Music Folder, and will be using almost the same exact steps. However, because of the change in folder size, we will need to recreate almost all the assets for our 2.0 version.


Day 13
(Thursday, August 21th, 2008) Line

IAD_13_Music_Folder The Music folder
The original Music Folder was one of my favorite icons in the Icon-A-Day series. It was one of the first special folders we did, #5, and it set the standard for the overall look of the folders in the pack.

I want to do pretty much the same type of thing with the 2.0 version. We will do a nice disc or two in the folder, and scatter in some pretty candy-like notes. We might even be able to salvage a few assets, however I am going to take this opportunity to show how we make the notes, as well as the disks. We will be doing this in almost exactly the same way as we did them 3 years ago, so I recommend that if you have any questions I don't cover here that you take a look at the original tutorial.

Step 1: 
We can start once again by grabbing our Wrapper folder, and our original Music folder.

Then we remove the assets that we will not be able to use.
   IAD_13_S1

Step 2:  
I keep all the notes and the CDs, though I don't know if we will be able to use them. I mostly want to be able to use them to copy effects and fills from them, while we create our new assets.

That said, I quickly create new ones as simple objects, using circles and boxes.
IAD_13_S2
When I have the shapes, I weld the notes together. I also combine the circles together, creating an inner and outer ring for our disk.

Step 3: 
Before I go any further, I group our two disk circles together, so that I can apply a perspective to them.

Now I use the Perspective tool to quickly give our new notes new perspectives. I also do the disk at this point. 

  IAD_13_S3
Now it looks like we won't have enough room to get our green note in without crowding the composition. This frees us up to move on to our fills. We will start with the CD.

Step 4:  
I give the main body of the CD a nice Conical Fill, copying the colors from our original CD. Then I give the center ring a gray to white liner gradation.

I give the same fills to the rear disk, however when I'm done I tint them 2 clicks black, to darken them up.

Then I copy both rings one more time, move them behind the originals, and over to the right a bit, to create the illusion of thickness. I also tint these a little darker.

IAD_13_S4

Step 5:
Now we need to make the inner rings of the disks transparent, which we do using the Interactive Transparency tool, and give them a liner transparency.

At this point we need to use our front circle to crop the copy of it we made in step 4, so we can have a lip yet be able to see through the "Glass." We need to do this twice, once for the inner lip, and once for the outer lip. 

We do the same thing for the rear disk.

IAD_13_S5 

Step 6:
Before we give the discs gloss or shadows, we will go ahead and move on to the music notes.
 
We will be doing them with mesh fills and blend groups. We start with the blend. First I draw a fresh ellipse over the bulbs of our notes. Then I copy that ellipse and make a smaller version, down toward the bottom of the other. We make the larger one the same color as our note, and the smaller one a lighter blue.

IAD_13_S6

Now we just blend the two ellipses together.

Step 7: 
Next we draw two new mesh rectangles to give that glossy look to the rest of the note.

IAD_13_S7

When we are done with the blue note we do the same thing on the new red note.
 

Step 8:  
Now we need to go through all of our new shapes and create new gloss, which we do this with our standard gloss technique. We have to be careful to crop some of the gloss on the Wrapper folder where it would be occluded by our new objects. IAD_13_S8

Step 7: 
Once again our last step is the Shadows and Reflections. These are a bit more difficult than normal, because we have a lot going on, and several reflective surfaces to keep in mind. See shadow and reflection techniques for more.  

IAD_13_S9

Finished Icon:
Here we have it, the new Music folder. I think it stands up well when compared to our original. 

IAD_13_S10

Wrap Up:
With the completion of the Music folder we are over half way through the User folders. Tomorrow we will end the week with a Videos folder. Who knows, we might even be able to do it in a Video.

About Me:
You can find all my skins, tutorials, and articles, on my Wincustomize Homepage, at http:\\mormegil.Wincustomize.com. Questions on icon use and techniques, can be emailed to mormegil@gmail.com. Twitter users can find me with the user name: Mormegil.

Download The Music Folder Icon: 
Get today's icon from the Miscellaneous Icons Library.

Find all the Icon-A-Day tutorials, and links to the icons and more at the Icon-A-Day 2.0 Index.
All Icon-A-Day artwork, copy, and icons, are copyrighted by Paul Boyer © 2008, and may not be used with out express permission.

State of the WinCustomize Community

WinCustomize for the remaining year

Wednesday, August 20, 2008 by Island Dog | Discussion: OS Customization

I thought now would be as good as ever to write a "State of the Community" post.  Over the past couple of weeks I have noticed a lot of negativity coming back to our forums, which have been a positive place for a while now.  Negative and discouraging comments on skins have been increasing, and when a post was made to address it, it turns into another argument and battle.  This really needs to stop and it will one way or another.

I do want to take a moment and give a big hats off to Zoomba.  Just over two years ago he took over WinCustomize and associated Stardock sites, and since then we have seen many, many improvements.  Not all are visible to everyone, but believe me a lot of work is done behind the scenes to make the experience at WinCustomize better.  If you don't listen to the WinCustomize SkinCast (which I don't know why you wouldn't), you might have missed that Zoomba has moved on from WinCustomize.  He's now doing some great work on Impulse, but thankfully he still has a part in WinCustomize, although not so much public now. 

Community

The thing I have always had pride in at WinCustomize was the community.  When I first started skinning people would jump at the opportunity to help, and not say that isn't happening now, but the tone has definitely changed over the years.  Obviously, skinning has changed over the years as well.  Commercial skinning now has a definite market and some don't seem to take too kindly to that.  Regardless of how skinning has evolved it shouldn't have an impact on how the community treats each other or behaves.

The insulting comments and bullying of other members will not be tolerated at all, regardless of their rank or status on the site.  We want WinCustomize to be a place where anyone can come and upload their skins and be part of this community, without having to be subject to ridiculous comments that only drive people away.  For newer skinners out there, you will get criticism on your works, but don't take it personally.  Listening to experienced skinners will only help you get better.  On that note, giving constructive criticism is fine, but blatant attacks and insults do not help, and will be dealt with. 

Here at WinCustomize we have a class system:

  • Citizen
  • Apprentice
  • Master Apprentice
  • Journeyman
  • Master
  • Wizop/Moderators

You can view specifics of each class here.  Basically, you start out at citizen and if you contribute skins and to the community, you will be promoted through each of the classes.  Promotion is done by recommendation and votes from the site moderators (wizops) and admins on a monthly basis.  The Journeyman level allows users to bypass moderation, so your skins go directly to the gallery.  The highest class most can achieve is Master, but this is not an easy road.  One of the advantages of becoming a Master skinner is the ability to sell your skins on WinCustomize.  There are just a handful of them currently, and we are always keeping our eye out for the next one.

This is a system that has been around for a long time, but lately I have been pondering if changes are needed, especially when it comes to the Master class.  One of the descriptions of Master is, "not only must the user be a significant contributor to the community, but instrumental to the day to day life of WinCustomize." We have Master skinners that contribute quite a bit to the galleries, both free and paid skins, but are not necessarily active in say the forums for instance.  Not everyone is into the forum scene, so how much leeway should be given for that?  Should it matter?  Those are all questions I have been asking myself lately, and one of my projects is to re-write the member descriptions and define member classes going forward. 

Ideally, I would love to see all Master skinners take a more active and positive role in the community, be true leaders to help guide the next-generation of skinners.  They are the "best of the best" in terms of what they do, but maybe just contributing skins isn't enough.  Is more community involvement needed?  I would definitely love your feedback on this.  I will also be looking for skin moderators soon, so anybody in the community that has been established for a while can feel free to contact me.

Skinning

This summer has been fantastic.  Usually during this time of year skin submissions drop to almost nothing, but not this summer.  I haven't looked at the numbers but I think submissions have actually increased.  I am also seeing a lot of new skinners make their way over here, which is even more exciting.  Skinners who have been missing for a while have also made some returns, so I am very excited on the skinning front.  Not to mention the GUI Champs 2008 is due to start very soon, I think the next half of this year is going to be great.

Halloween and the Christmas season are also approaching, and I would really like to get some good sets of skins going, possibly even another community based skin.  I also have a mockup skin that will be the basis of a community project, but not until the GUI Champs is done.  You all have enough on your hands as is.

Although I can't mention specifics, we have also been tossing around ideas for the next version of WinCustomize.  Although nothing is set or guaranteed, I'm really hoping to have a bigger focus on personal pages and sorting of galleries.  I will leave it at that for now. 

Now lets address some issues people have been bringing up lately, and attempt to squash problems going forward.  Gallery moderation has been going pretty smoothly.  Most skins are moderated in good time, and we have been working to make sure a clear set of guidelines are followed.  To make things easier for everyone, I wrote the Tips for Moderation guide which everyone who submits skins should look over. 

Let me now emphasize some things to end some discussions and problems:

  • Resetting skin dates on updates will only be moderated if the skin has a significant change.  Fixing a start menu issue, or altering the color slightly does not constitute that.  Trying to game the system to stay on the front page of downloads will no longer pass.

  • Vista clones are permitted within reason.  Some of the most popular skins across the net are modifications of Vista.  The advantage we have with WindowBlinds is that the skins can be much, much better than the default Aero look.  Now we all have personal opinions on Vista looking skins, and the origins of images, but it's things we have gone through and determined it's not a simple matter to determine who created what. 

  • Multiple colors of the same skin must be included in a pack, or sub-styles.  SkinStudio has a remarkable re-coloring feature which makes making separate colored sub-styles very easy so this is what I would recommend.

Conclusion

Overall, I have been very happy with the state of WinCustomize this year.  Although there are some minor bumps in the road lately, those are ending today and I expect a great time for the rest of this year.  Your comments and feedback are welcomed.

Icon-A-Day 2.0, Day 12, Links in a Blink.

Tuesday, August 19, 2008 by mormegil | Discussion: OS Customization

Today I spent most of my Icon-A-Day time figuring out how to get some videos to integrate in future tutorials. Unfortunately this left me with very little time for tonight's icon, but luckily we have a quick one available; the Links folder.


Day 12
(Tuesday, August 19th, 2008) Line

IAD-12-LinksThe Links Folder
The Links folder is another of the new additions in Windows Vista. It is simply a User folder where the user can place shortcuts. All the shortcuts in this folder are then made available in all the Explorer Windows.

Tonight we will be able to save a ton of time, because all we have to do is take yesterdays icon and replace our Download arrow, with a Links arrow.

Step 1:
We start my making a copy of our Downloads folder from Day 11.

 
IAD-12-S1  

Step 2:  
Now we simply delete the download arrow, the shadows, and the gloss that we created for it. 

While we are poking around, we go ahead and change our background rectangle to blue.

IAD-12-S2

Step 3:
Now we we pick up pretty much exactly where we were in yesterdays step 4. 

We draw a new links arrow, and give it a contour -remember to break the contour group apart - and regroup our the two objects together again.

 IAD-12-S3

Step 4:  
We take our group and give it some perspective with  the Perspective tool.


IAD-12-S4

Step 5:
Now we give it our poor mans bevel (from yesterdays step 6).


IAD-12-S5

Step 6:
Now we give our new interior arrow the inner glow. This will be exactly the same as yesterdays step 7, the only thing different is that we are using blues instead of greens.
IAD-12-S6

Step 7: 
We finish up with the same steps as yesterday. Give it new gloss, then we polish it off with the classic shadow and reflection techniques

  IAD-12-S7

Finished Icon:   
Sadly we this was our only remaining super simple User folder icon, but here it is: the Links folder.  


IAD-12-S8

Wrap Up:
That is it for our Links folder, quick and dirty. Tomorrow, I will be at a meeting of the Michigan Independent Game Developers, so we will have to wait until Thursday for Day 13, when we will do one of the more interesting User Folder icons, maybe by then I will know which one it will be.

About Me:
You can find all my skins, tutorials, and articles, on my Wincustomize Homepage, at http:\\mormegil.Wincustomize.com. Questions on icon use and techniques, can be emailed to mormegil@gmail.com. Twitter users can find me with the user name: Mormegil.

Download Links Folder Icon: 
Get today's icon from the Miscellaneous Icons Library.

Find all the Icon-A-Day tutorials, and links to the icons and more at the Icon-A-Day 2.0 Index.
All Icon-A-Day artwork, copy, and icons, are copyrighted by Paul Boyer © 2008, and may not be used with out express permission.

Icon-A-Day 2.0, Day 11, the Downlow on the Downloads... Folder.

Monday, August 18, 2008 by mormegil | Discussion: OS Customization

As we enter week three of the Icon-A-Day 2.0 tutorial series I stop and ponder, why, why am I doing this? well the answer seems pretty simple: I am crazy.  Of course, this seems to come up often on Mondays. Luckily my insanity is of a variety that won't let me give up on a project once I said I would do it, so with that said, let us dive back in to the User folders with one of Vista's brand new special folders. The Downloads folder.


Day 11
(Monday, August 18th, 2008) Line

IAD-11_DownloadsThe Downloads Folder
The Downloads folder one of the new User folders Windows Vista. It is simply a default location for downloaded media, and you can change it simply enough, however it is kind of nice if you want to keep track of the assorted goodies you get from your favorite web sites and IM friends. It is also user specific, so every user on your computer will have their own place to keep their downloaded content.

This is also one of the more boring icons in the new User folder structure. By default it is simply a folder with a blue arrow pointing down. Since it is Monday I am inclined to do something simple, so we will be doing something similar, however we will be bringing in one of the icon conventions that we established in the original Icon-A-Day series. Hopefully we will be able to raise the bar above Vista while still keeping it simple.

Step 1:   
Once again we will start by gathering our ingredients, in this case we only have two, our Wrapper folder, and the Log Off Icon, #73.

Then we get rid of the elements we are not going to be using. However take not of the key, we will be using the same techniques to create a new Downloads arrow.

IAD-11-S1    

Step 2:  
Now, sadly, we need to flip our glass plate, since it does not look very fitting when I try and place it in the folder. This is going to require us to do some tweaks to the lighting and perspective.


IAD-11-S2 
  

Step 3:  
Now we go in and do our tweak. I start by skewing the glass square up a bit, and then skewing the shadow down a bit.

Next we tweek the top left corner up a bit, as well as the blue rectangle, since our perspective does not match exactly.

I strongly recommend looking at the original post #32, and #73. The techniques used to do the glass, are exactly the same as we will use today.

IAD-11-S3 

Step 4:  
Now, for some reason, I've always associated the downloads arrow with green, so I will be doing a new green arrow. Before I do this I use the mesh fill to change the blue rectangle to green.

Then I simply draw a nice, new, flat 2D arrow. Once I am happy with our arrow, I give the arrow a small inside contour with the contour tool.

When we have our contour, we break the contour apart and then re-group the two objects, the arrow and its outline.
IAD-11-S4

Step 5:
Now we will use the Perspective tool to adjust our arrow to were it looks correct; sitting out a bit in front of our glass plate. We will be giving it bit of an extrusion, so we have to make sure we leave room for that.

IAD-11-S5

Now we bust out one of the classics, what I like to call a "poor mans bevel," and extrusion.

Step 6:
I simply ungroup or new arrow, shift the green a bit down and to the left. Then I copy the gray area, and shift it up and to the right, and drop it back behind the original. Then with the Shape tool I adjust the corners so they meet up.

With the Interactive Fill tool, I give our bevel a nice gradient fill and the extrusion, another darker and more elaborate fill.

IAD-11-S6

Step 7:
Next we use another classic technique; I give our arrow a gradient fill from green to darker green. With the Contour tool do a 20 step inside contour with a fill from dark green to light green. This gives us that inner glow, that are the hallmark of the Icon-A-Day 1.0 icons.

 IAD-11-S7

Step 8:
With that done, we are back to the basics. We need to create some gloss for our arrow, and tweak the gloss on the glass plate behind it.


IAD-11-S8 

Step 9: 
I am going to combine our last 3 steps together, because they will be the same for the rest of the User folders. You can check out day 9 and 10 for more information.

To polish things off we create a reflection for the front of the Wrapper. Once we have that we are free to use our shadow and reflection techniques.

IAD-11-S9 

Finished Icon:  
This gives us our new Downloads folder, and will provide us several new assets for later in the project.


IAD-11-10

Wrap Up:
Tomorrow we will move on to one of the other new User folders, "Links." This will be very similar to what we have done today, so it should be a breeze. I will take the opportunity to go into a bit more detail on some of the more obscure techniques we used today. Hope to see you then.

About Me:
You can find all my skins, tutorials, and articles, on my Wincustomize Homepage, at http:\\mormegil.Wincustomize.com. Questions on icon use and techniques, can be emailed to mormegil@gmail.com. Twitter users can find me with the user name: Mormegil.

Download Downloads Folder Icon: 
Get today's icon from the Miscellaneous Icons Library.

Find all the Icon-A-Day tutorials, and links to the icons and more at the Icon-A-Day 2.0 Index.
All Icon-A-Day artwork, copy, and icons, are copyrighted by Paul Boyer © 2008, and may not be used with out express permission.

No, There is Nothing Wrong With Selling Skins!

Monday, August 18, 2008 by Island Dog | Discussion: OS Customization

Over the weekend we had a little flamefest going over a skin, and one of the comments was basically trying to trash people for selling their skins.  Now since I posted a warning about a 3 month ban from WinCustomize if any other trolling was going to continue, a certain person decided to go to my personal blog and send me an e-mail to my personal account about it.

The e-mail:

“So you think that there's nothing wrong with selling skins between $4 and $5 a pop, uh. Everyone of you is ripping off the the american public. Do you know how much money it takes to make a simple song? Do you know much mp3 files cost? I get them for 10 cents a piece, and yet songs take a hell of a lot more time and money to make, than your skins, and your selling them for more than what a gallon of gas costs. You need to wake up, and look around you. You obviously don't know what the hell is going on in this country right now. You got the nerve to sell some desktop skin for the price your selling for. You Spencer Scott are very little piece of the problem we have in this country, you Spencer Scott, are very good example of an asshole.”

My first reaction at this e-mail was a very good chuckle.  I then read it again and wondered what this person was really thinking.  Trying to compare .mp3’s to skins really made no sense to me, but then I realized probably what they were saying, and then once again realized this person had no clue about skinning.  Let me explain something to this person specifically.  Making skins is not easy, and making professional-type skins is much, much worse.  A high-quality WindowBlinds skin can easily take months to complete, so what really is the PROBLEM with selling a skin?  Nothing at all, that’s what!

I work with many of our Master Skinners here on WinCustomize, and I think every one of them also creates plenty of free content that is also released, so not only do I not have a problem with someone selling skins, I encourage people to buy them as well and support these works.  WinCustomize will continue with the Master Skins programs, and if you have an issue with it, you can contact me via the WinCustomize or Stardock e-mail. 

Better yet, lets have a discussion about the selling of skins.  What is your opinion about it?  Do you buy skins?  So instead of following me around the internet, step up and post some reasons why someone should not be allowed to sell something they have worked countless hours on.  I really can’t wait to read the communities opinions, especially from this commenter (which I do know who you are ). 

Icon-A-Day 2.0, Day 10, You got Videos in my Pictures Folder!

Friday, August 15, 2008 by mormegil | Discussion: OS Customization

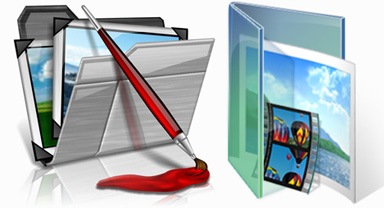
Yesterday we created the first of our User folders, the Favorites folder. In doing so we established the style we will be using for the rest of them. Today we will move from that one to another of the simpler examples, the Pictures folder.


Day 10
(Friday, August 15th, 2008) Line

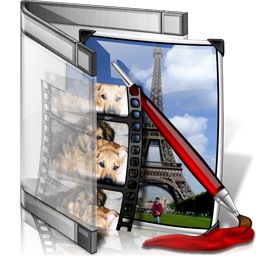
IAD_10_Pictures_FoldersThe Pictures Folder
The Pictures folder remains more or less the same in Vista as it was in XP, or even 9x. However like the rest of the User folders, it has been taken out of the Documents folder, and moved into the User folder.

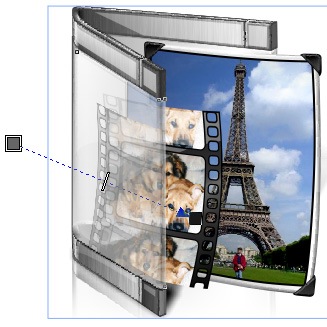
In the Windows Vista Pictures folder icon, Microsoft has also finally acknowledged that just about every digital camera also shoots video, and that despite their efforts, most people will not move the resulting videos into the Videos folder. This is something we will do as well, even though it will be the most time consuming portion of our Pictures folder.

Step 1:   
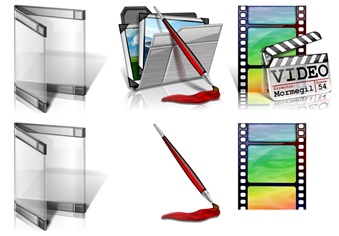
Again we will start with our Wrapper folder from day 8.  I will also grab the original 1.0 My Pictures folder #25, and the Video Clip file # 54.

Once I have these elements gathered together, I delete the elements I don't need. 


IAD_10_S1  
   

Step 2:  
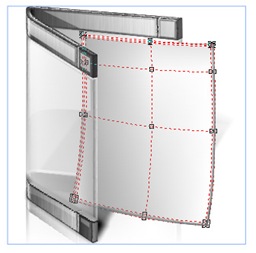
Now, I have chosen to create a brand-new photo rather than attempt to use one of our existing items. This is because I want something a bit higher resolution, and I want to be able to do a nice perspective.  

So the first thing I do is use a Mesh Rectangle to draw in the basic shape of my new image. Once I have this I create some additional mesh nodes to give it some depth and definition.
IAD_10_S2  

Step 3: 
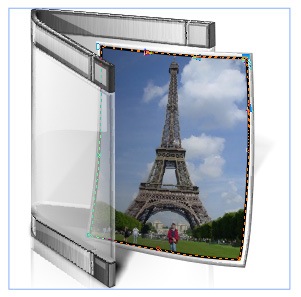
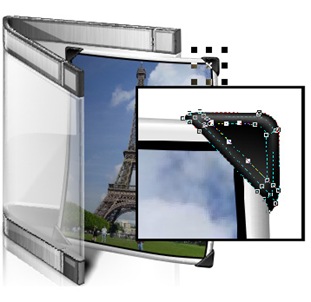
Next I import in my new picture, and using the Bitmap 3D Effects Perspective tool, I give it a bit of perspective to make sure it fits. Then I crop it down to fit on my photo back. 

I also want their to be a black outline around the image, so using the Bezier tool I draw a matching rectangle behind it. 
  IAD_10_S3

Step 4:  
I know it is a bit old fashion, but to make sure that our new Photo matches our originals, I want to go through and add some corner clips.

I do this with four small mesh fill objects. You could probably do this just as well with some basic shapes, but I am partial to the Mesh tool. 

IAD_10_S4

 Step 5: 
We still need to add gloss to our photo, but we will do it later. For now we will move on to our Video file. 

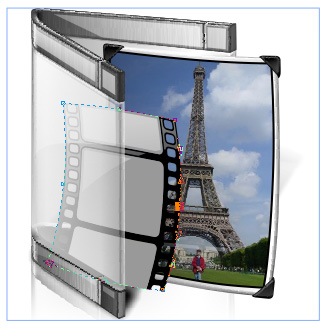
We will want to change the content of the frames of our video file, so I remove the texture fill we have now. Then I group the file together and with the Envelope tool, and give it a bit more of a film-like look.   

IAD_10_S5

Step 6: 
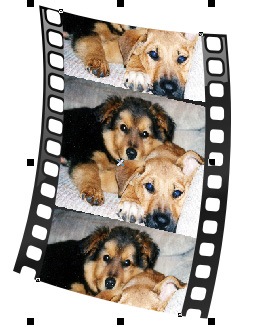
Now that we have our film in place, I want to change the image on the film like I did the photo, so I import in another image. I place this behind the cells of our film, and crop it and skew it until it looks ok.

Then I do this again for the top and bottom frames.  


IAD_10_S7

Step 8: 
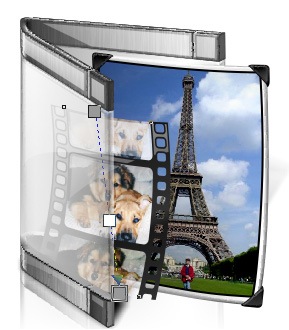
Now I grab all three of these images and convert them to one bitmap. Once this is done, I use the Interactive Transparency tool to give the images some translucency.


IAD_10_S6

Step 9:
Now, like yesterday, we will need make copies of our new assets and convert them to bitmaps for the reflection on the Wrapper. Once I have these in place, I convert them both into a singe bitmap, and crop them.

Finally I fade them out with the Interactive Transparency tool.

IAD_10_S8

Step 10:
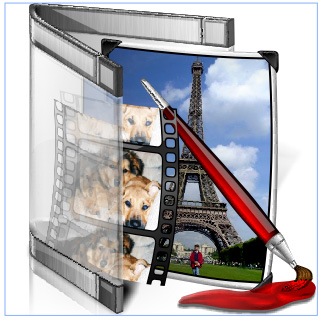
Now we can finally move our paint brush back into the composition. With a bit of tweaking with the shape tool it seems to fit right in.


IAD_10_S10

Step 11:
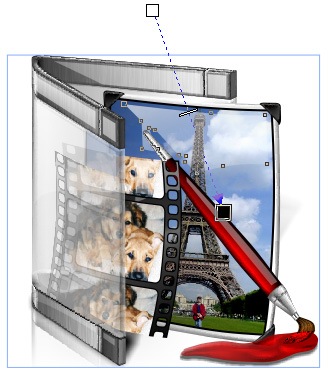
Now that we have all of our assets in place, we need to go through and touch up our gloss. This is relatively simple, but is very important in giving the icon continuity within the set.IAD_10_S11

Step 12: 
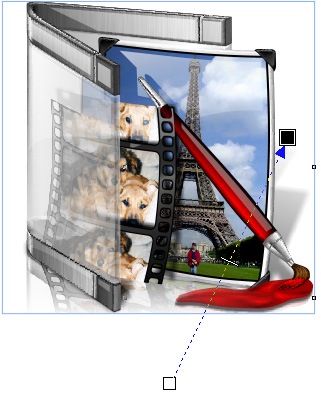
Our lasts two steps, as usual, are to create the shadows and reflections. 
Don't forget that you can learn more about this over at my CorelDRAW for Skinners tutorials.

IAD_10_12

Finished Icon: 
Our finished Pictures folder looks pretty good, even if that silly film strip would not leave us alone.


IAD_10_13

Wrap Up:
This brings us to the end of Week 2 of the Icon-A-Day 2.0 tutorials. So far I am very happy with how it is going, however I would love to hear back from those of you who are following along. Let me know what techniques you would like me to go into in more detail, or even things you would like me to skip.

I will be back next week, and we will continue our way through the User folders.

About Me:
You can find all my skins, tutorials, and articles, on my Wincustomize Homepage, at http:\\mormegil.Wincustomize.com. Questions on icon use and techniques, can be emailed to mormegil@gmail.com. Twitter users can find me with the user name: Mormegil.

Download Pictures Folder Icon: 
Get today's icon from the Miscellaneous Icons Library.

Find all the Icon-A-Day tutorials, and links to the icons and more at the Icon-A-Day 2.0 Index.
All Icon-A-Day artwork, copy, and icons, are copyrighted by Paul Boyer © 2008, and may not be used with out express permission.

This Week in Skinning - August 15th

Skin Roundup for 8-15-08

Friday, August 15, 2008 by Island Dog | Discussion: OS Customization

Another Friday, another week is done.  A tremendous amount of skins came through the submission pipes this week, and as usual, it was a tough pick.  I have to say once again how pleased I am about the skinning activity over the summer, it didn't slack of, and in fact it has increased!

I hope some of you are already getting your GUI Champs skins ready.

Now for this weeks picks!

http://skins7.wincustomize.com/PuterDudeJim/cursorxp/t2443.jpg


Rocky for CursorFX
by PuterDudeJim

This cursor took some inspiration from the Boulder skin, but it's a cursor theme that will go with many other themes as well.

http://skins2.wincustomize.com/CarGuy1/dream/t1380.jpg


Anchorage in Dreams
by Carguy1

This is a nice, relaxing dream that isn't distracting at all.  Well done.

http://skins6.wincustomize.com/PoSmedley/dock/t14800.jpg


Impulse Blogger in ObjectDock Icons
by Po' Smedley

This is a really slick set of icons.  I see he has done some others in this same style, so be sure to check those out too.

http://skins7.wincustomize.com/Lantec/ob/t320.jpg


Green Piece for RightClick
by Lantec

Not sure what it was, but this skin for RightClick just seemed to catch my eye.  It's a very detailed design.  Great work.


http://skins2.wincustomize.com/hallv5/sp/99.jpg


Jungle Drums for SoundPackager
by hallv5

There are some very unique sounds in this pack for SoundPackager, but if you want something different than the default Windows sounds, this is for you.

http://skins6.wincustomize.com/RichardMohler/wallpapers/t37785.jpg


Stormy Night in Wallpapers
by Richard Mohler

A really beautiful scene here.  Definitely check this one out.

http://skins3.wincustomize.com/JenifferChang/wallpapers/t37750.jpg


Jeniffer logo wallpapers in Wallpapers
by Jennifer Chang

A simple, yet elegant design makes this wallpaper a great pick for this week.


http://skins2.wincustomize.com/pixel-z/wb/t6580.jpg


VITREX for WindowBlinds
by pixel-z

This is another first-time skin that is just fantastic.  A great use of color and design makes this a definite pick.
http://skins7.wincustomize.com/theAVMAN/wb/t6579.jpg 3D Metal for WindowBlinds
by theAVMAN

A 3D skin.  That's all I need to say, so just download it and check it out for yourself.

Thanks to everyone who contributed this week, your work is always appreciated.  Be sure to show this article to your friends and family and show them how cool this stuff is.  See you next week!


Icon-A-Day, Day 9, Bringing Back Some Old Favorites.

Friday, August 15, 2008 by mormegil | Discussion: OS Customization

Yesterday we created a "Wrapper folder" and we will be using it as the key ingredient for our User folders. Tonight we will start with one of the simple ones, just to see how it works out.


Day 9
(Thursday, August 14th, 2008) Line

IAD_Favorites_FoldersThe Users Folder:
In the past, the favorites folder was tucked away in the depths of the Documents and Settings folder. In Vista it sits proudly in the User folder. This is very useful to those of us who back up our Favorites often and do not feel the need to go folder spelunking every time we want something.


In the original Icon-A-Day series, I did what I always did and just made it a folder. In 2.0 we will be bringing it into the new User folder convention by placing our heart and our document inside the Wrapper we created yesterday.

Step 1:   
We start as we have become accustomed, by gathering the ingredients that we have already created. In this case we need our Wrapper icon from Day 8, the Favorites folder #43, and the HTML Document #16 from Icon-A-Day 1.0.

Once I have these elements gathered together, I delete the elements I don't need.


IAD_9_S1 
   

Step 2:  
Now we start by placing our HTML file inside our Wrapper folder. Once it is in place, we give it some perspective with the Perspective Tool.

At this point we run into a minor problem. The blue bar on the top of this icon is a Mesh Fill, and a mesh can not be given perspective. So I simply clear the Mesh Fill, and convert it to a basic Flood Fill. This is a bit flatter, but we can fix it later. Now we group the file together, and give it that perspective.
IAD_9_S2 

Step 3:
Now we need put put our heart in the right place (See? I'm funny). I was a bit concerned about this, but now that I see it, I think the existing "lean," will work as well, if not better, with the Wrapper folder as it did with the original folders.


IAD_9_S3 

Step 4: 
Now we come to the tedious part. We need to go through and polish up our assembled elements to make sure that they all go together.

A: Tweak the file's edge so it has a return.
B. Tweak the gloss on the heart, the file, and the back of the Wrapper to match the new lighting convention. 
C: We need to fix our former mesh fill. In this case I just change it to a gradient, from a darker to lighter blue. 

   IAD_9_S5

 Step 5:
Now we need to go through and update our shadows and reflections. First the reflections. The reflection on the "floor" is done pretty much the same way we have been doing them for the last 5 days.

However we will need to do a few special things for the heart. I start by copying the heart and converting it to an RGB bitmap. Then I use the pick tool to size and skew it into the position that its reflection would take in the glass of the Wrapper. 

IAD_9_S6

Step 6:
Once I have my bitmap heart in place, I use the shape tool to crop it down, then I fade it out with the Interactive Transparency tool.

Now that we have our crazy heart reflection established, I can use our standard reflection techniques to create our "floor" reflection.
IAD_9_S7

Step 7:
Our last step will be to do our shadows. I do this the same way as before; the only reason I am doing it from scratch is that the HTML file and the heart have completely changed the shadows basic shape. IAD_9_S8

Finished Icon:
Now we have the first of our new User folders. This will serve as a template for the next week or so, as we run through the rest. 


IAD_9_S9

Wrap Up:
I chose the Favorites folder as our first User folder because it was both simple, and would it would give us a chance to see if our Wrapper folder works with the original Icon-A-Day assets. I think that today we have established that they do, although not without a few tweaks. Check in tomorrow when we tackle the pictures folder.

About Me:
You can find all my skins, tutorials, and articles, on my Wincustomize Homepage, at http:\\mormegil.Wincustomize.com. Questions on icon use and techniques, can be emailed to mormegil@gmail.com. Twitter users can find me with the user name: Mormegil.

Download Favorites Folder Icon: 
Get today's icon from the Miscellaneous Icons Library.

Find all the Icon-A-Day Tutorials, and links to the icons and more at the Icon-A-Day 2.0 Index.
All Icon-A-Day artwork, copy, and icons, are copyrighted by Paul Boyer © 2008, and may not be used with out express permission.

Icon-A-Day 2.0, Day 8, Home is were the User Folders are.

Thursday, August 14, 2008 by mormegil | Discussion: OS Customization

Windows Vista has brought us a great many things, some good, some bad. One of the less noticed changes is the new User folder structure. With this they have changed one of the staples of windows customization and icon design in general.


Day 8
(Wednesday, August 13th, 2008) Line

IAD_8_User_Folders The Users Folder:
In Windows 95 through XP, user folders (My Music, My Pictures, My Video, etc.) were placed into the My Documents folder. This was fine for most people but was a bit annoying to people who did not want to poke around the Documents & Settings folder to find their files. In Vista we now have the Users Directory, and in the Users Directory there is a folder for each user, and in that folder almost all user files live, by default. This is not a terribly new concept, as OS-X, Linux, and even more hardcore Windows users have been doing this for years.

How This Affects Our Icon Package:
In order to differentiate these special User folders, Microsoft came up with a new convention; they placed them all in a special folder. In Vista it is a glass binder-like thing. The truth is that this is completely superfluous; the folders themselves are still special folders, like they were in XP. However, I am of a mind to keep this convention going for a few reasons. First, because it gives us something new to do, and second, because it gives the user an obvious way to tell what all these folders are - special - and have special properties that they all, more or less, share.


Today we will create a brand-new icons, although sadly it will not be used in our final pack, but will be used in creating all our User folders. For lack of a better name, I am going to call it the "Wrapper." In Vista the Wrapper is the teal colored glass folder. Because the Icon-A-Day icons have already established several glass elements in the icons, we will do it again in our Wrapper, but we will try and keep it from looking too much like the standard Vista style.

Step 1:  
Because the Wrapper will need to contain several different types of sub-icons - folders, documents, music, etc. - I am going to begin by making a copy of my Open folder icon from last week and use it as a guide for my shapes. 

Like in Day 3, we will start with two rectangular mesh fills.
   IAD_8_S1

Step 2: 
Once I have my shapes in position, I can delete the Open folder assets and begin to sculpt my meshes into the shape I want our Wrapper to be.


 IAD_8_S2

Step 3:
Now unlike our folder we want the bulk of our Wrapper to be glass, so I primarily use white and black in my fills. I then use the Interactive Transparency tool to make them translucent. This will make everything wash out a bit, but we will get our definition back in a few steps, with gloss and shadows.


IAD_8_S3

Step 4:
Now we dont just want to copy the teal Wrappers from Vista, we want to make our own. In order to change things up a bit, we will create a brushed metal edge on the top and bottom of our wrapper. This is done more or less the same as we made the main portion of the Wrapper, except this time we give our shapes the more "tooled" look of our folders.  
IAD_8_S4  

 Step 5:
Once we have our metal bands, we need to bring in some gloss to sell the glass look, and to bring some definition to our shapes. We have to be careful not to make the gloss too bright, however, since these Wrappers will be going around other icons in the future.
IAD_8_S5

Step 6:
Now we need to re-establish our shadows. These are a bit more touchy than in the last few icons, because the bulk of our Wrapper icon is transparent.
As we bring the shadows in you will notice that it goes a long way in selling the glass feeling.


IAD_8_S6

Step 7:
Our last step, as is often the case, is to do our reflection. I do this more or less the same way as in our previous icons, but like the shadows it is a bit more touchy do to the transparency.

IAD_8_S7

Finished Icon:
Here we have our finished Wrapper icon.
I will be including it, and 2 Pings, a front and a back in today's zip, so that people will be able to create their own matching User folder icon if they choose.

IAD_8_S8

Wrap Up:
Tomorrow night, we will take this Wrapper and begin creating our USER folders. We should, in theory, be able to reuse many of our 1.0 folder assets as we go along. I have not quite decided which to do first, so you will have to check back tomorrow to find out. It probably depends on how late I get home from work

PS. Those of you who use Twitter, can follow me; username Mormegil. I will be tweeting after each Icon-A-Day post is posted, as well as throughout the day, with various things from tech to running.

Download Wrapper Folder Icon: 
Get today's icon from the Miscellaneous Icons Library.

Find all the Icon-A-Day Tutorials, and links to the icons and more at the Icon-A-Day 2.0 Index.
All Icon-A-Day artwork, copy, and icons, are copyrighted by Paul Boyer © 2008, and may not be used with out express permission.


web-wc01