


3 Tips for Using Stardock's Fences 3
Friday, February 17, 2017 by Island Dog | Discussion: Personal Computing
Fences, Stardock’s desktop organization app, has become quite a fan favorite since it was first released. The app lets you automatically organize your desktop icons and shortcuts into fences to keep your desktop area clean and organized. The latest version, Fences 3, added several new features, including compatibility with Windows 10.
Get Fences here.
Fences has lots of cool features to help you organize your desktop just the way you want it. I’m going to share my top 3 tips for using Fences.
Save space with Roll-up Fences
This is a new feature introduced in version 3, and it’s probably one of my top favorites. Fences already makes your desktop much more organized, and the roll-ups take it a bit further. A roll-up fence does just what the name implies: with this setting, the entire fence will roll-up and just display the title bar for the fence. This saves you even more desktop space. To see the contents of the fence, you simply move the mouse over it. This is especially useful if you have lots of fences, or a fence that has items you don’t access too often.

Access frequently used folders with Folder Portals
This is another feature I use all the time. If you have a folder that you use often, you can create a fence in order to have access to that folder's contents right on your desktop. You can now navigate the folder structure right within the fence, making portals even more useful.
There are several ways to create a folder portal, but I just drag my mouse to create a fence and select the create a folder portal option. Other methods can be found in the Fences configuration.

Customize the look of your fences
I like to customize the items I have on my desktop, and Fences allows several different customization aspects to help make my desktop look the way I want it to. In the Fences configuration screen, you can select from a variety of options such as the background style and color, label customization, and more. In Windows 10, you can also have translucent backgrounds in the fences.

Those are just a few things that I find useful when using Fences. It really is a great piece of software to keep your desktop organized, so be sure to give it a try. Let us know in the comments below if you have any favorite tips or want to give us some examples of how you use Fences.
Learn more about Fences here.
WindowBlinds 10 Walkthrough: Changing your Desktop Theme
Wednesday, January 18, 2017 by Island Dog | Discussion: OS Customization
WindowBlinds 10 gives Windows users the ability to change the look and feel of the desktop by applying custom skins to the user interface. There are thousands of skins available to create a truly custom feel. WindowBlinds has an interface that is very easy to use, but I wanted to go over the basics of the app and how to get started with changing your desktop theme.
Get WindowBlinds here.
WindowBlinds Overview
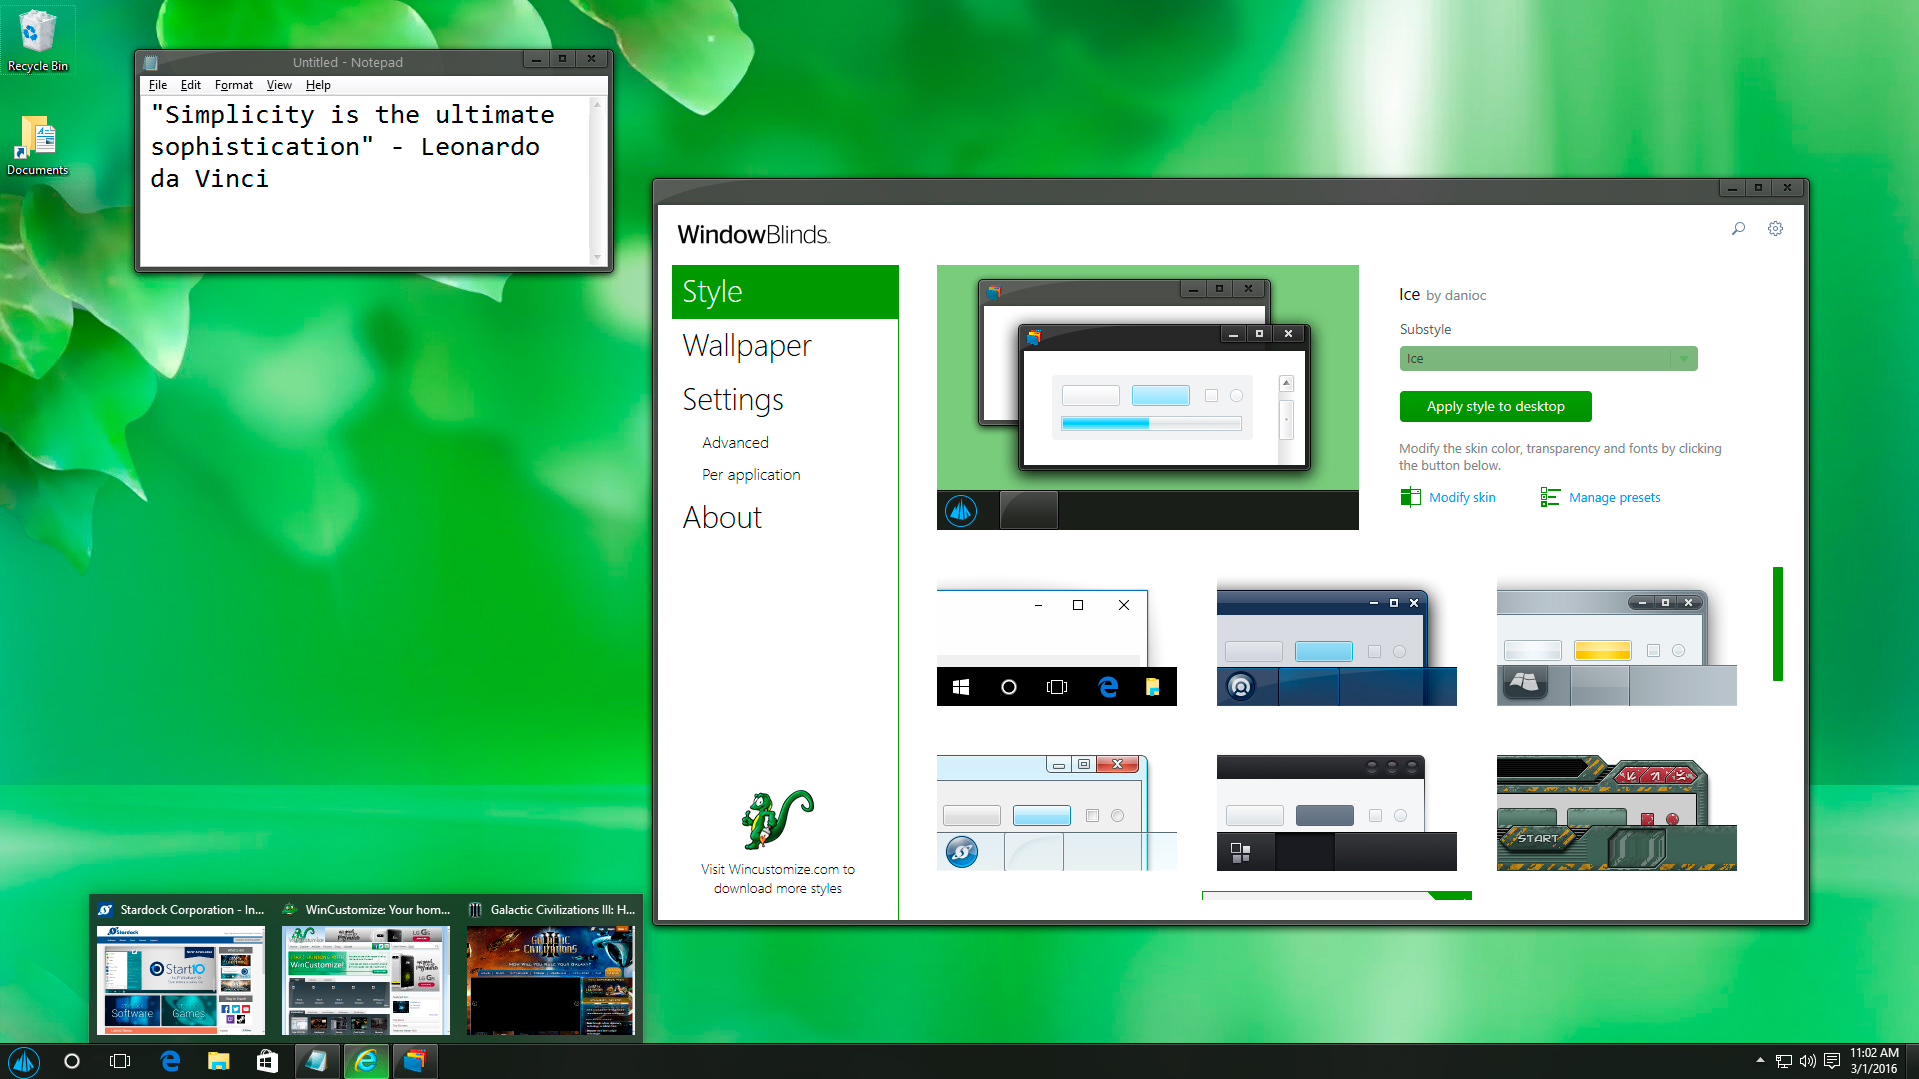
When you first open WindowBlinds, the main ‘Style’ configuration screen will pop up. Here you’ll see the main window which displays all of your installed WindowBlinds skins. On the left side you have links to other features in WindowBlinds such as wallpaper management and settings. Clicking the WinCustomize logo at the bottom will take you directly to the WindowBlinds skin gallery where you can browse and download thousands of skins to use.

Applying a desktop skin
WindowBlinds includes several skins that you can immediately start using. If you don't find anything you like in the defaults, you can download more at WinCustomize.com. To install a skin that you've downloaded, just double-click the .wba file and it will automatically install into WindowBlinds. Click any skin in the WindowBlinds window and you’ll get a preview of the skin with additional options shown at the top of the WindowBlinds window. These options include the ability to color the skin, adjust transparency, apply textures, and more.
Some skins will have a substyle that can be chosen by using the drop-down menu. Substyles are the same skin, but with different options such as different color options or substyles that are made for a particular version of Windows.

Once you have selected the skin you want to use, either double-click the WindowBlinds window or select ‘apply style to desktop’ to apply the skin. You desktop should now be skinned!
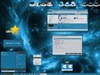
Examples of WindowBlinds skins:
 |
 |
Wallpapers
Another cool feature in WindowBlinds is being able to manage your desktop wallpaper right from the app. In the wallpaper section you’ll see all your specified wallpapers in one place. Click the setting button and choose wallpaper locations. Here you can tell WindowBlinds where to look for your wallpapers so they’ll be included.

Once you have your folder locations setup, you can easily browse through your wallpaper collections and apply them by double-clicking or hitting the apply button.

WindowBlinds Settings
Here you will find all the settings that you can adjust in WindowBlinds. I won’t go into much of what these do, but if you need to adjust any settings or set specific app-specific settings this is where you will be able to do that.

So that was just a basic overview of the WindowBlinds configuration and how to apply a skin and wallpaper to your desktop. This should help any new users get started, and be sure to check back for more articles as we will take a look more at some of the features in WindowBlinds.
Learn more about WindowBlinds here.
Windows 10 Apps from Stardock for Under $5
Wednesday, November 2, 2016 by Island Dog | Discussion: Personal Computing
If you are a Windows 10 user, we have a great set of apps that can help you customize and enhance your user experience. The best part is, this can be done for under $5 each!
Below is a quick overview of each app and what it can do to improve your Windows 10 experience.
Start10
Start10 is one of Stardock's most popular apps for Windows 10. It is an alternative Start menu that brings additional customization and functionality to the Windows 10 Start menu. If you prefer the look of the Windows 7 Start menu, you can configure that style using Start10. You can even apply custom Start buttons for even more individuality.
Start10 also gives you the ability to maintain the "All Programs" folder metaphor, filter searches in the Start menu, and even integrates with Stardock Fences, another popular desktop application.
ShadowFX
ShadowFX lets you add custom drop shadows to Windows 10. You can choose from a variety of pre-made shadows that are included with ShadowFX, or you can design and use your own custom shadows. Additional shadows can also be downloaded from WinCustomize.com. ShadowFX is great to use when you have windows stacked on each other, as it helps you distinguish between the windows.
Launch
Launch is a stationary dock that is designed to be used in the Windows 10 Start screen. This allows you to quickly launch applications right from the dock and use docked app jump lists for even quicker access. Launch can be positioned at the top or bottom of the screen and will always stay in place when you swipe left or right in the Start screen. This is a very useful tool when working in Tablet mode in Windows 10.

These are just a few examples of the many desktop enhancements we have available for Windows users. You can see all the rest of our apps here. I also recommend taking a look at Object Desktop, the suite of desktop apps which include all of the apps mentioned above.
Learn more about Object Desktop here.
Object Desktop 2017
Thursday, October 27, 2016 by Draginol | Discussion: Personal Computing

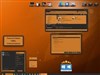
My desktop running WindowBlinds, DeskScapes, WindowFX, Fences, Start10 at 5K resolution

IconPackager, Tiles and more at 5K resolution
Object Desktop is a suite of desktop enhancement utilities designed to allow users to customize their Windows desktop to work however they want it to work.
The core components of it are:
- WindowBlinds – customize the Windows GUI
- Fences – organize your desktop
- IconPackager – customize your icons
- DeskScapes – customize your desktop background
- WindowFX – customize the UI behaviors
But that line up has changed as Windows has changed over the years as Windows has changed.
When Object Desktop first launched for Windows its 5 core parts were:
- WindowBlinds
- ControlCenter – virtual desktops
- IconPackager
- Tab LaunchPad – launching programs

Back then, the idea of “skinning” your Windows GUI was radical.
By 2000, we had added a 5th item: DesktopX

DesktopX let us objectify the Windows desktop. It was one of our most popular components. Unfortunately, the Windows UAC (the security features built into Windows) eventually made DesktopX untenable because, by its very nature, it was designed to integrate executable code into the desktop which is the opposite of what Microsoft wanted to accomplish with its secure desktop initiative.
Windows XP Era
By 2004, Object Desktop had 3 years of Windows XP to be able standardize all its efforts on. This resulted being able to create Theme Manager which let users gain total control of the Windows desktop.


Object Desktop 2004
Windows Vista
Windows Vista was tough on Stardock and Object Desktop. Microsoft pioneered a number of amazing technologies including Windows Presentation Foundation (WPF), XAML, Silverlight and more. For two years, Stardock put a great deal of effort into creating an Object Desktop Vista. This included a DesktopX that could import XAML and export sidebar objects, a version of WindowBlinds that would use WPF to create resolution independent windows and a desktop compositor and of course the animated wallpaper program, DeskScapes.
Unfortunately, two things happened. First, Windows Vista did not replace Windows XP for most people. Second, Microsoft decided to change direction leaving its promising new technologies sidelined.
Moreover, the new secure desktop, UAC, made it very hard to run DesktopX.

Object Desktop 2006
Windows 7
With Windows 7, Microsoft was back on course. Stardock updated Object Desktop to version 2010. DesktopX was deprecated and in its place was Tweak 7 which gave users the ability to modify various largely hidden settings.

Tweak 7
Windows 8…sigh
For Object Desktop to thrive, it needs a single OS target. This is very important. Windows 8 split the Windows market. It made Start8 possible (which became very popular) but it meant that any technology we developed would have to be aware that it might not work on most of our customers machines.

Start8
Object Desktop 2013 saw Start8 and Fences become the two stars of Object Desktop. Neither program, however, was about customizing the look and feel of Windows as much as altering the way people work with Windows.
Windows 10
With Windows 10, Microsoft has created an OS that appears to be their new flagship. It’s still new but it appears that it will be a stable platform for us to focus our Object Desktop development efforts. This means we can potentially revisit bringing back apps that were broken on certain versions of Windows and get them on Windows 10.
The real question is, in the age of mobile computing, what is the use case of a Windows desktop (or laptop) PC?
Object Desktop 2017
Since the release of Object Desktop 2016, Stardock has added two new programs to Object Desktop:
- Multiplicity
- SpaceMonger
Neither customizes the desktop but rather focuses on what we are calling the Metadesktop. Multiplicity lets you easily access your other desktops on other machines and SpaceMonger lets you manage your drive space on your desktop and cloud drives.
This represents the start of the next stage of Object Desktop.
Let’s take a look at the core components now:
WindowBlinds
The hardest part of WindowBlinds development now is high DPI. Many of the skins were designed when everyone was running much lower resolution. WindowBlinds 10 nails high-DPI support but not all skins will play well with it. This will be an ongoing evolution for WindowBlinds 10.

WindowBlinds 10
DeskScapes
Animated wallpapers are pretty cool. And today, they use trivial amounts of resources. When DeskScapes first came out, CPU use was a concern for animated desktops. Now, machines are so much faster it’s barely measurable.

DeskScapes 10: Animated wallpaper
Fences 3
Stardock released a new generation of Fences this year.

Fences 3
But we have a lot of plans in mind for future versions of Fences. For example, in the age of cloud storage, imagine being able to create fences to Google Drive folders? Or a Fence of your YouTube subscriptions? The mission of Fences, now that Windows 10 seems to be the standard will evolve to incorporate your world into your desktop experience. We’re very excited.
Tiles
Tiles is a program that doesn’t get enough attention. The idea behind Tiles is that you have a sidebar with a series of pages on it. Each page can have different things on it depending on what you’re doing.

Tiles
On my desktop I have these pages:
- Development page. I keep Visual Studio and a few other apps related to making software here.
- Business page. This is where I switch over to start working on budgets and contracts
- Games page. This is where I link to the various games
- Surf page. This is just a list of my favortie sites I visit. It’s how I quickly get to all the forums and such. Just click click click.
We are looking to further update Tiles (or possibly rebrand it as its mission has changed since its original release) to address Object Desktop 2017’s mission of integrating your world onto your desktop.
Start10
Is the Windows 10 Start menu better than the Windows 8 thingy? Yes. Is it good? That’s only something you can decide for yourself.
As someone who deals with a lot of programs, Start10 is probably the first thing I install on a new box with Fences being a close second.


Start10

Windows 10 on my relatively new box. Thank goodness I know the weather.
Start10’s mission, to keep with our theme, will evolve as Windows 10 stays around longer. Think about how you use your modern desktop. You may have an Android device or an iOS device. Does your Start menu pick up any of this? Most people now have multiple devices. Their desktop is supposed to be a superset device. That’s where we have to go with Start10 in the future. Keep the Start menu a simple, fast way to access your things but also give you the ability to quickly access anything on any device. Google and Apple are already doing this on their devices. Windows needs to do the same thing.
Multiplicity
Multiplicity is best known as the program that lets you control multiple PCs with a single keyboard and mouse. The idea is that you might have a desktop and a laptop or maybe a couple other desktop machines that you have local access to and want to be able to combine these machines into a single user experience.

Multiplicity is super easy to set up.
More recently, Multiplicity added support for machines that aren’t local. In this case, it acts more like a KVM switch or a remote desktop solution. What makes Multplicity differnet from a normal remote desktop solution is that it is focused on fidelity from top to bottom. For example, you could play a video game via Multiplicity without a problem.
Once again, with Windows 10 becoming our target OS going forward, Multiplicity has a lot of room to grow over the next year. Our goal, again, is to integrate your digital world to your desktop.
The others
This past year we released IconPackager 10, the first major update to IconPackager in some time. Once again, the reason is that Windows 10 is becoming a viable target for development – i.e. our finite development time isn’t going to be put into targeting something that is going to be thrown out in 2 years.
WindowFX continues to evolve as well. We haven’t decided whether we will evolve the touch and other features we have in mind into WindowsFX or into a new Object Desktop program.
SpaceMonger is another recent entry into Object Desktop. With its ability to manage not just your local storage but your cloud, it’s compelling.

SpaceMonger will map out Google Drive, OneDrive and Dropbox use
We want to hear from you!
So how can you get Object Desktop 2017?
Just go to www.objectdesktop.com and there are options to renew your access to it (if you previously had Object Desktop) or get it new. When you buy it, you access the Object Desktop manager which handles installing the components.
Comment below with your own thoughts on what you’d like to see.
3 Tips for Using Stardock's Start10
Tuesday, September 27, 2016 by Island Dog | Discussion: Personal Computing
Ever since Windows 8 came out with the missing Start menu, Start8 has been a very popular Stardock app because it brought users back to Start menu they were familiar with. Even when the Start menu eventually returned, Start8 remained popular since it still offered Windows users a variety of options and customization.
Fast forward to today and now we have Windows 10 with its own take on the Windows Start menu. That’s where Start10 comes in, and just like before, gives Windows users the features and customization options to make the Windows Start menu look and function like they want it to.
Below, check out a few tips to make your Start10 experience even better!
Start10 Integrates with Fences
Fences is another hugely popular Stardock app, so it makes perfect sense that some integration has been added. Fences lets you organize your desktop icons into grids called "fences", and now those fences are integrated right into the start menu with Start10. Any fence you have on your desktop will now also appear as entries in the Start menu.

Use a Custom Start Button
Start10 has several options for unique Start buttons that you can choose from included in the configuration screen. If you want to use a different image, there are hundreds available for download from WinCustomize.com that can be easily implemented. Pick the image you want to use, and that will be your new button on the Start menu.

Apply Textured Backgrounds to Start Menu and Taskbar
Start10 allows you to customize the Start menu and even the taskbar with the ability to apply textures. You can select from a variety of textures and can even adjust transparency, color, and other customizations to get your Start menu and taskbar looking exactly how you want it to.

Learn more about Start10 here.
Start10, DeskScapes, WindowFX, and ShadowFX updates released
Wednesday, April 13, 2016 by Island Dog | Discussion: WinCustomize News
We have released several software updates today to address some issues reported by our users. We always appreciate the community feedback!
The updates can be downloaded from your Stardock account here.
Start10 v1.10
- WindowBlinds10 compatibility tweaks.
- Fix for UI configuration when viewing on a high DPI monitor.
DeskScapes v8.51
- Fix for black screen after user locks computer, before restarting Windows after install.
Learn more about DeskScapes here.
WindowFX v6.02
- "Inactive Window" adjustments.
- Miscellaneous bug fixes.
ShadowFX v1.12 (beta)
- Fix for insider build breaking ShadowFX.
Learn more about ShadowFX here.
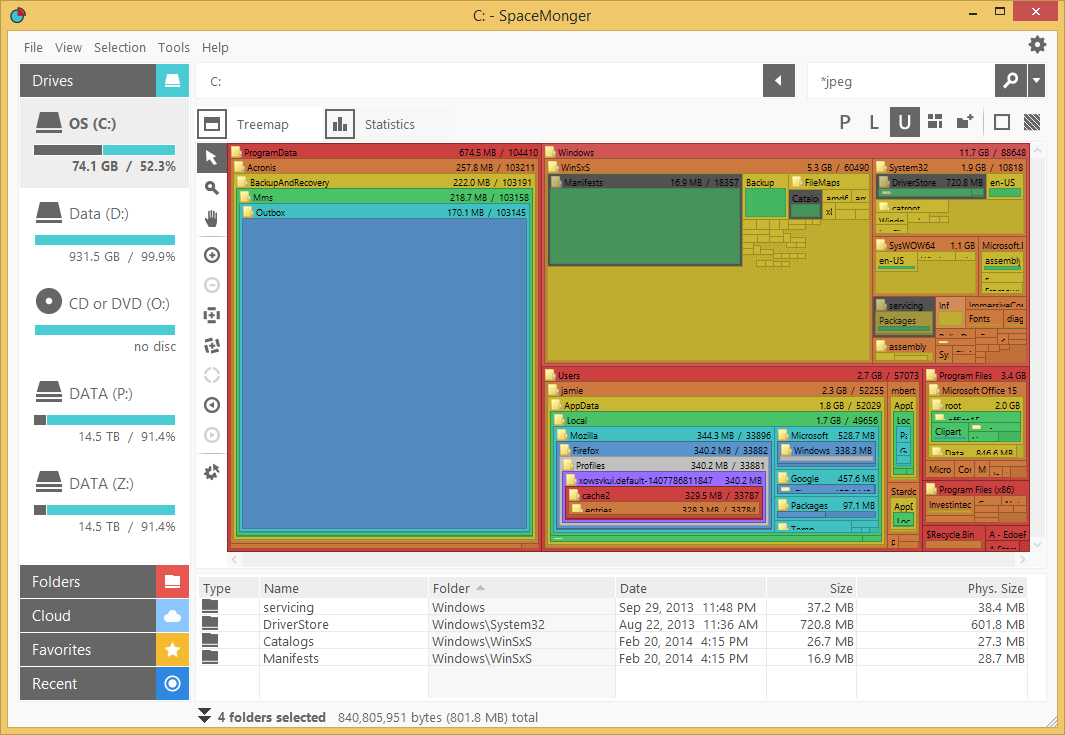
Free up storage space on PCs, shared-network and in the cloud with SpaceMonger
Tuesday, January 26, 2016 by Island Dog | Discussion: WinCustomize News
Now available for purchase through Stardock!
SpaceMonger enables the fast discovery of files and folders taking up storage space on computers, shared network and personal cloud storage on Dropbox, OneDrive and Google Drive services.
Cloud storage may seem unlimited, but it is not free and does need to be managed. SpaceMonger is the first storage management tool supporting popular cloud storage services in addition to local PC, network and virtual storage. SpaceMonger even understands soft-links and mount points.
Learn more at the website.
Additional Key Features
-
Scan, map and manage PC, network and cloud storage
-
Copy, move and delete files to free up storage space
-
Locate large files and folders quickly with Treemap visuals
-
Find files by size, type and custom criteria with flexible search
-
Take clean-up actions on dynamically built file lists
 |
 |
 |
 |
 |
Windows 10 tip of the day: Why does my battery drain while sleeping?
Tuesday, September 8, 2015 by Frogboy | Discussion: Personal Computing
Does your laptop or tablet run out of battery while it’s supposed to be asleep?
You can find out why thanks to a fairly obscure but relatively new feature in Windows.
Step 1: Open a command prompt in adminstrative mode
Step 2: Go to a temp directory (like cd\temp)
Step 3: Type powercfig /SleepStudy
This will create a file in the current directory. Open that file in your web browser and you will find out why.
Common causes:
- Notifications. Even while sleeping, the Windows notification system (WNS) does stuff. Turn off as many unnecessary notifications as possible.
- Your type cover can wake the machine inadvertently.
- Your network card. Make sure you have the latest firmware and network drivers.
Good luck!
Gift Purchasing from the Stardock Store
Friday, April 10, 2015 by Island Dog | Discussion: Personal Computing
With a new store page, I wanted to refresh the guide for purchasing gifts through the Stardock Store. Whether you want to purchase a game or desktop application, you can easily purchase it and send it digitally to a friend or family member to enjoy. It’s easy to do, and here’s how!
You might end up at the Stardock store from our various sites, but you can access the store directly from https://store.stardock.com/.

Once you place the order the recipient will receive an e-mail with their registrations and download info. Your personal or payment information will not be seen by the person receiving the gift.
Registration and downloads can always be found in your Stardock account at http://download.stardock.com
Start8 and Fences: First Apps Installed on New PC
Tuesday, February 17, 2015 by Island Dog | Discussion: Personal Computing
If you follow my posts you might have seen I planned and recently finished my new PC. Putting together a new PC is a bit of work, at least assembling all the parts together and making sure everything works. That's only one part of it though, as you also have to install Windows, install all your apps and games, and then get your data moved back.
My new PC doesn't have an optical drive, so I loaded up my Windows 8 ISO onto a USB drive and installed it. It didn't take long at all to install, and there was my new desktop. Once I got updates installed and all the necessary drivers installed it was now time to get all the software I needed installed.
Before I got too far into my new desktop, I found myself continually trying to open the start menu. After a few minutes of that, it was time to install Start8 and get my start menu back. I installed it and set it up to how I like it, which is to have the Windows keys on the keyboard open the Windows 8 Start screen, and the start button to open the start menu. Now it was much easier to navigate and quickly open places on my computer.
Next was to install Fences. I was downloading a bunch of apps to install and my desktop was quickly filling up with icons, so that is where Fences comes in. I created a folder portal with Fences to show my downloads folder, so everything I downloaded was placed there and was kept contained in that Fence. Instant order came to the desktop.
Once those were installed I started installing the most used and important apps. This is also a good time not to install everything you had before, and just focus on the software you really need and use. While I still have a few more things to install and get setup, these are my tops apps I got installed.
- Steam
- Office
- iTunes
- Chrome
- Firefox
- LastPass
- Dropbox
- Live Writer
- MetroTwit
- Snagit
Those are just a few of what I find most useful, but I still have several more to get installed. Here's my current desktop which I still need to do some more organizing with.

Get Start8: https://www.stardock.com/products/start8/
Get Fences: https://www.stardock.com/products/fences/